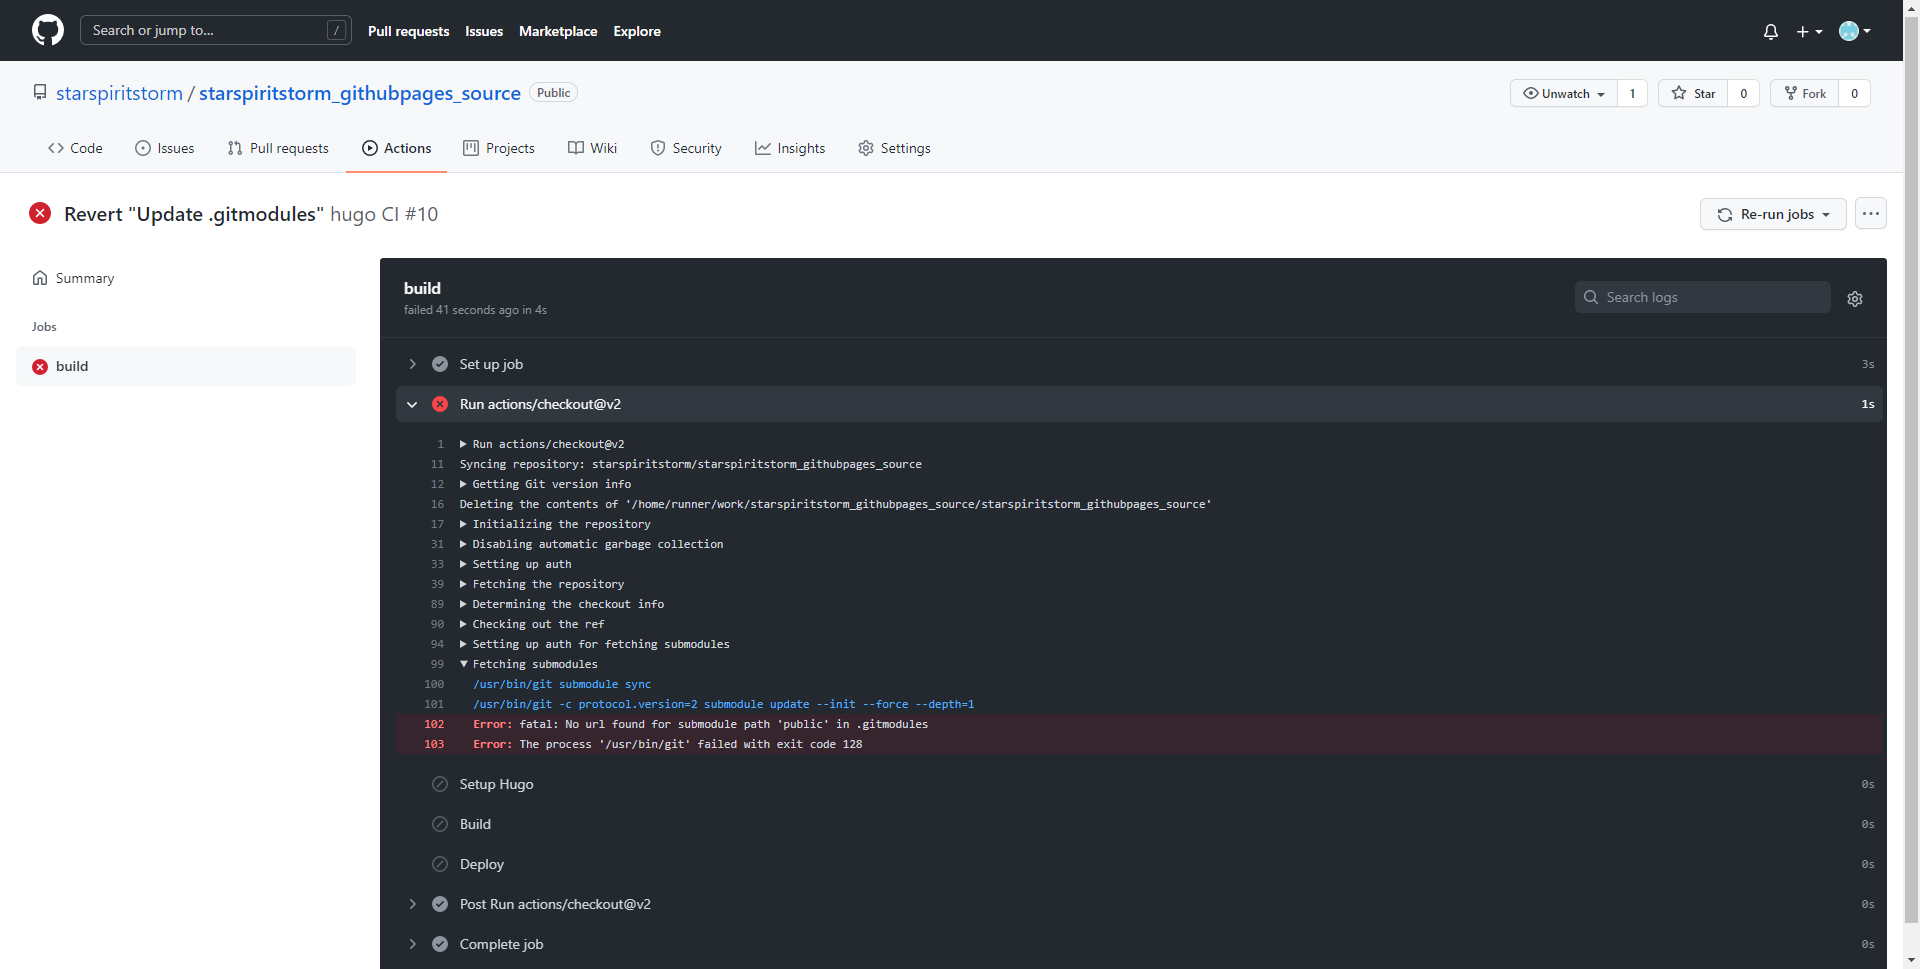
在 Github Pages 上建立 Hugo。
建立 Hugo Site
本地端
先到你喜歡的資料夾裡面,開啟 git bash
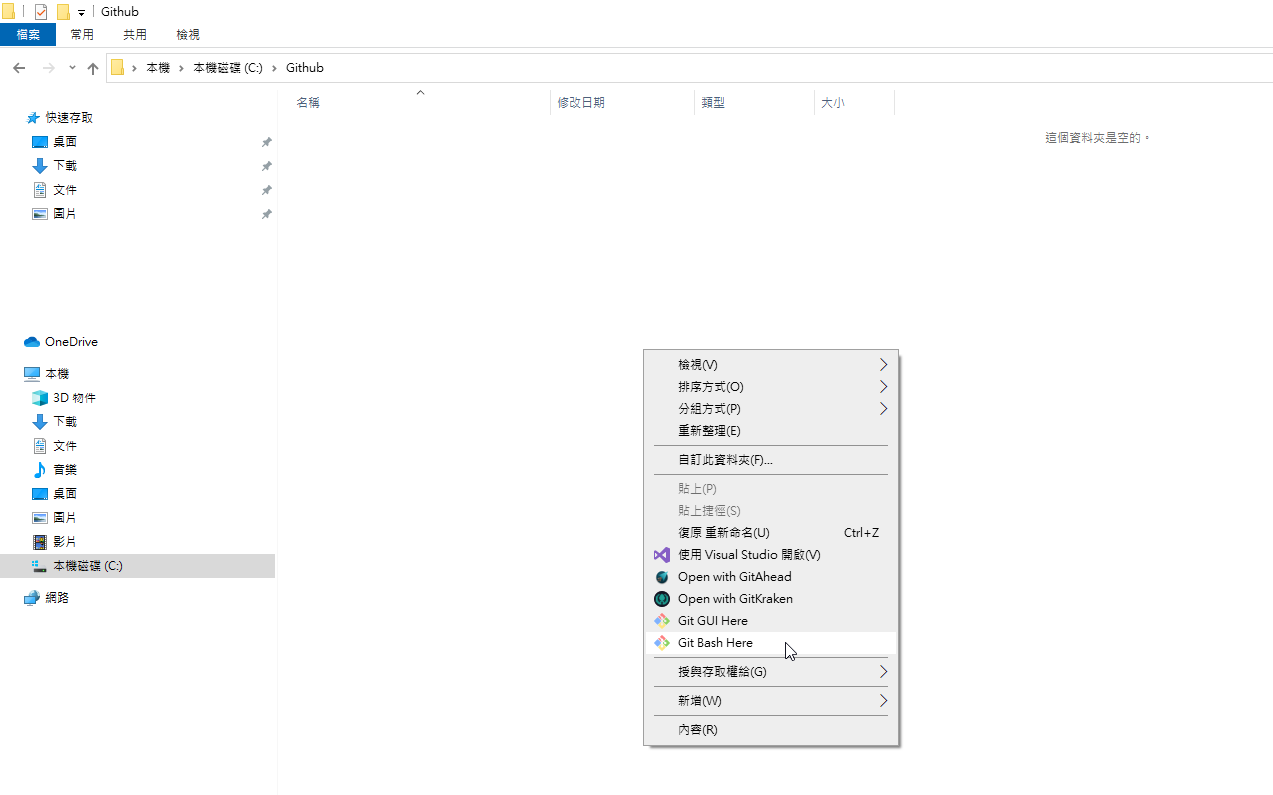 ◎ Fig1. start git bash here
hugo 的產生 hugo site 相關內容的指令
hugo new site myblog
進入剛剛創好的
cd myblog/
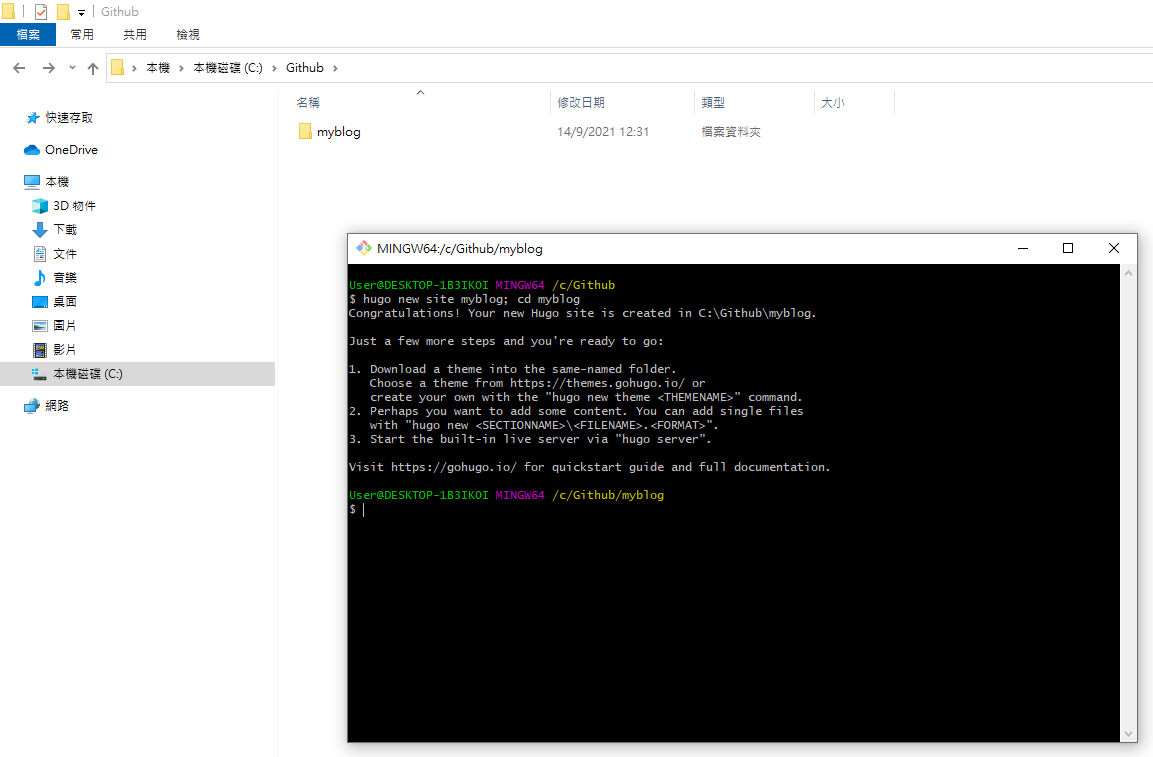 ◎ Fig2. hugo new site
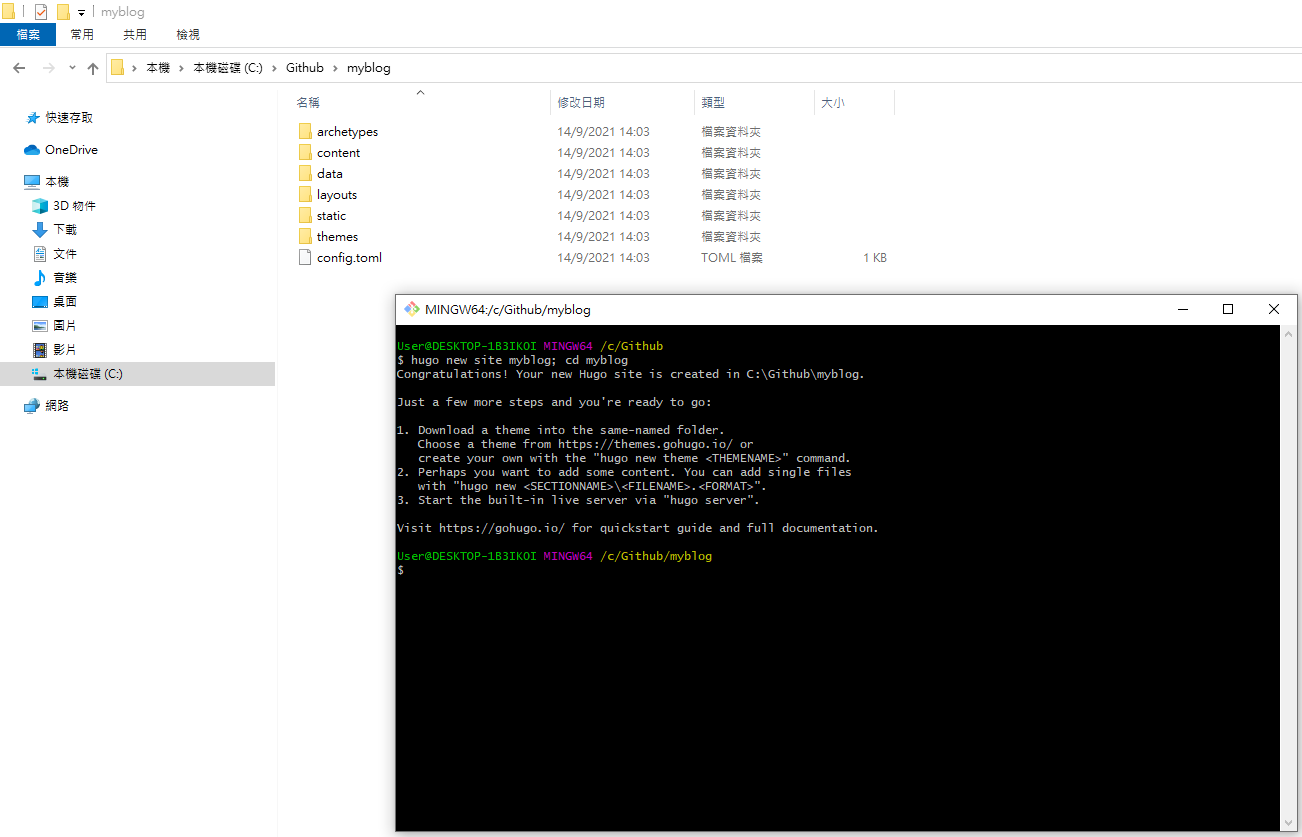 ◎ Fig3. cd folder
安裝 Hugo Theme - meme
可以到 hugoranked 看星星數多的,
或是直接到 hugo 的官方網站 的theme挑選喜歡的主題,
這邊我挑的是 theme/meme,
不同的 theme 請看各個 theme 的教學引導。
利用 git 取得 theme meme
git init
git submodule add --depth 1 https://github.com/reuixiy/hugo-theme-meme.git themes/meme
套用 hugo theme meme 的config.toml
rm config.toml && cp themes/meme/config-examples/en/config.toml config.toml
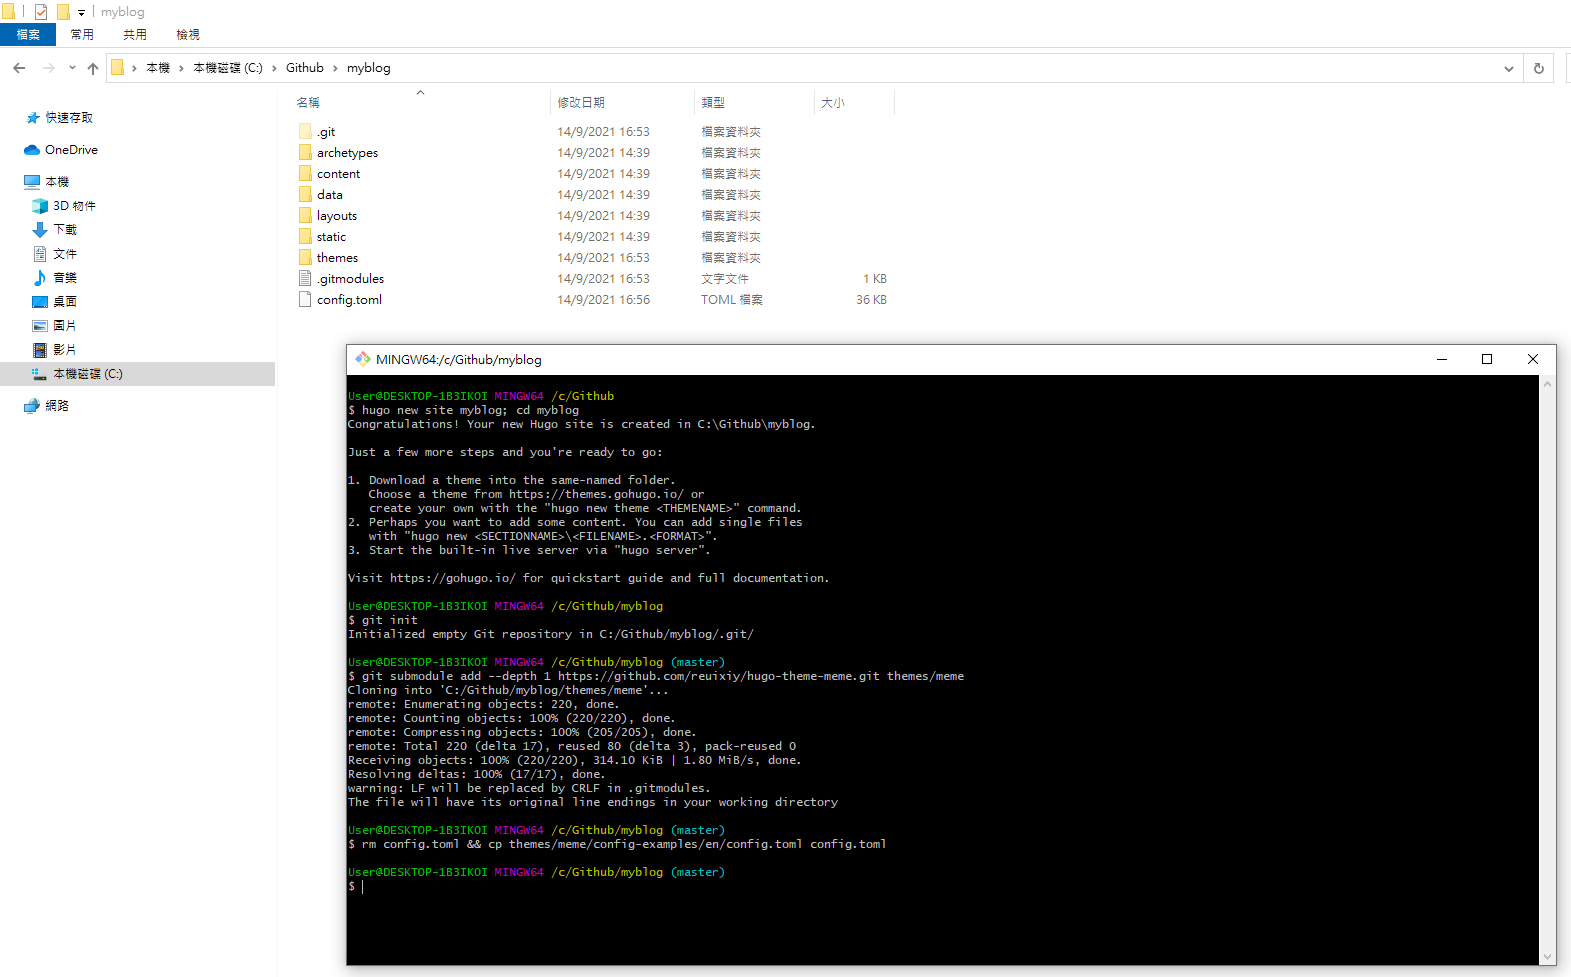 ◎ Fig5. git command
修改 config.toml 的 baseurl = “https://[your_github_username].github.io/”
例:https://starspiritstorm.github.io/
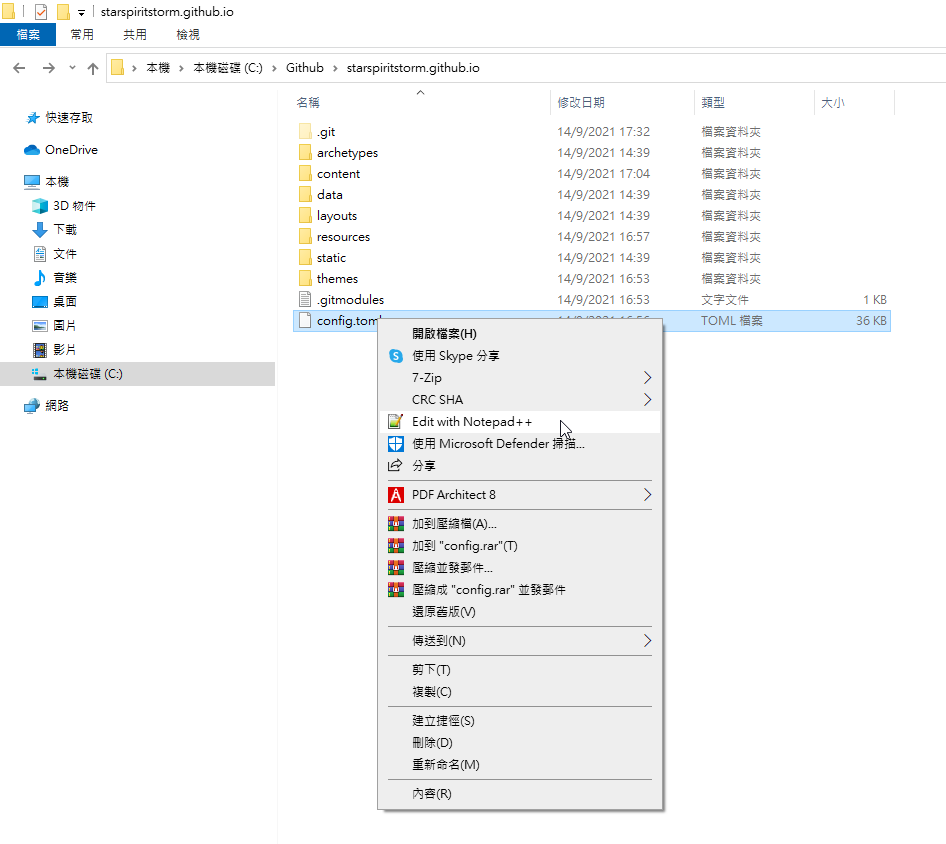 ◎ Fig5-1. edit config
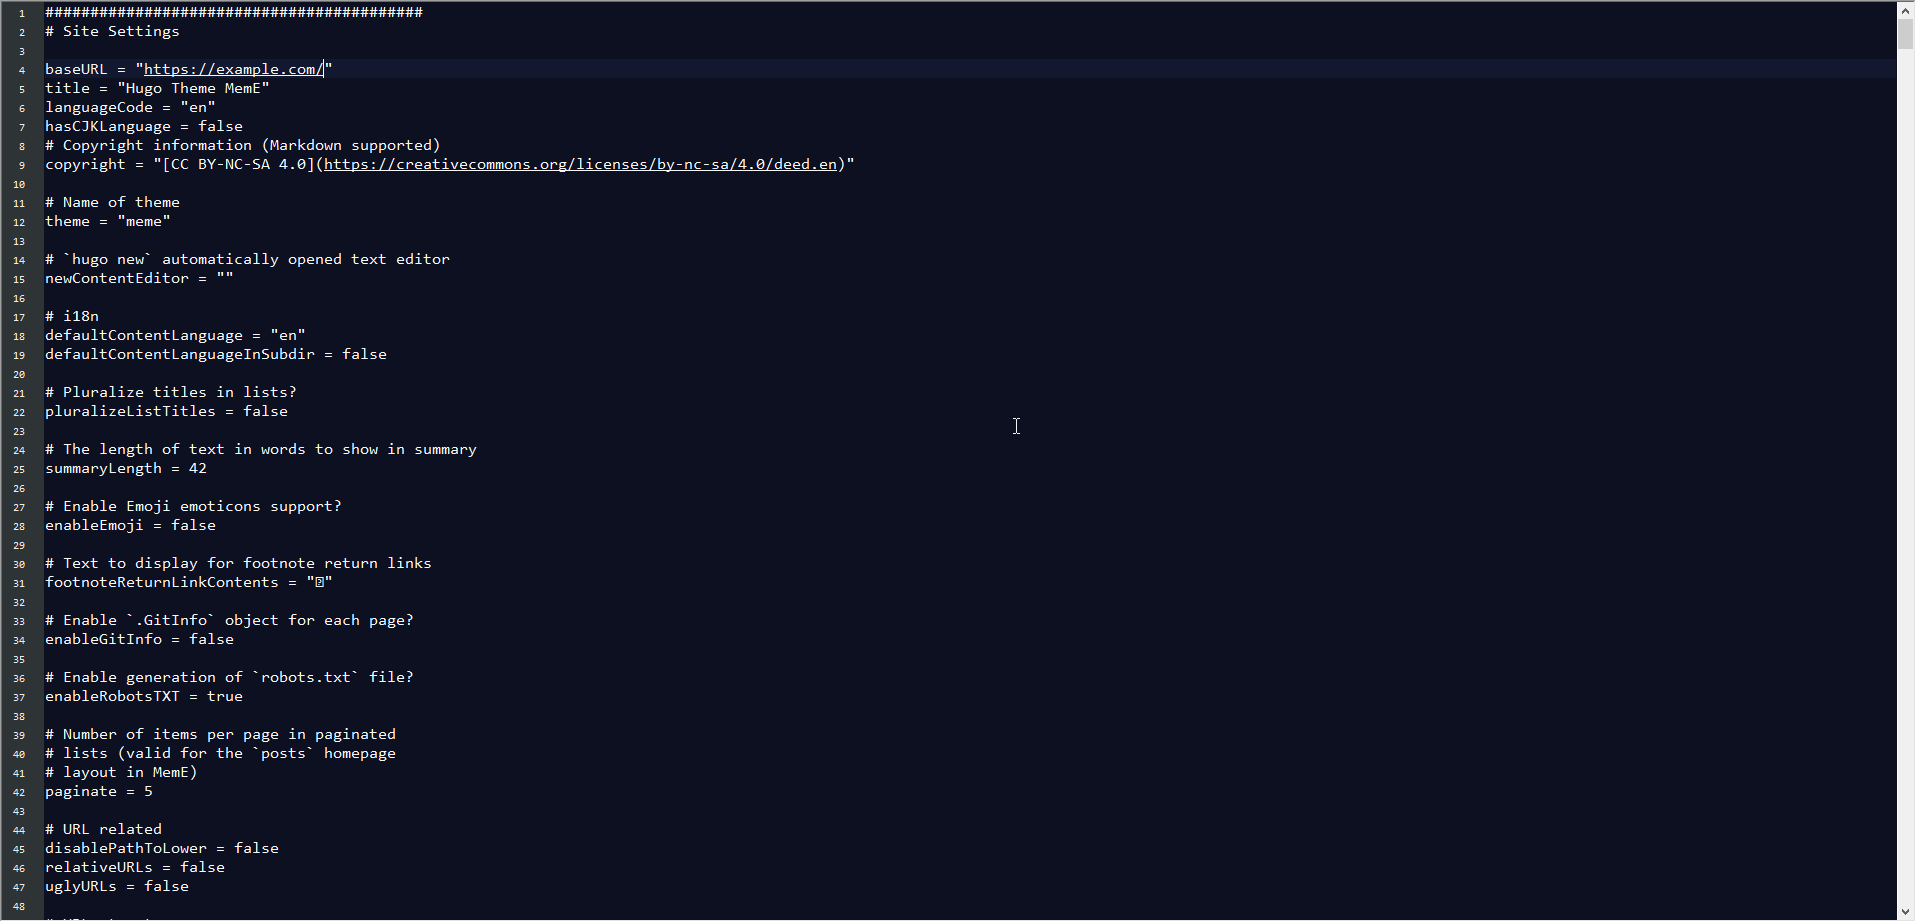 ◎ Fig5-2. rename url
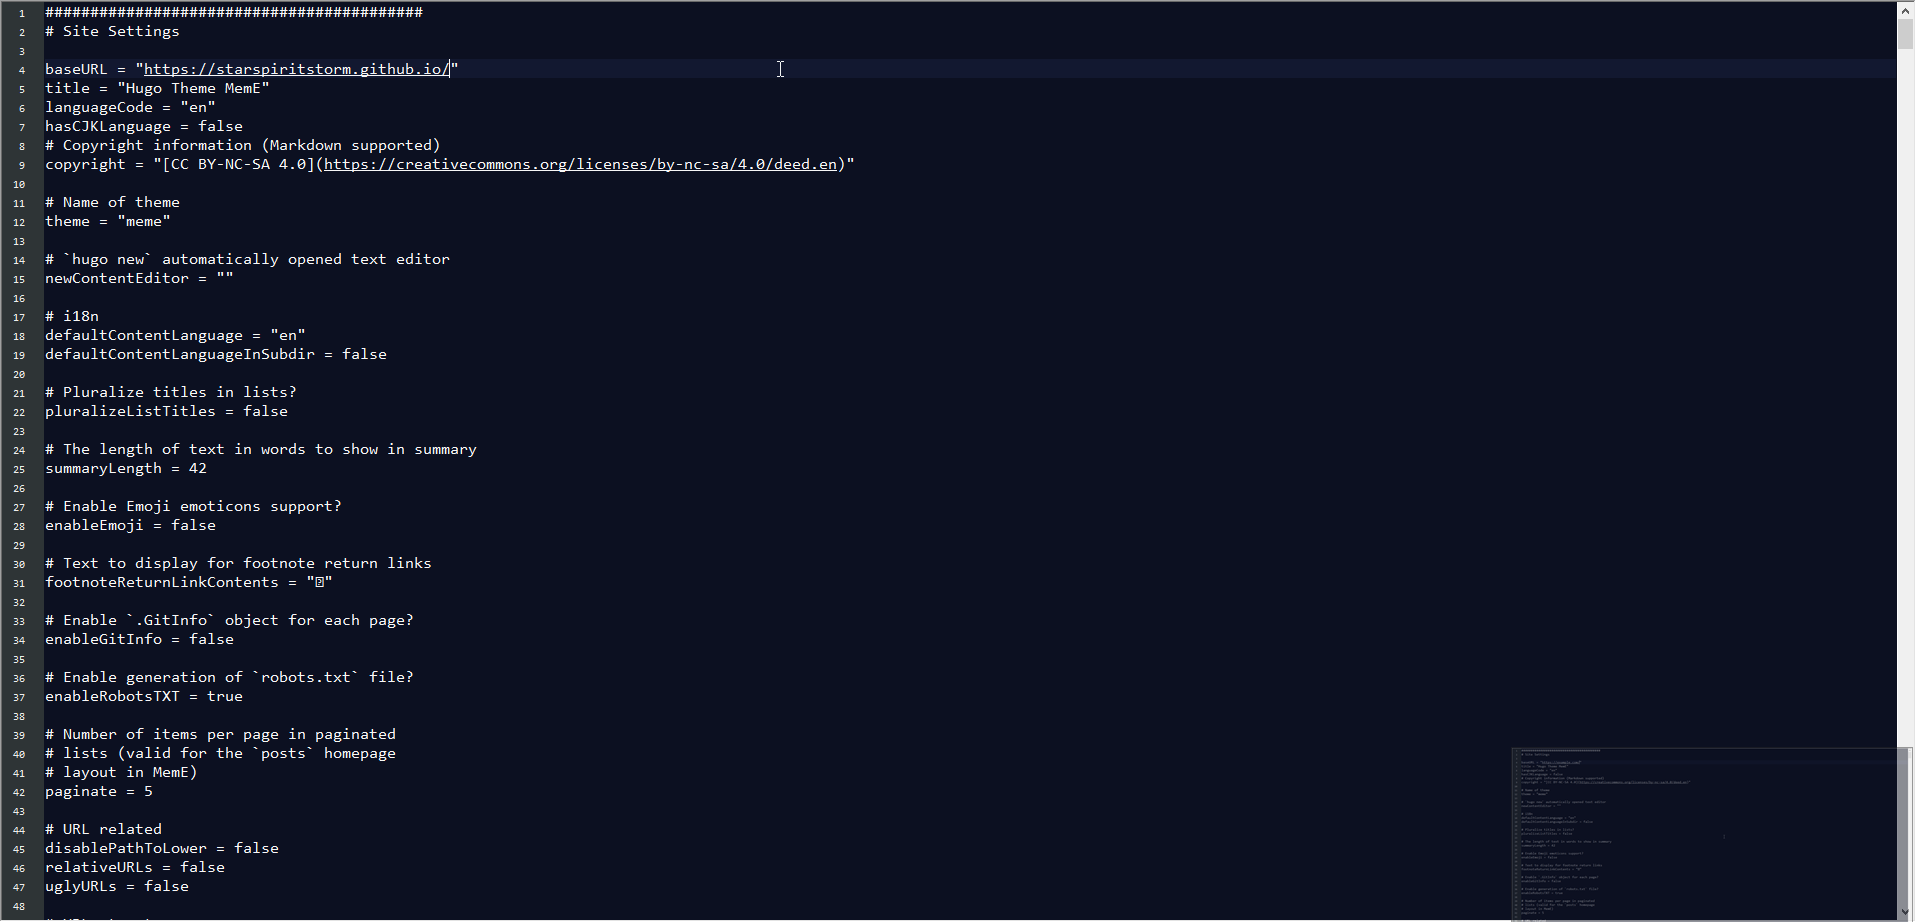 ◎ Fig5-3. rename url yours
產生簡單的 post&about
hugo new "posts/hello-world.md"
hugo new "about/_index.md"
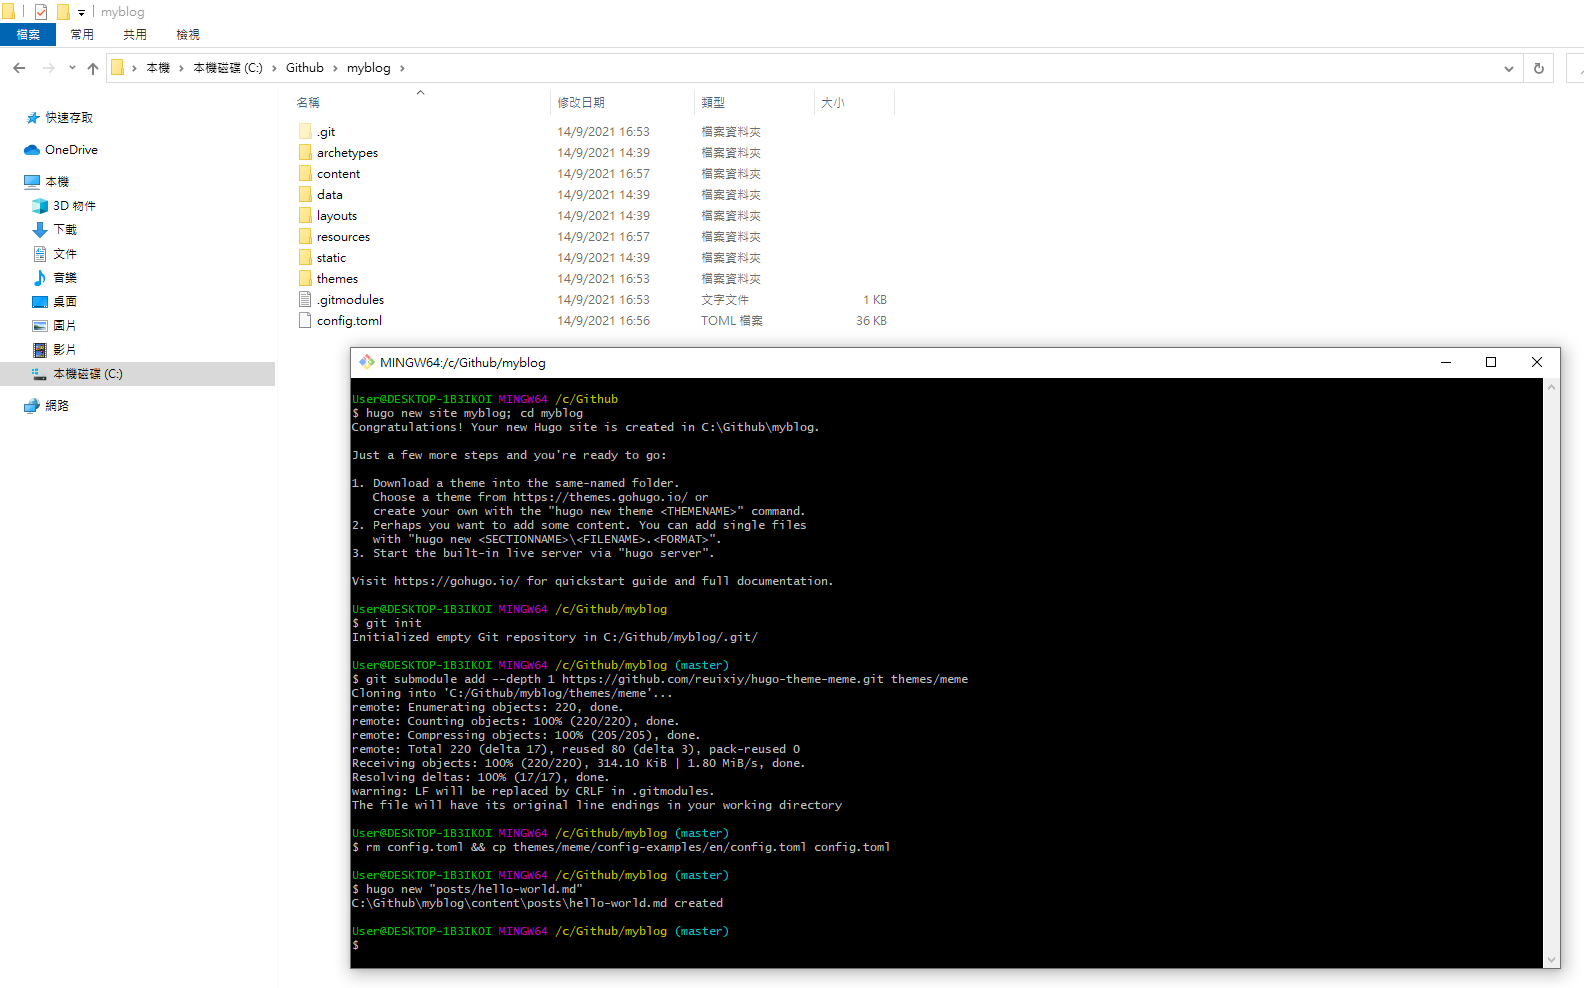 ◎ Fig6. generate posts
這邊有一點要注意的是,hugo new 產生的文章預設 draft 都是 true,用 notepad++ 開啟,
並把 draft 設定改成 false 才會真正的在 Github Pages 上顯示出來。
路徑在分別在
myblog\content\posts
myblog\content\about
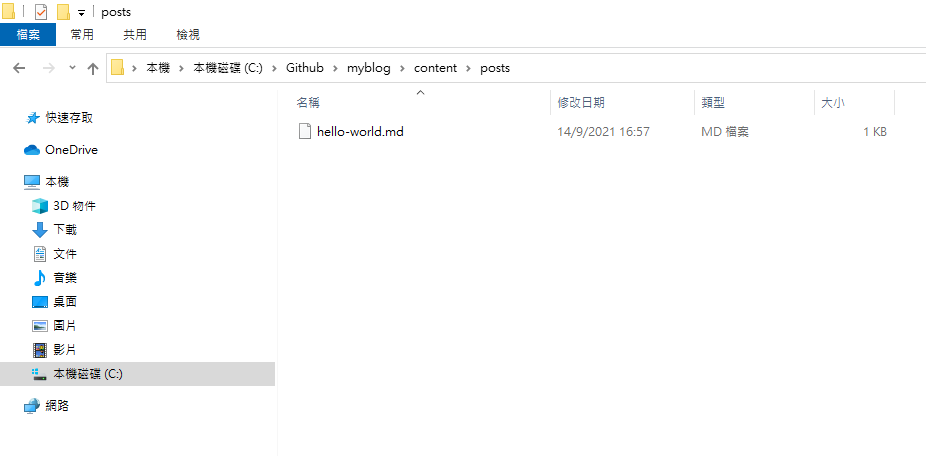 ◎ Fig6-1. file in posts
 ◎ Fig6-2. file in about
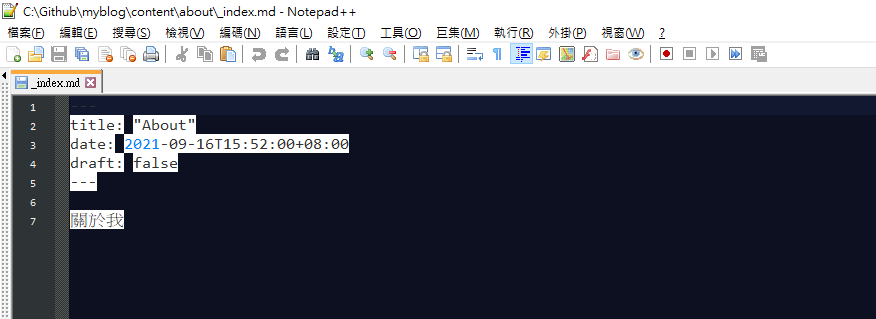 ◎ Fig7-1. about draft false
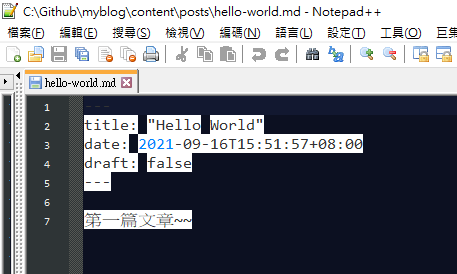 ◎ Fig7-2. post draft false
本地端檢驗 Hugo site
開啟
hugo server -D
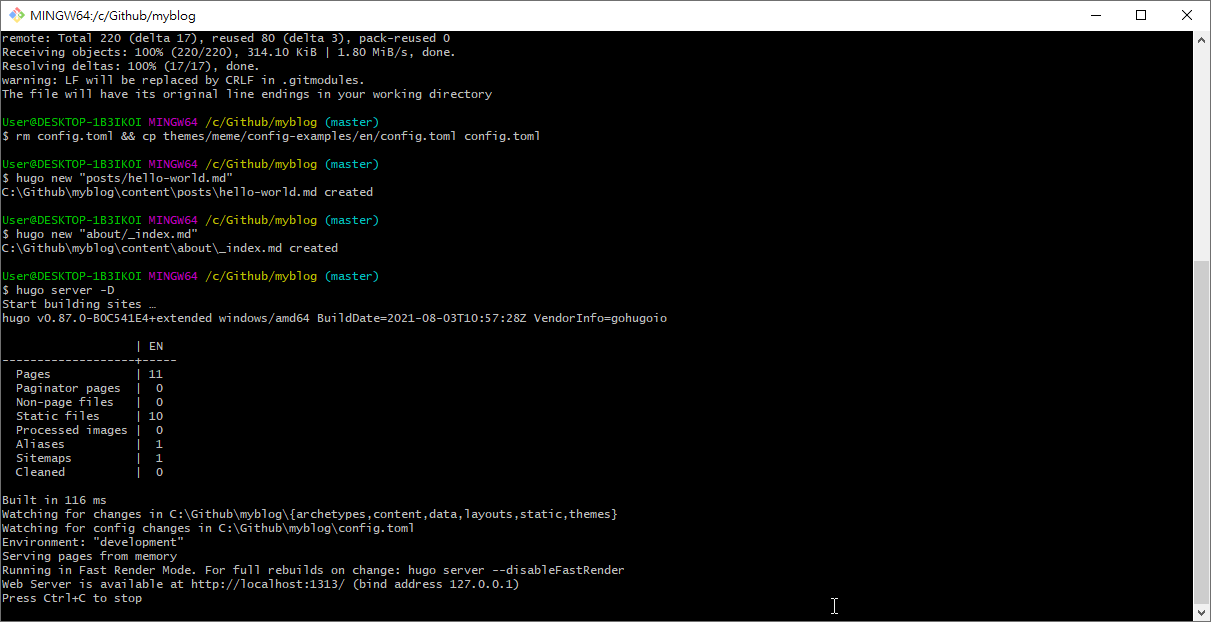 ◎ Fig8. hugo server
到瀏覽器 URL 輸入
http://localhost:1313/
檢查本地端是否能成功看到剛剛建好的網頁
 ◎ Fig9. hugo blog in local
部屬至 Github Pages
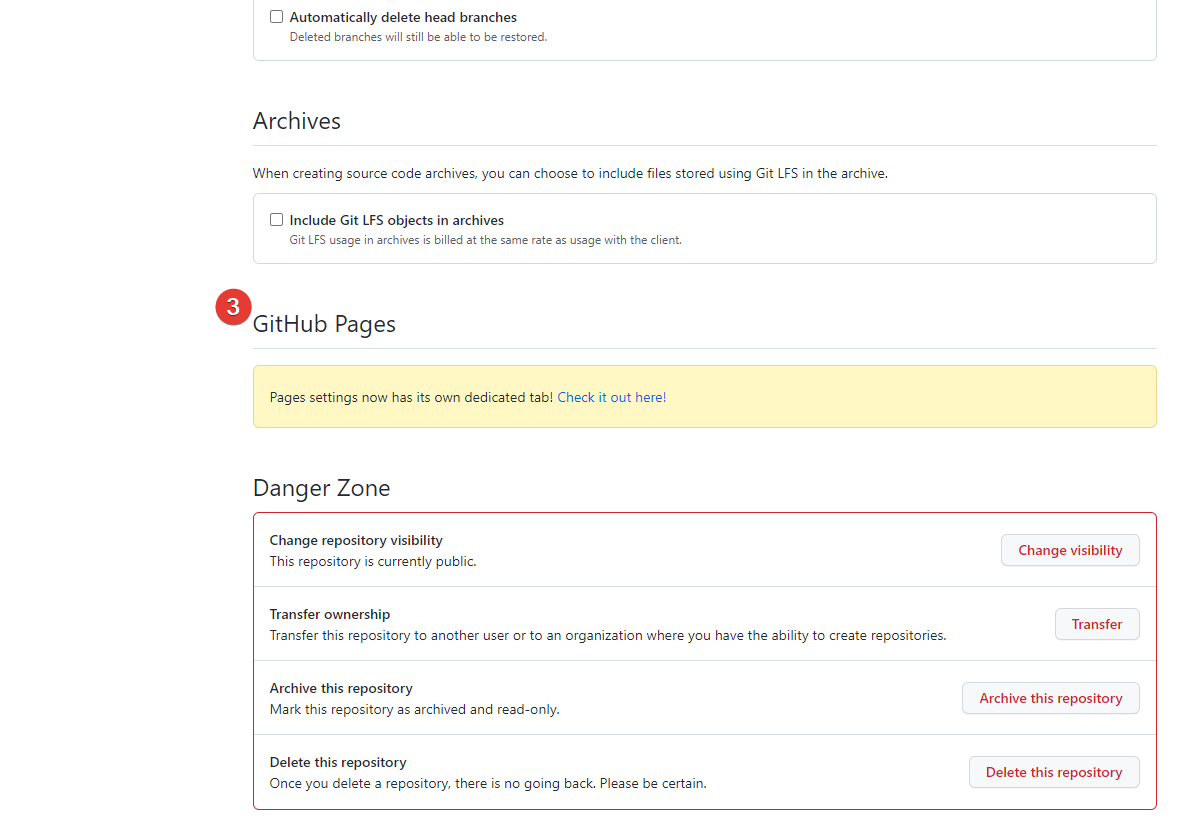
先產生 Github Pages 的 repository
先去 github 產生你的 Github Pages 需要用到的 repository。
repository 的名字必須是 “[你的github帳號].github.io”。
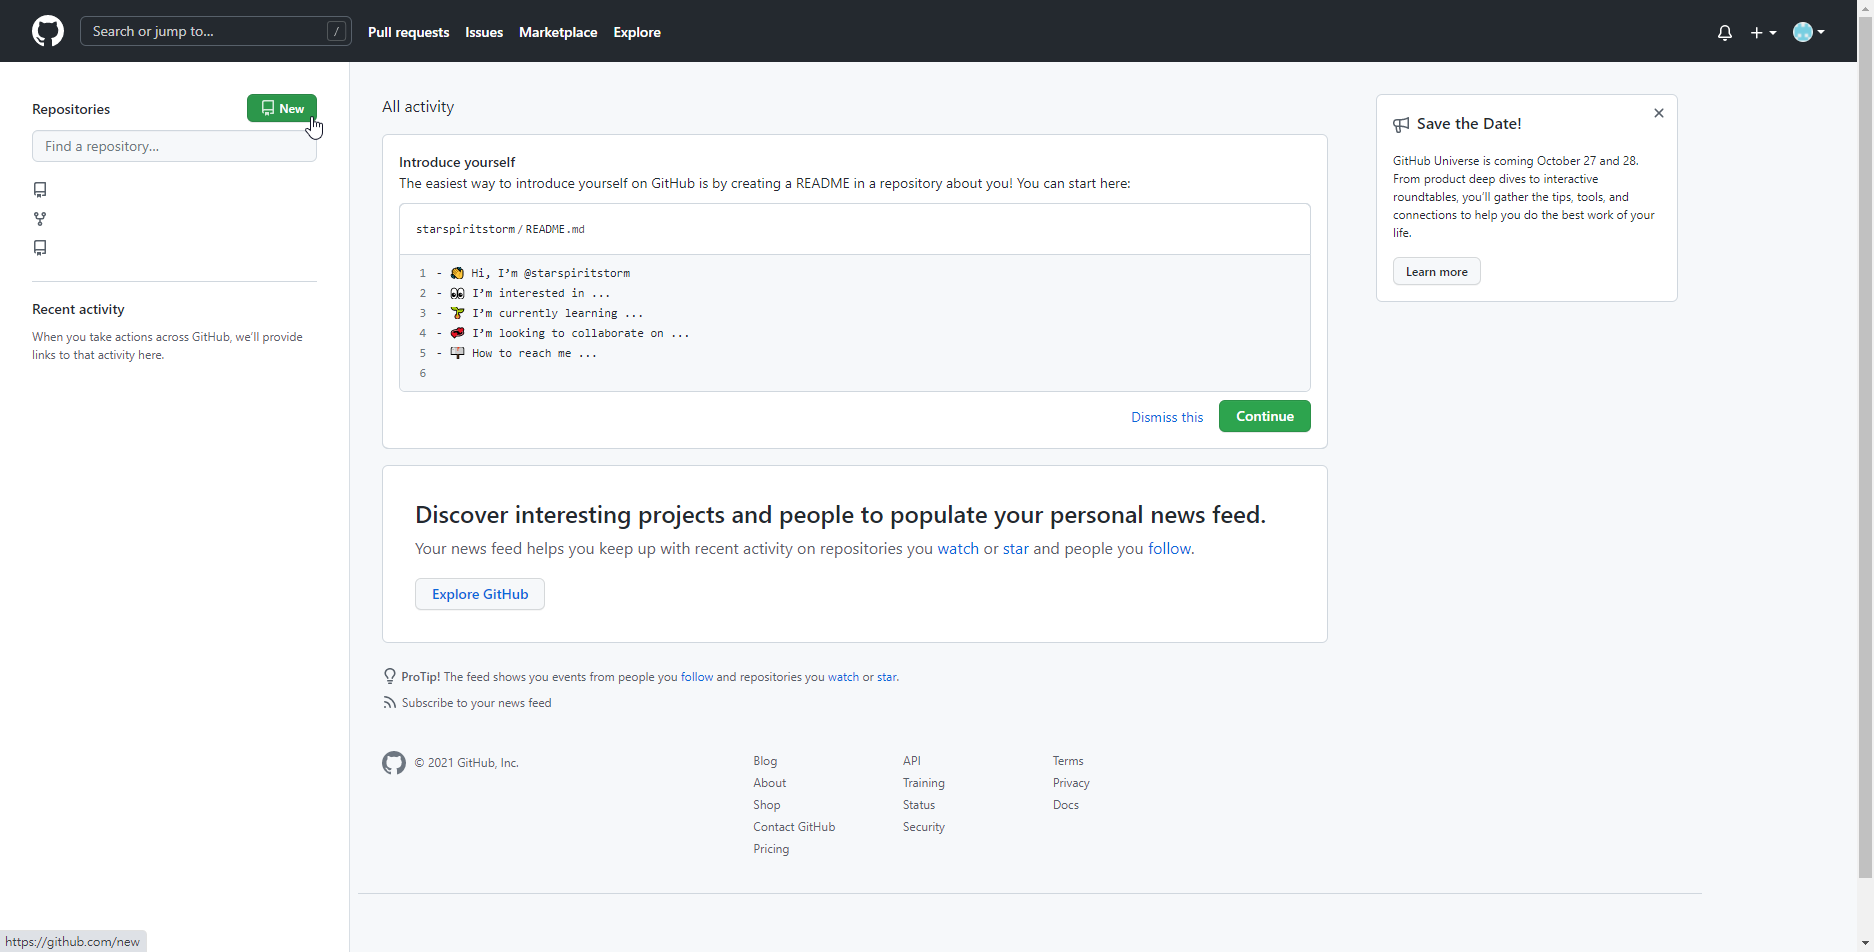 ◎ Fig10. step1 yourname.github.io
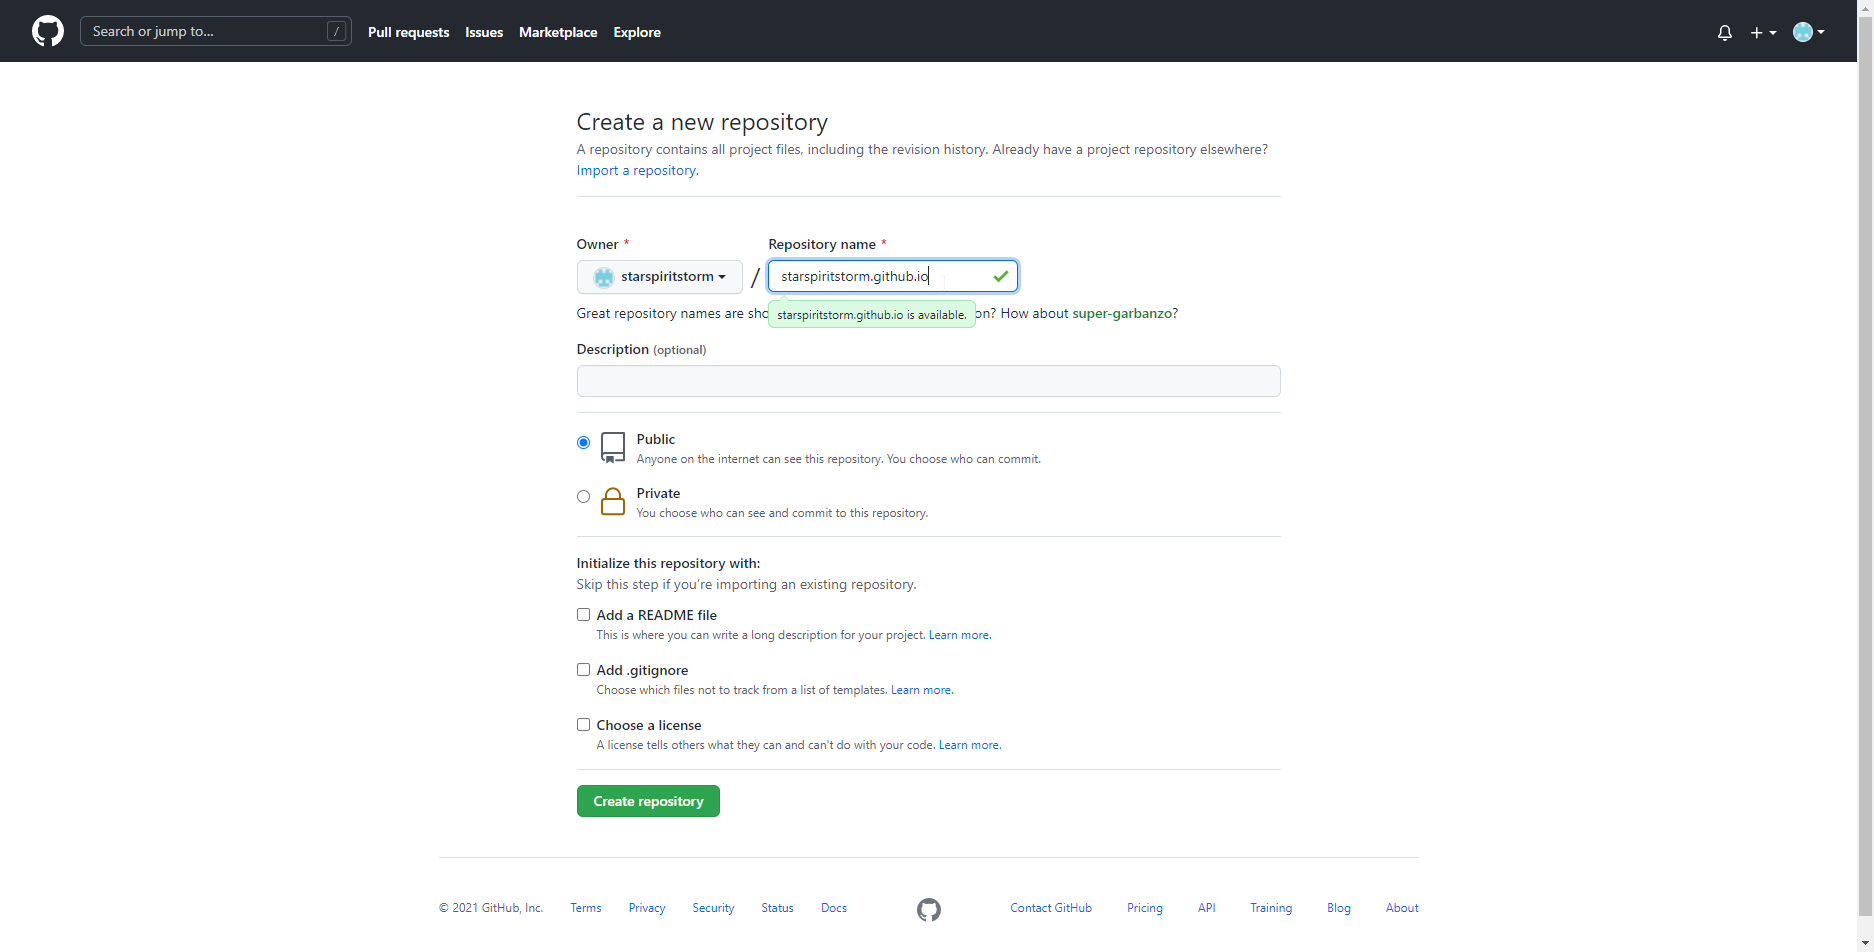 ◎ Fig11. step2 yourname.github.io
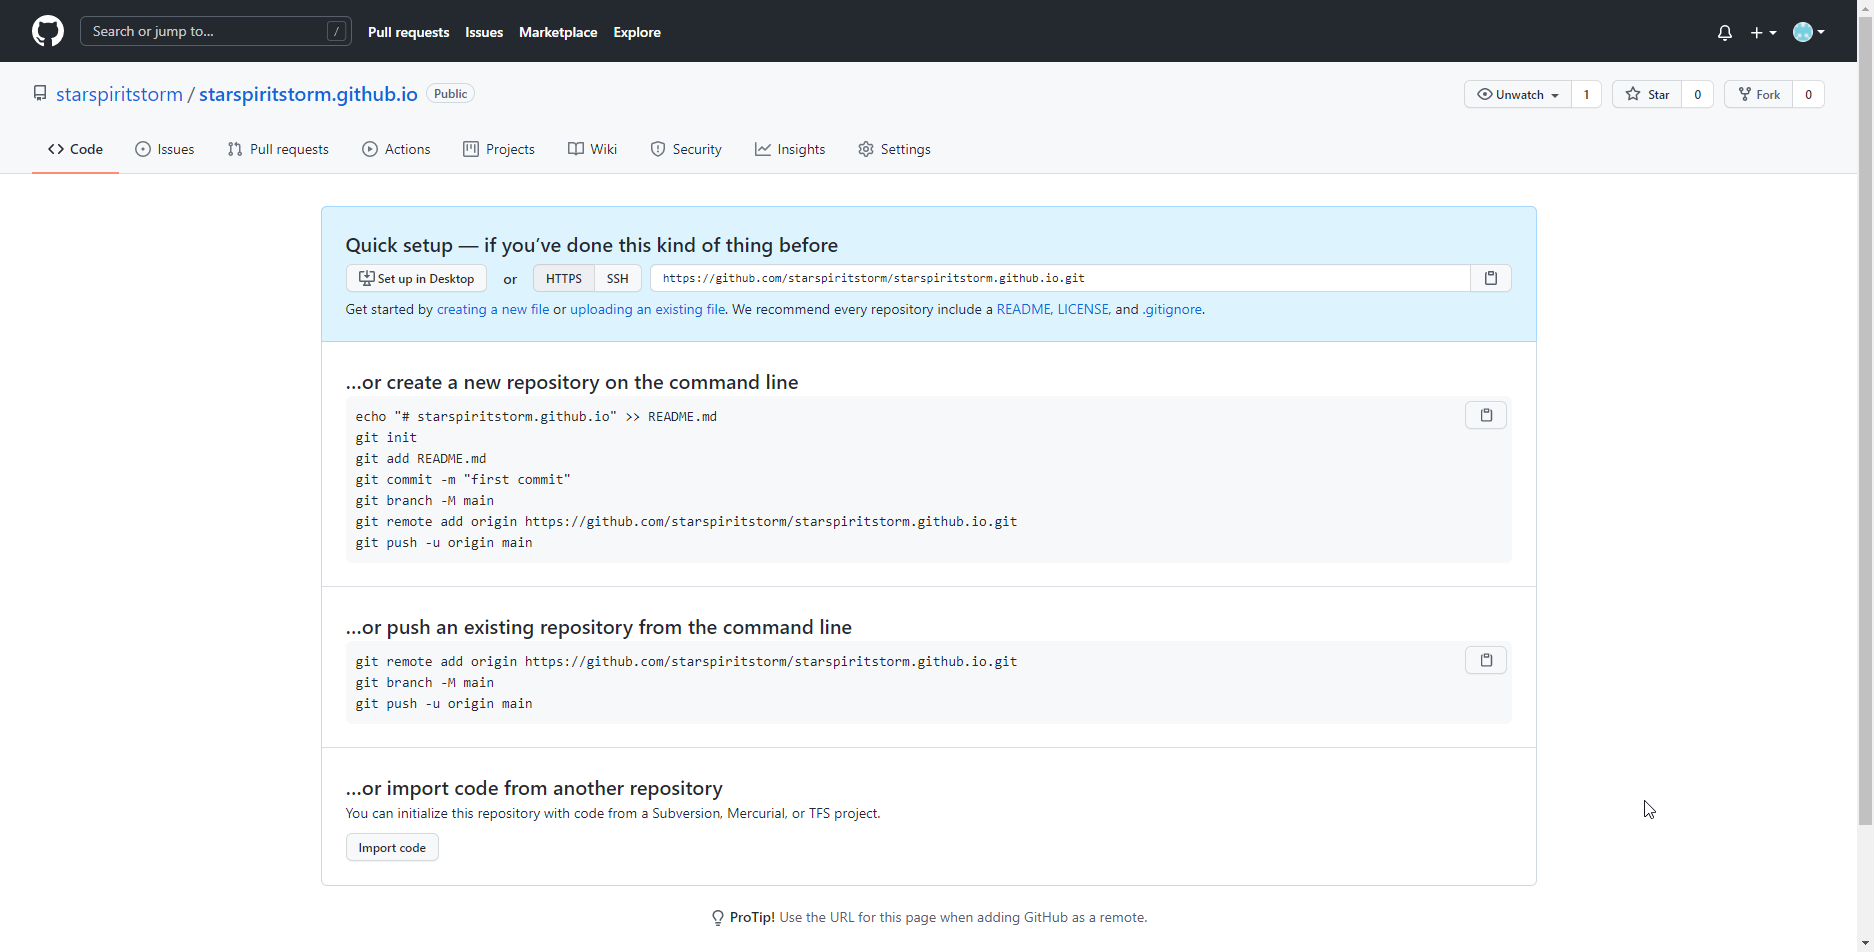 ◎ Fig12. step3 yourname.github.io
在 myblog 下,產生 hugo 的 public 資料夾
再回到剛剛創好的 myblog 路徑下,直接執行
hugo
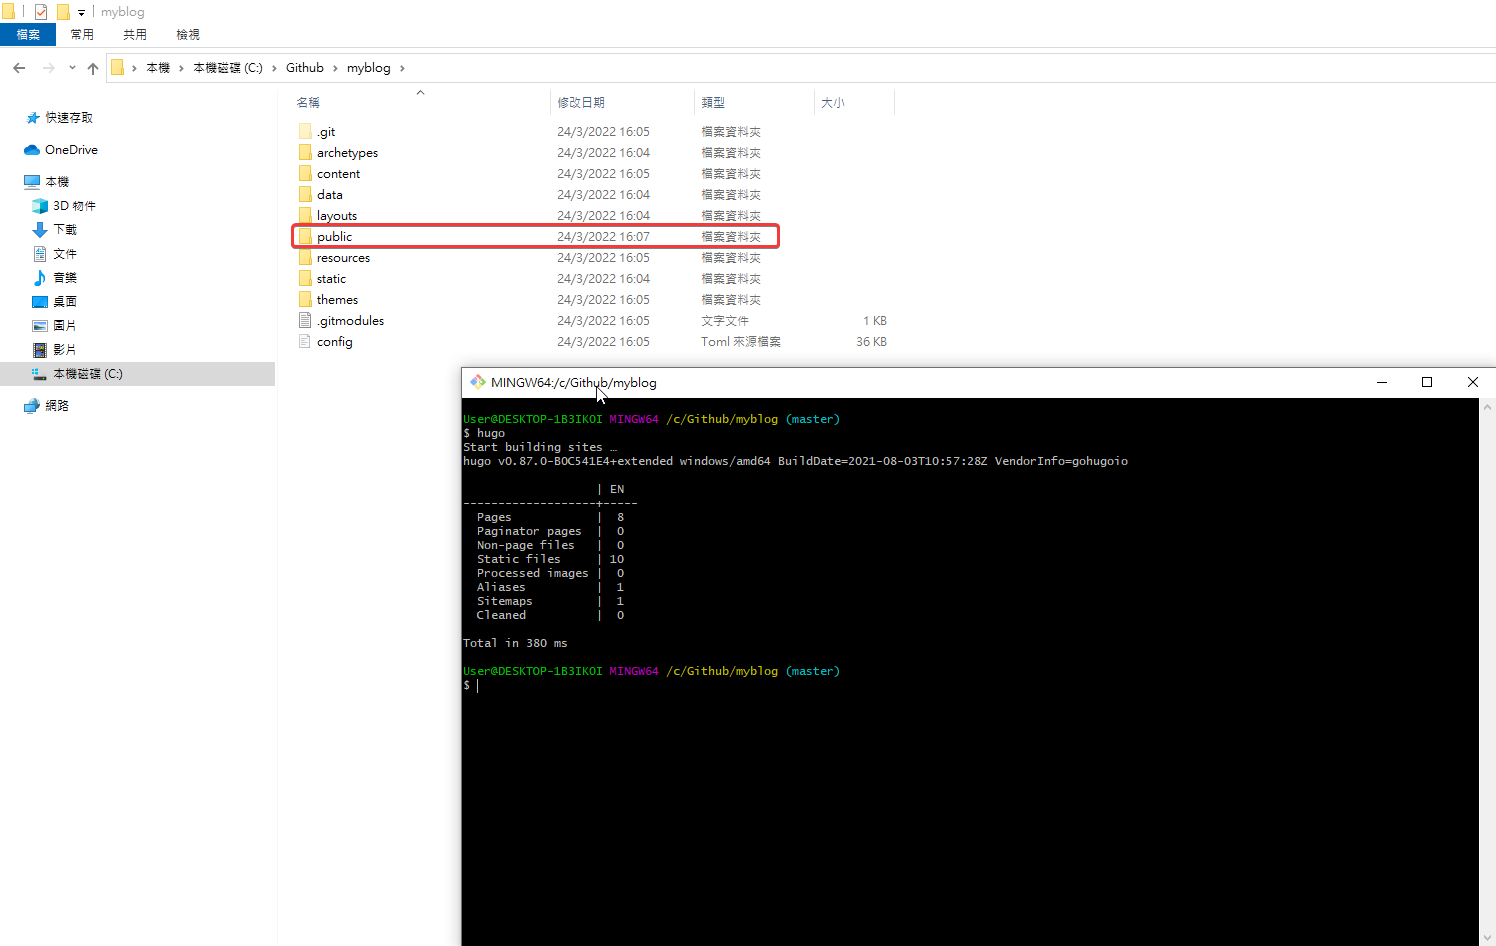 ◎ Fig14. execute hugo
會看到 public 資料夾產生,然後進入 public 資料夾
cd public/
public 資料夾是 hugo for Github Pages 靜態頁面用的,也就是
https://github.com/[你的帳號]/[你的帳號].github.io
這個 repository 要用的。
在 public 資料夾,開啟 git,要上 github 用的
接下來要在 public 資料夾裡面開 git 才能推到 github 上。
git init
git remote add origin https://github.com/[你的帳號]/[你的帳號].github.io
例:git remote add origin https://github.com/starspiritstorm/starspiritstorm.github.io
git add .
git commit -m "Initial commit"
git push --set-upstream origin master
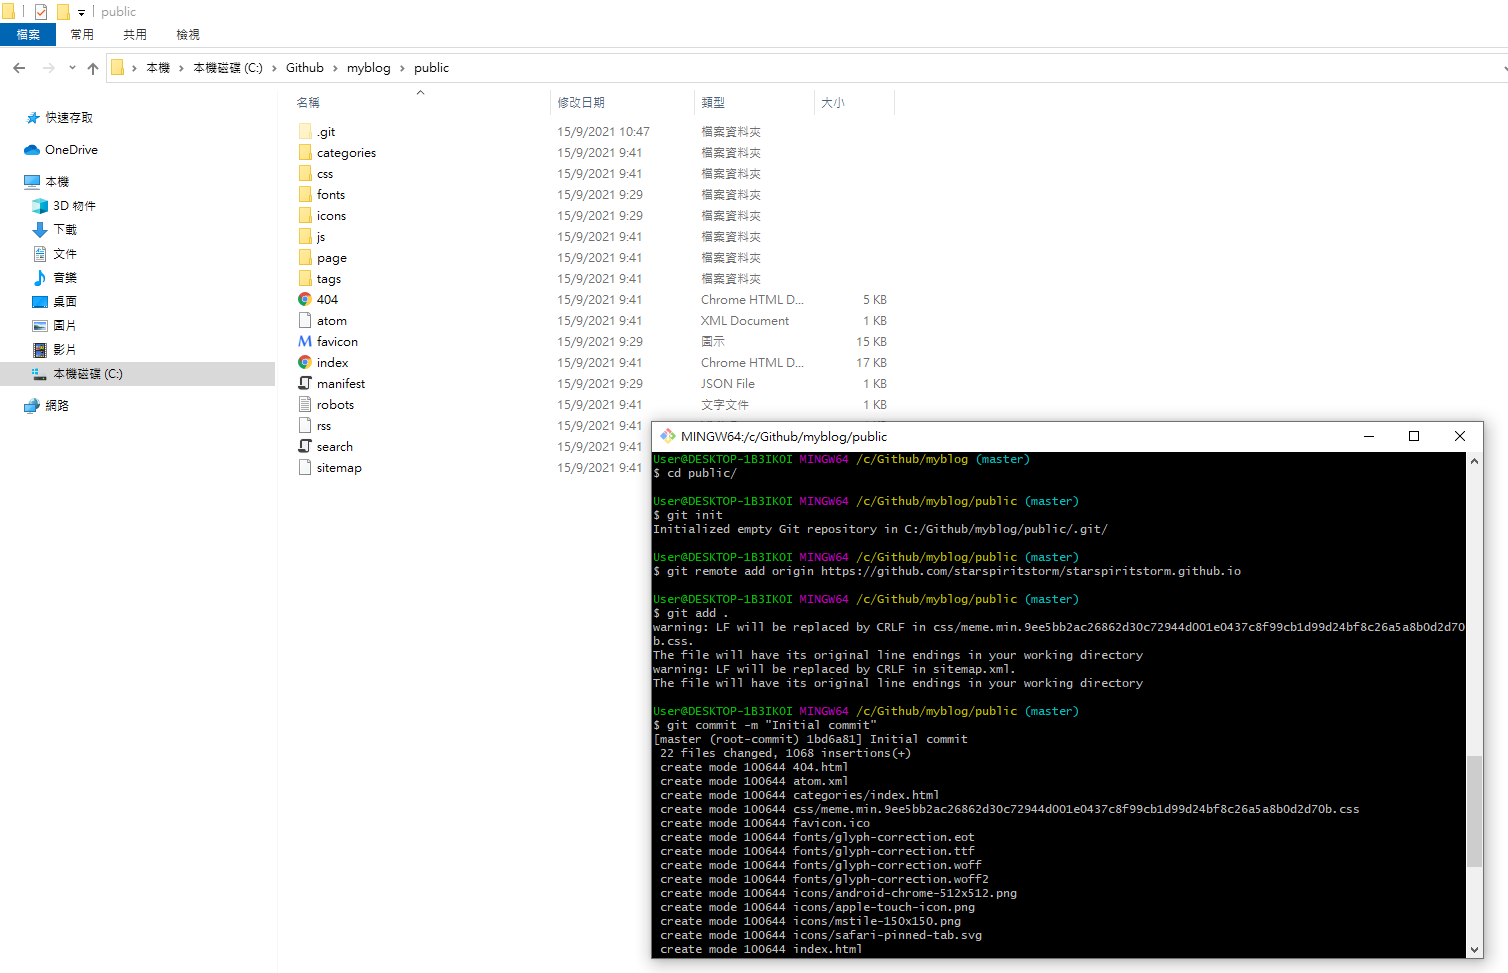 ◎ Fig15. init git in public
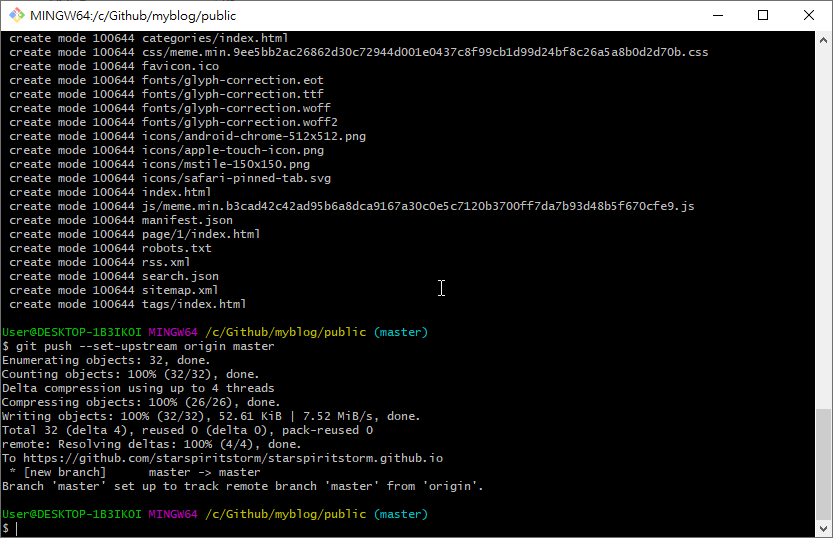 ◎ Fig16. init git in public2
到 github 網頁設定 Source
推完之後還需要去設定。
Settings > Options > Github Pages > Source to “master branch”
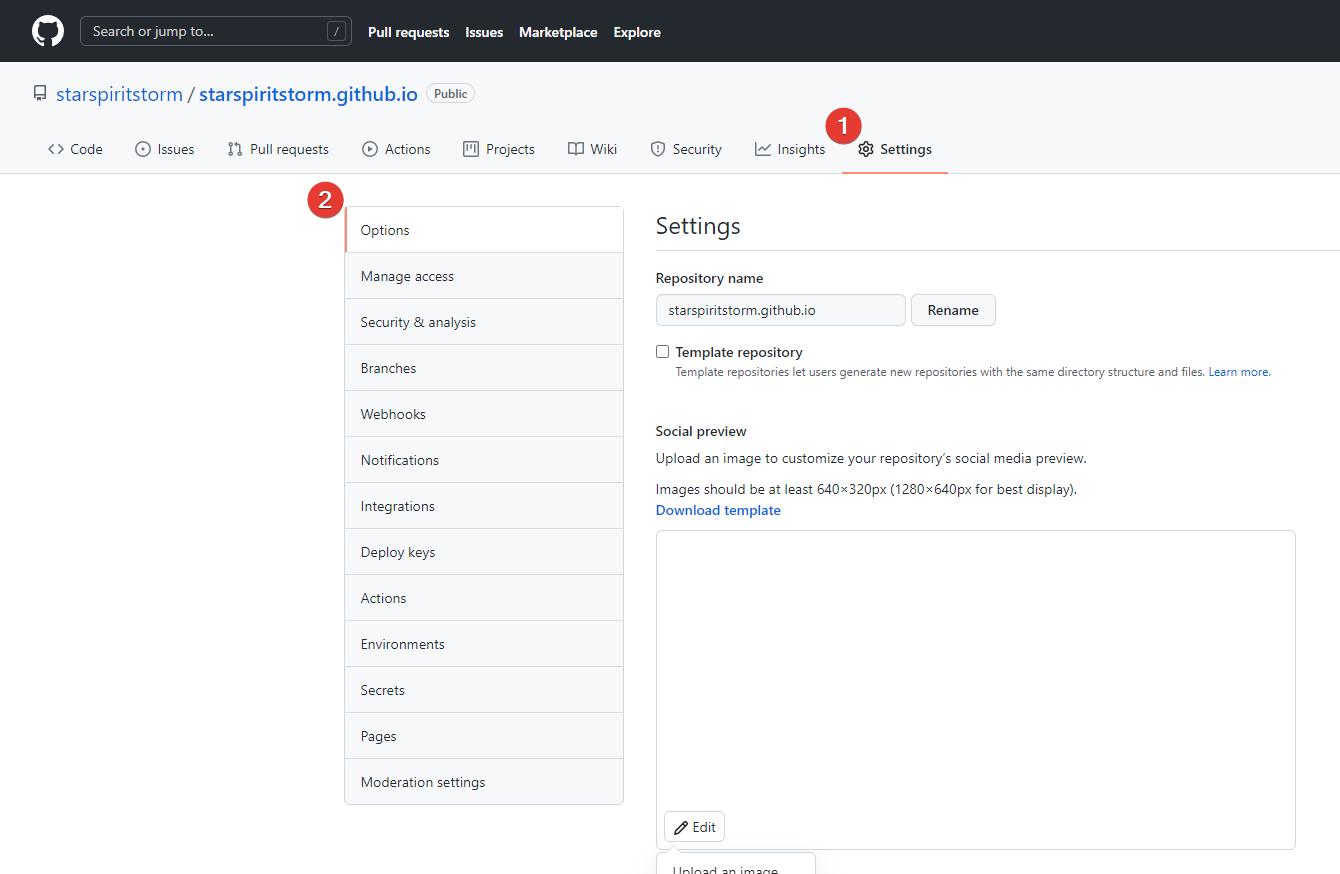 ◎ Fig18. github setting source1
 ◎ Fig19. github setting source2
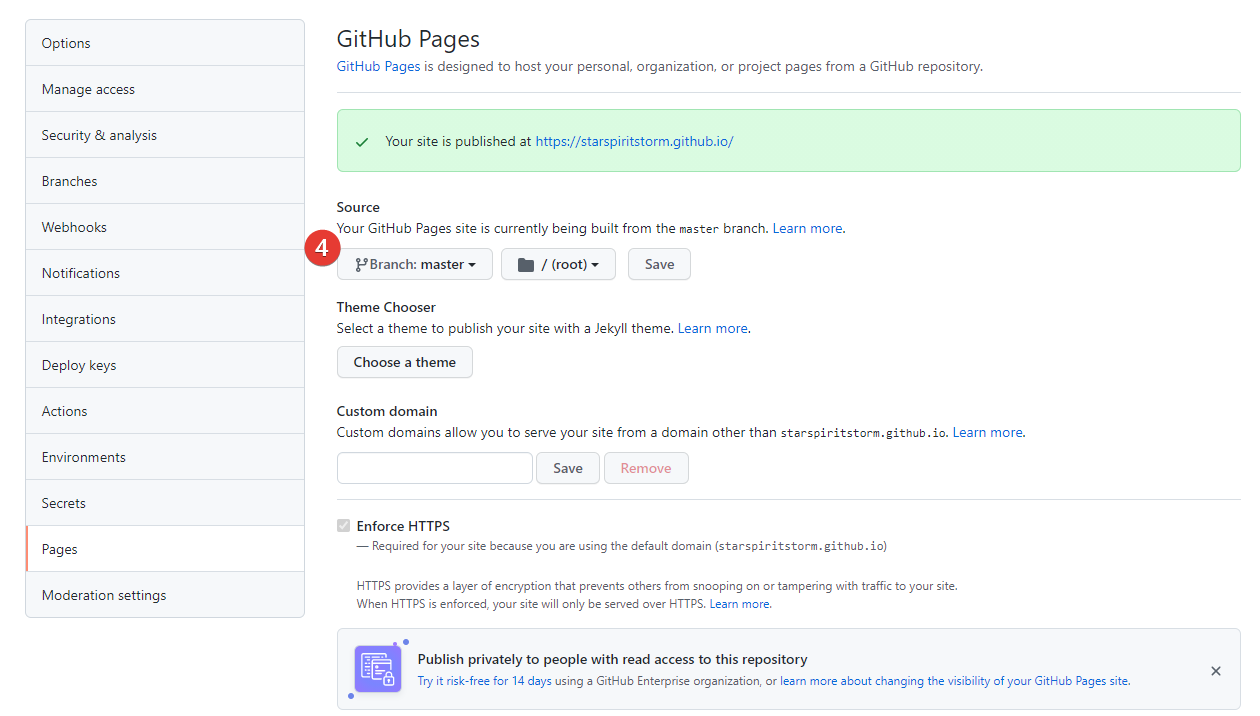 ◎ Fig20. github setting source3
推完之後就可以到 你的 Github Pages (https://[你的帳號].github.io/) 看看結果了。
 ◎ Fig22. github pages result
Github Pages hugo source code
產生 Github Pages source code 的 repository
這邊要注意的是,所有文章的 source code 還是存放在你的本地端, 剛剛的 Github Pages 實際上只有上傳了 public 資料夾內的東西到你的 Github Pages 的 repository。
所以還需要再開另外一個 github repository,來儲存你的 source code, 步驟跟剛剛開 Github Pages 的方法一樣,名稱可以自己取一個喜歡的,這邊我是直接這樣取。
https://github.com/[你的帳號]/[你的帳號]_githubpages_source
例:https://github.com/starspiritstorm/starspiritstorm_githubpages_source
 ◎ Fig24. create source code repository
回 myblog 資料夾,開啟 git,要上 github_source_code 用的
創好之後再回到 myblog 資料夾重新開一個 git bash。
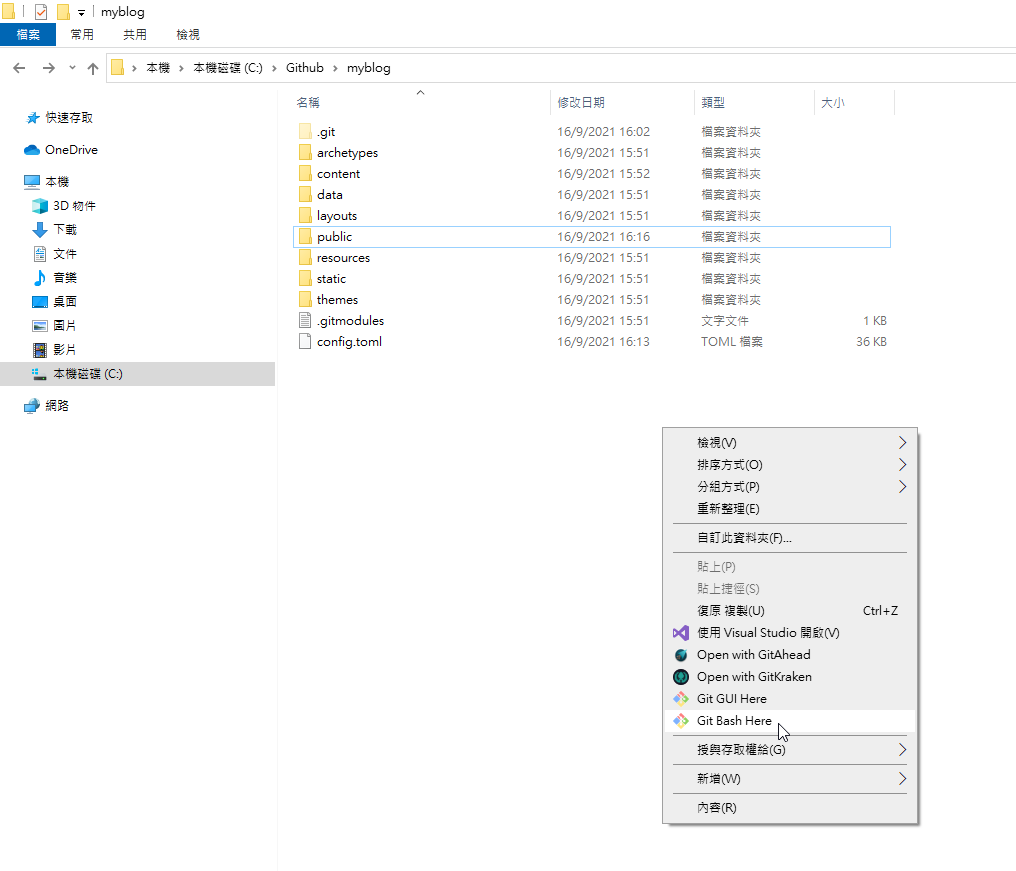 ◎ Fig25. open git bash in myblog
然後產生一個 gitignore 把 public 資料夾排除,因為 public 是 hugo build 出來的產物
echo "public/" >> .gitignore
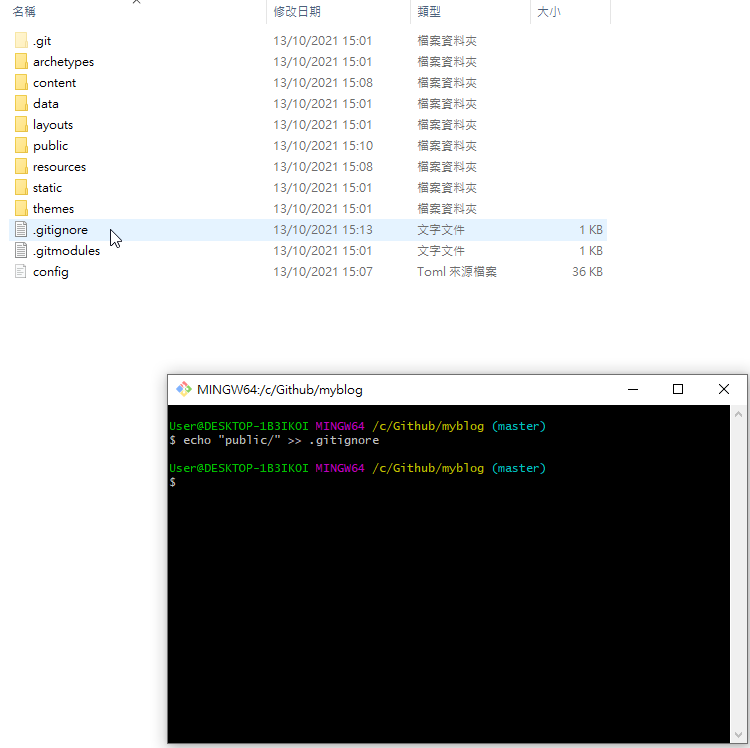 ◎ Fig26. git ignore public
然後做一樣的事情把你的 source code 推到新的 repository。
git init
git remote add origin https://github.com/[你的帳號]/[你的帳號]_githubpages_source
例:git remote add origin https://github.com/starspiritstorm/starspiritstorm_githubpages_source
git add .
git commit -m "Add hugo source code"
git push --set-upstream origin master
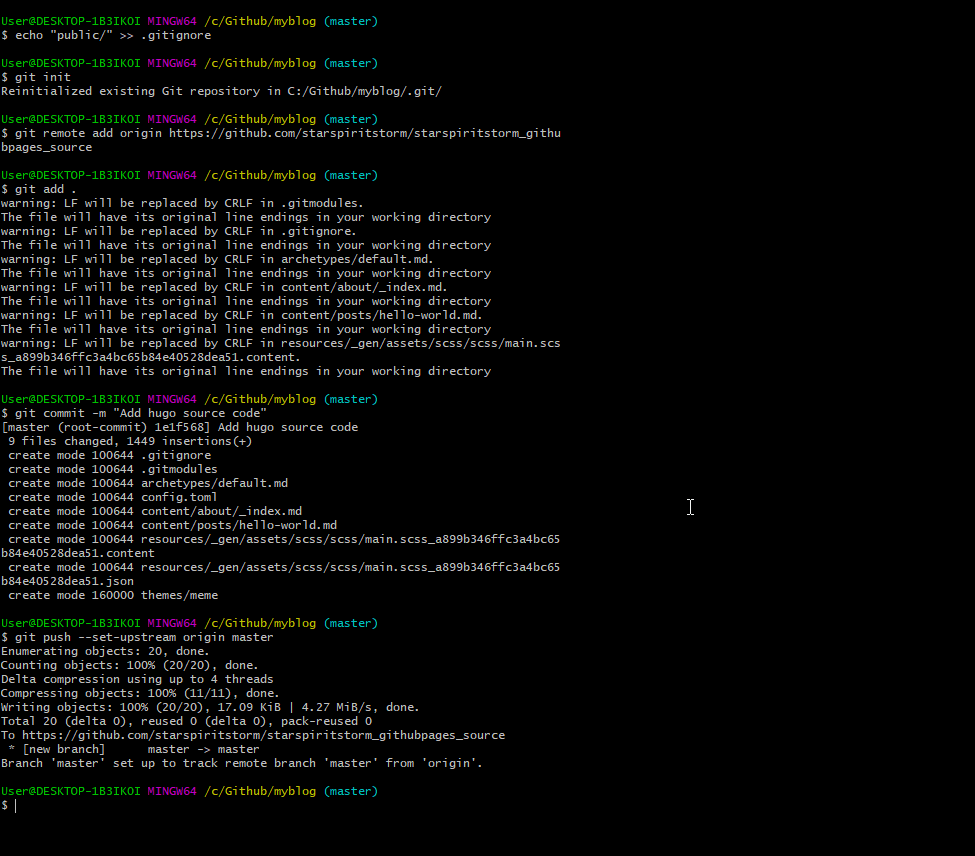 ◎ Fig27. init git in myblog
自動化部屬 (GitHub Action),只要推 source code,就會幫你更新 Github Pages
Submodule 要產一個 public 出來
最後一步驟,藉由 GitHub Action 來做自動化部署。
為了後面要能自動化部署,需要先產生 submodule public 預備著[1]。
git submodule add -f --depth 1 https://github.com/[你的帳號]/[你的帳號].github.io.git public
例:git submodule add -f –depth 1 https://github.com/starspiritstorm/starspiritstorm.github.io.git public
產生完之後記得 commit & push。
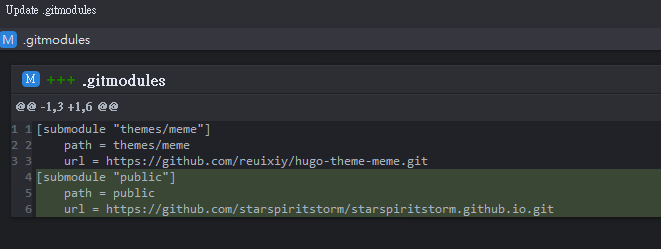 ◎ Fig28. submodule commit
產生 github Personal Access Token
先到 這個頁面 ,產生 Personal Access Token (PAT)。
名稱可以自取,過期時間先選 No expired,因為也只會給 workflow 用,如果之後有疑慮可以重新產生 token。
勾選 workflow
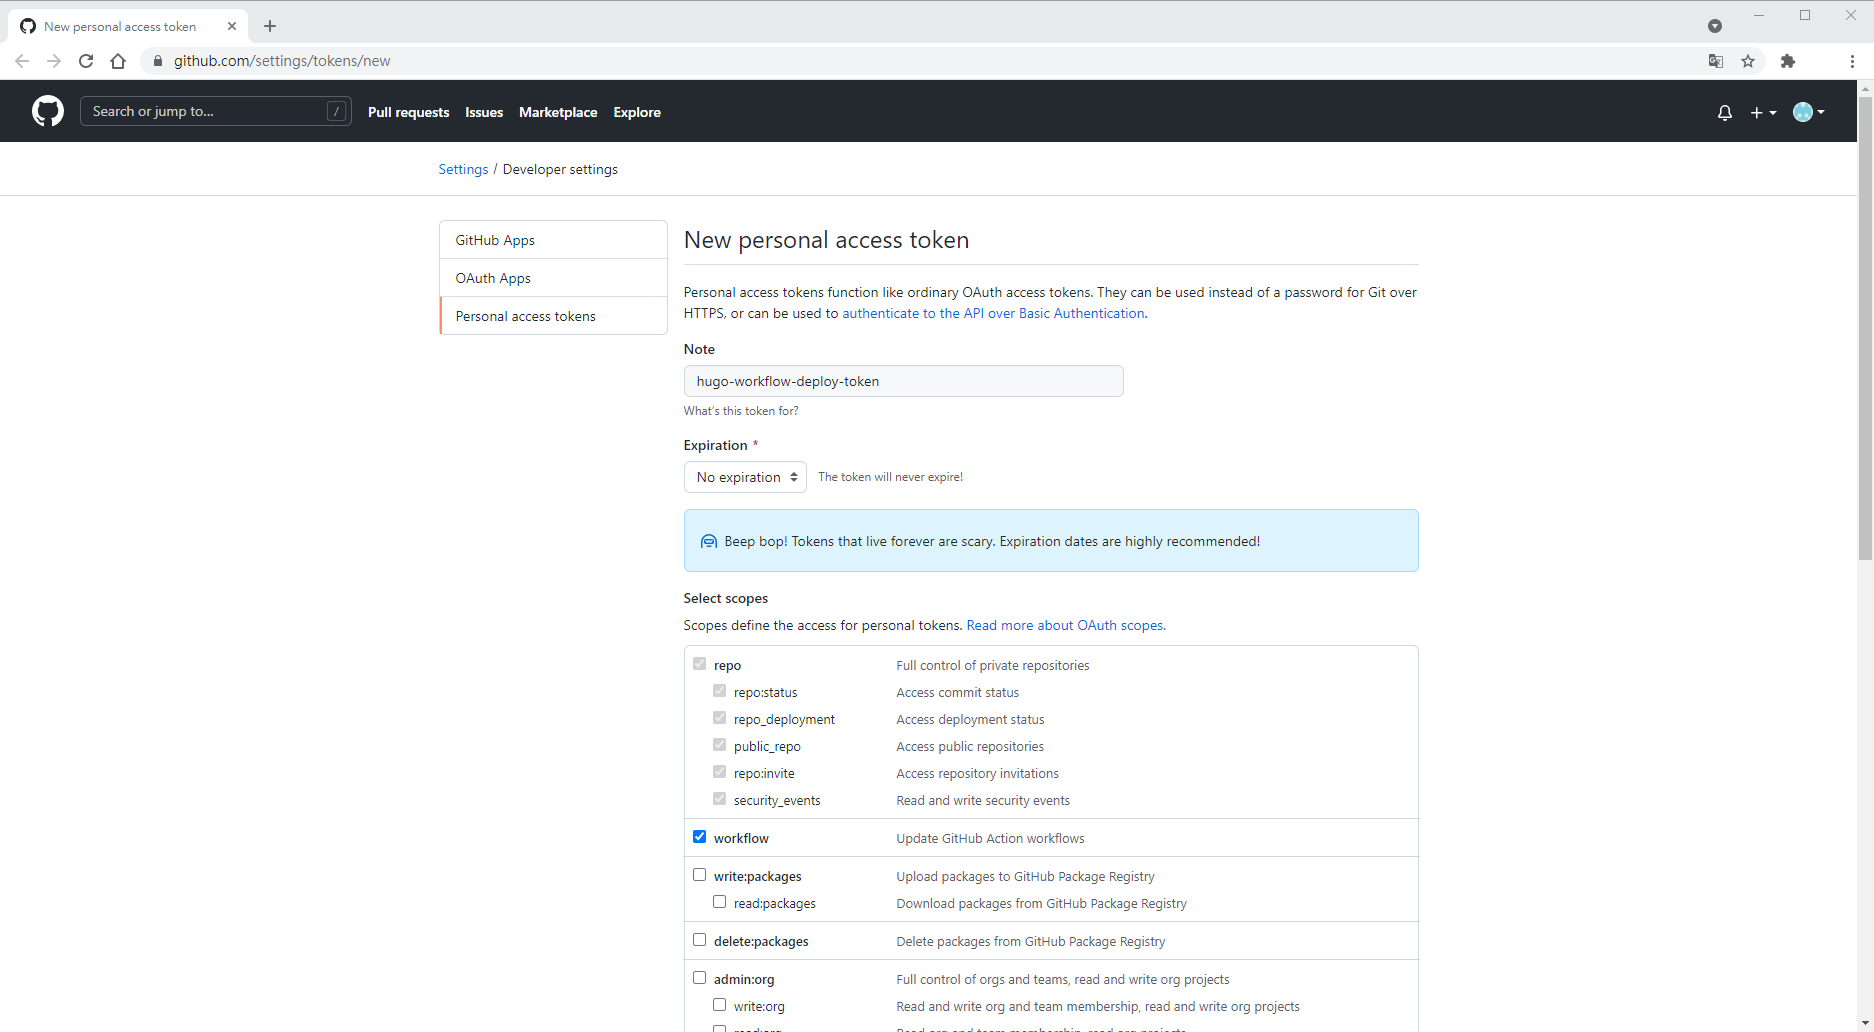 ◎ Fig30. generate github personal access token
拉到下面按產生
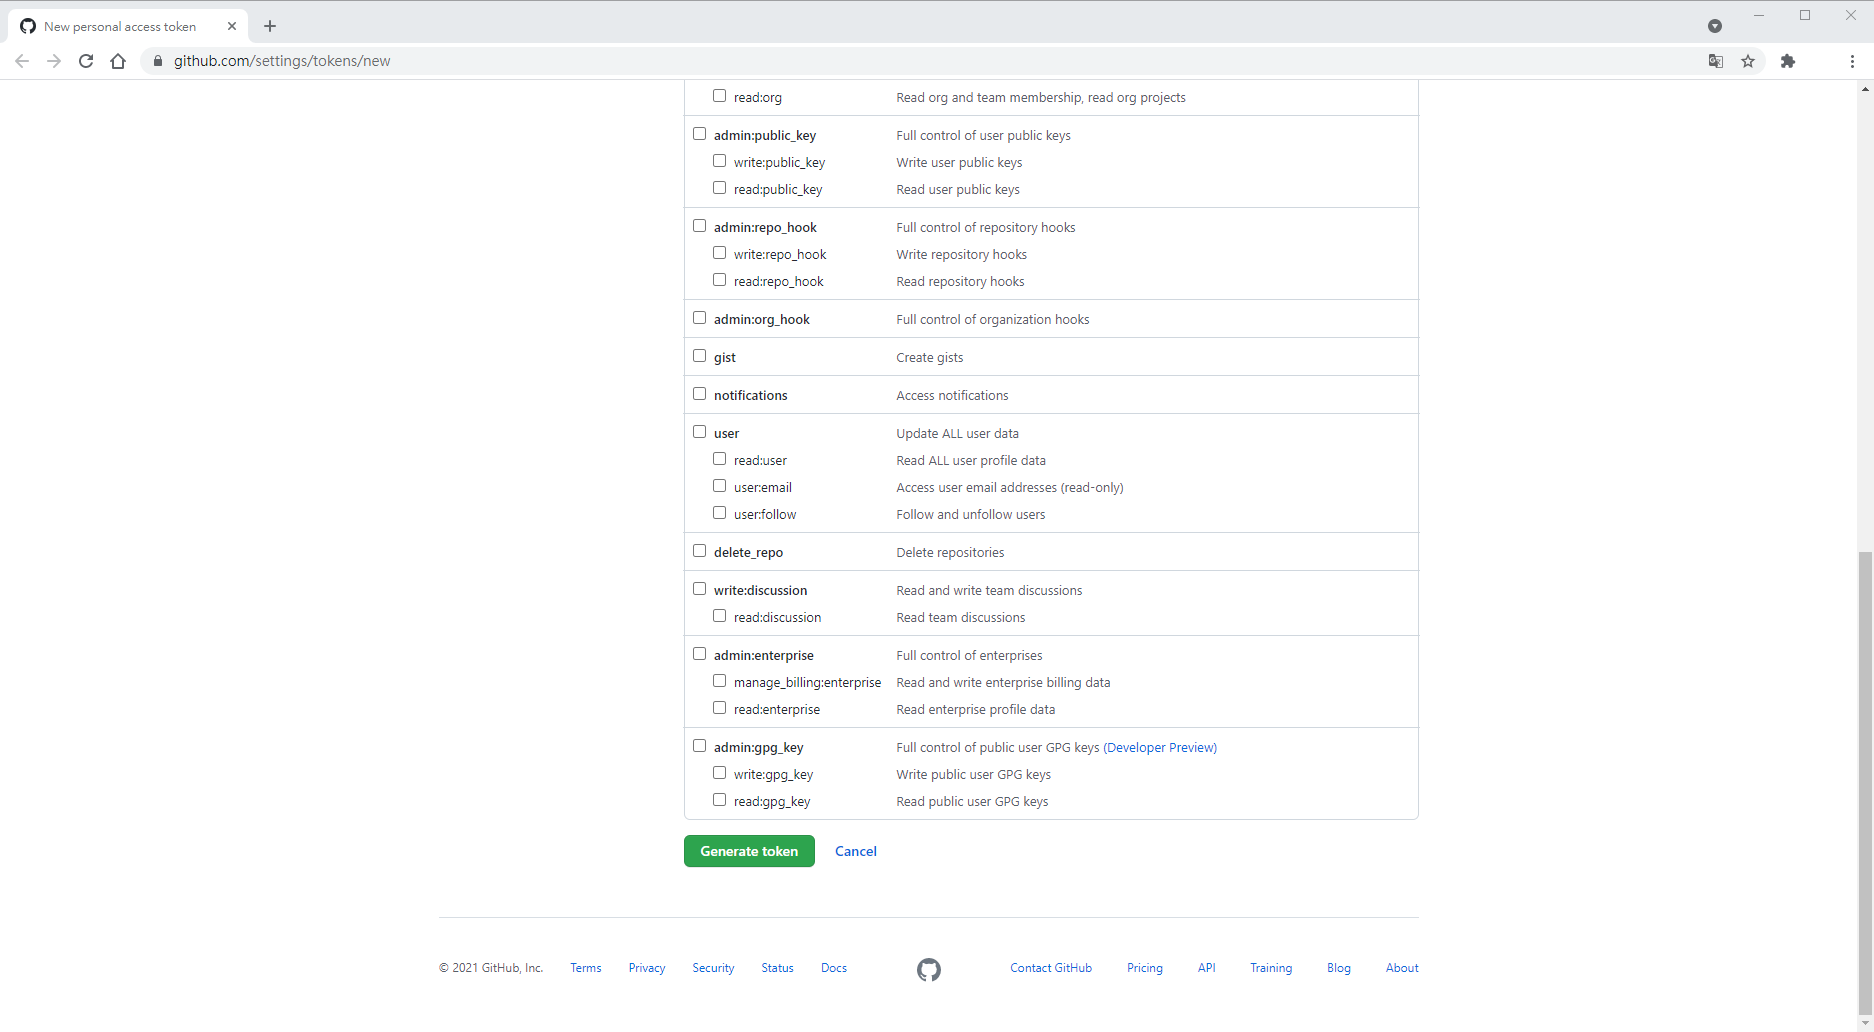 ◎ Fig31. click generate
產生完以後先複製token的值
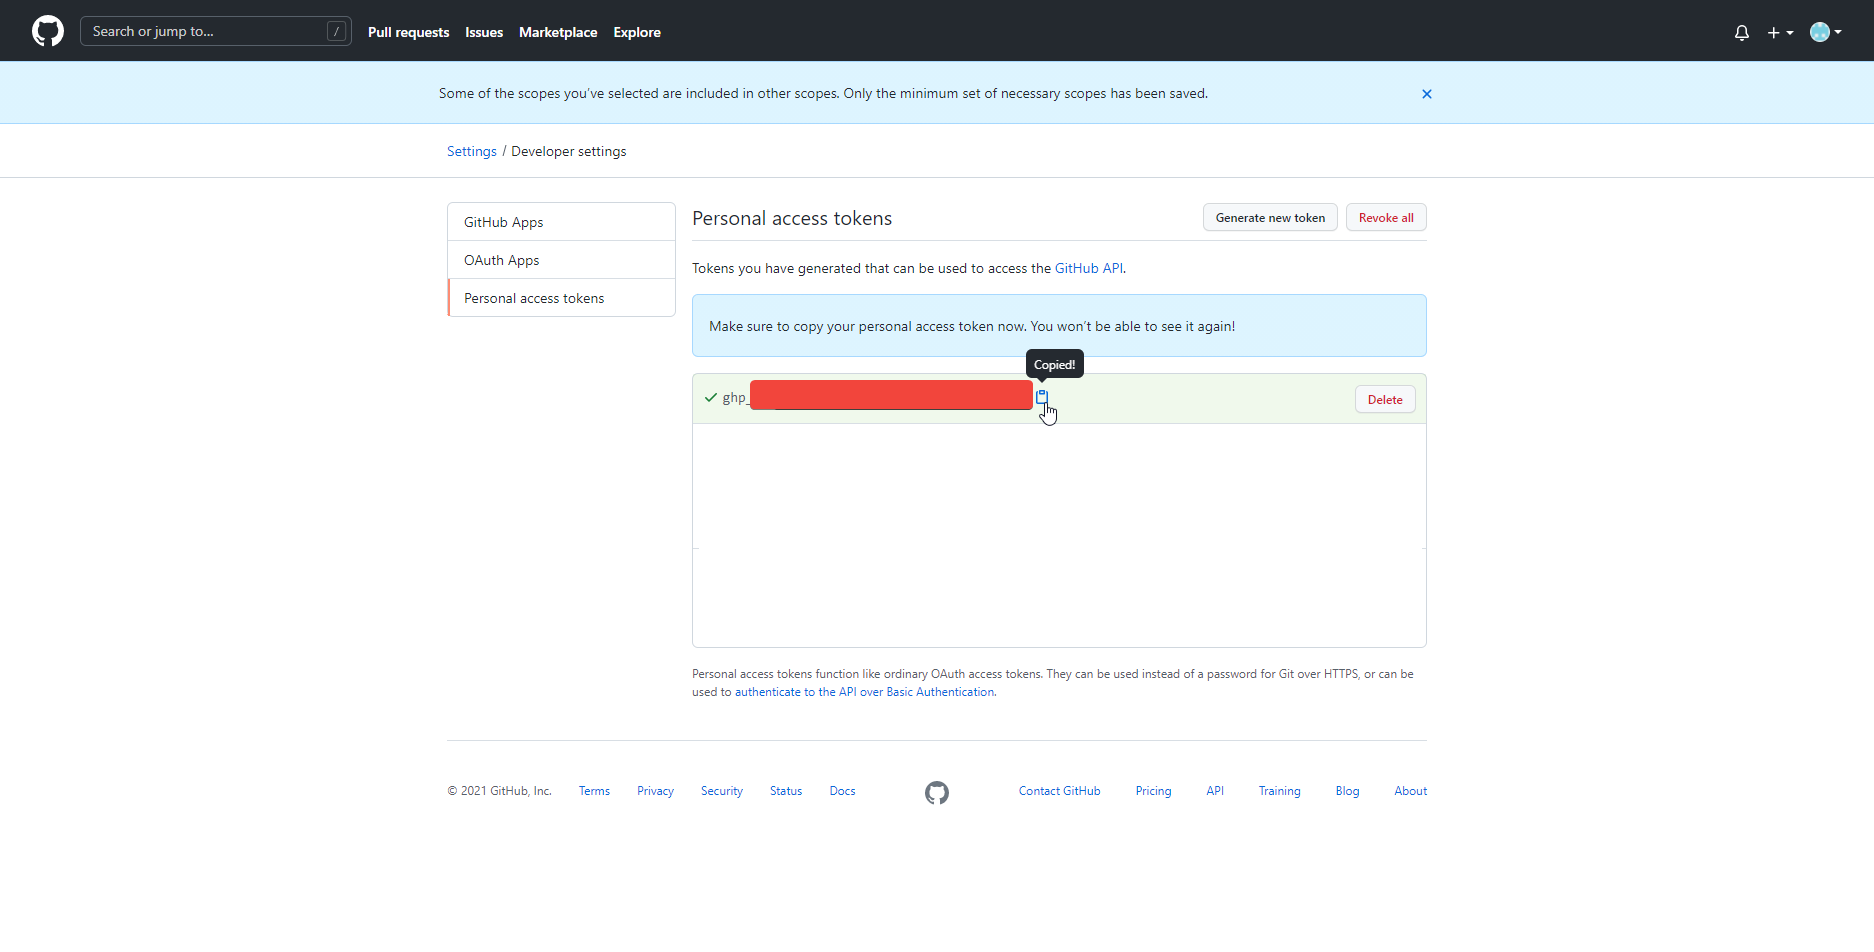 ◎ Fig32. PAT generated
到存放你 source code 的 repository 去設定剛剛產生好的 token
Settings > Secret > New repository secret
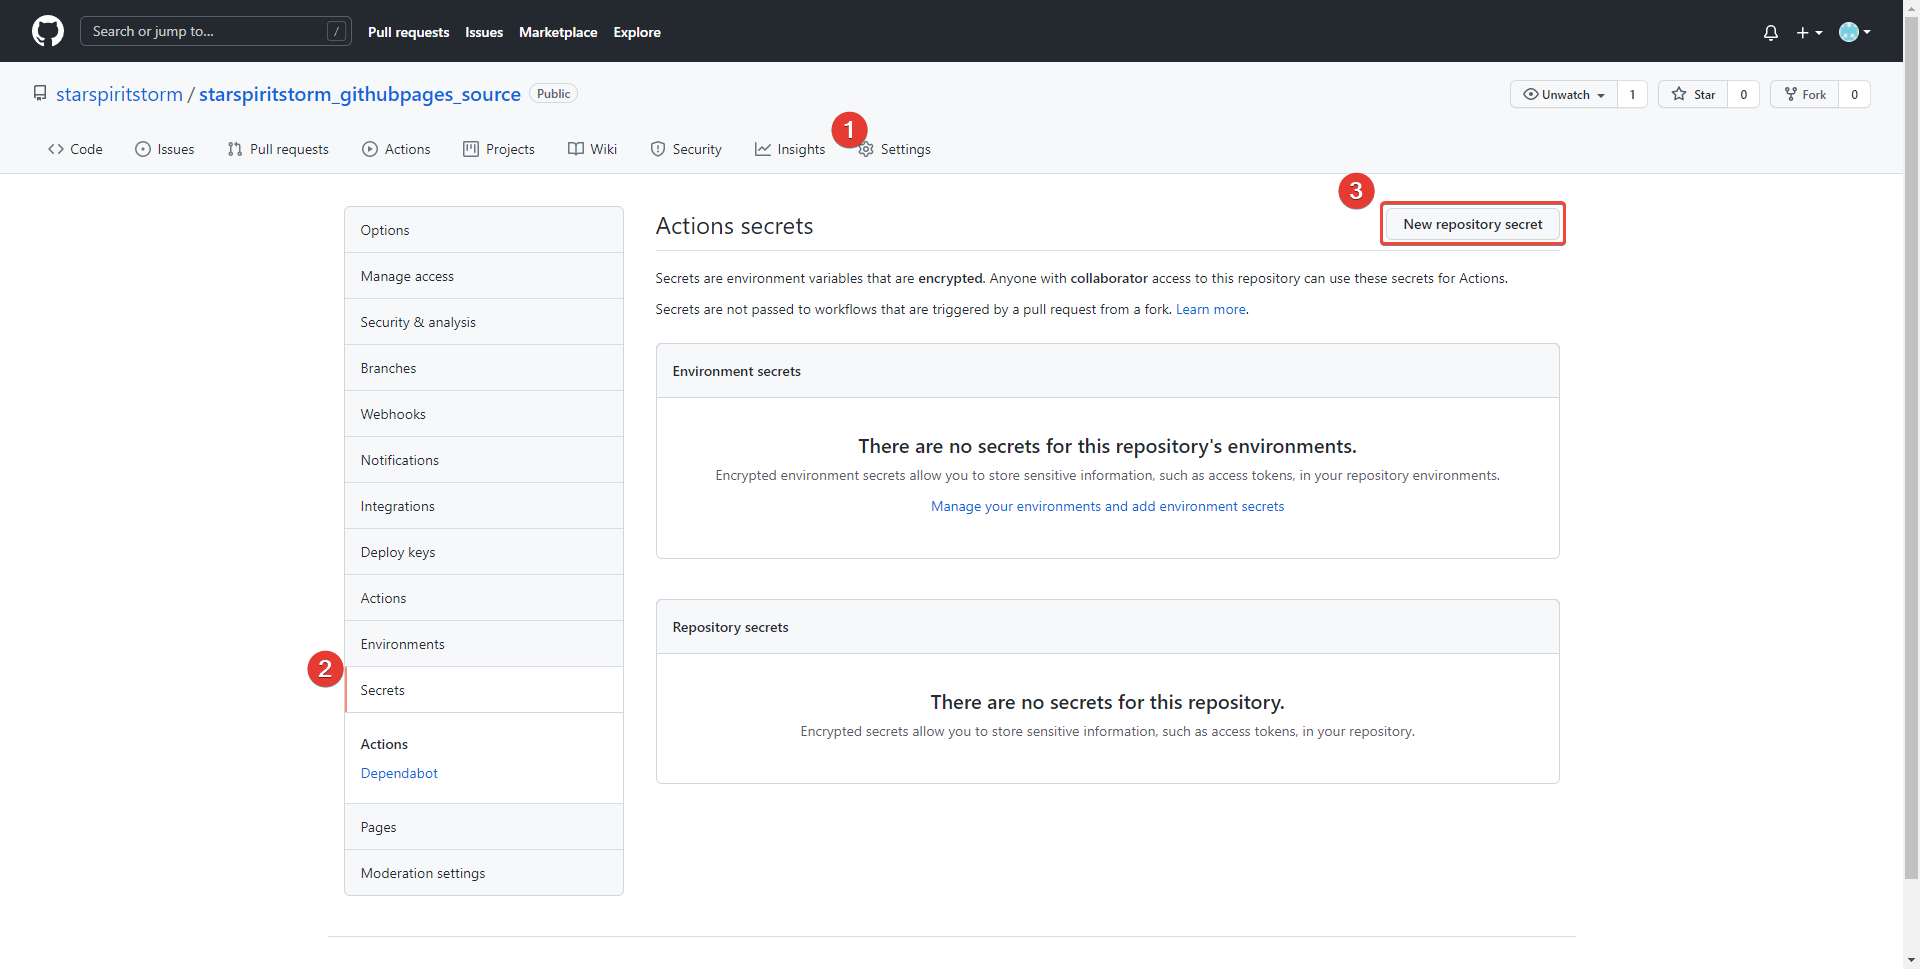 ◎ Fig33. use token
取名 HUGO_DEPLOY_TOKEN,並貼上剛剛複製的token的值
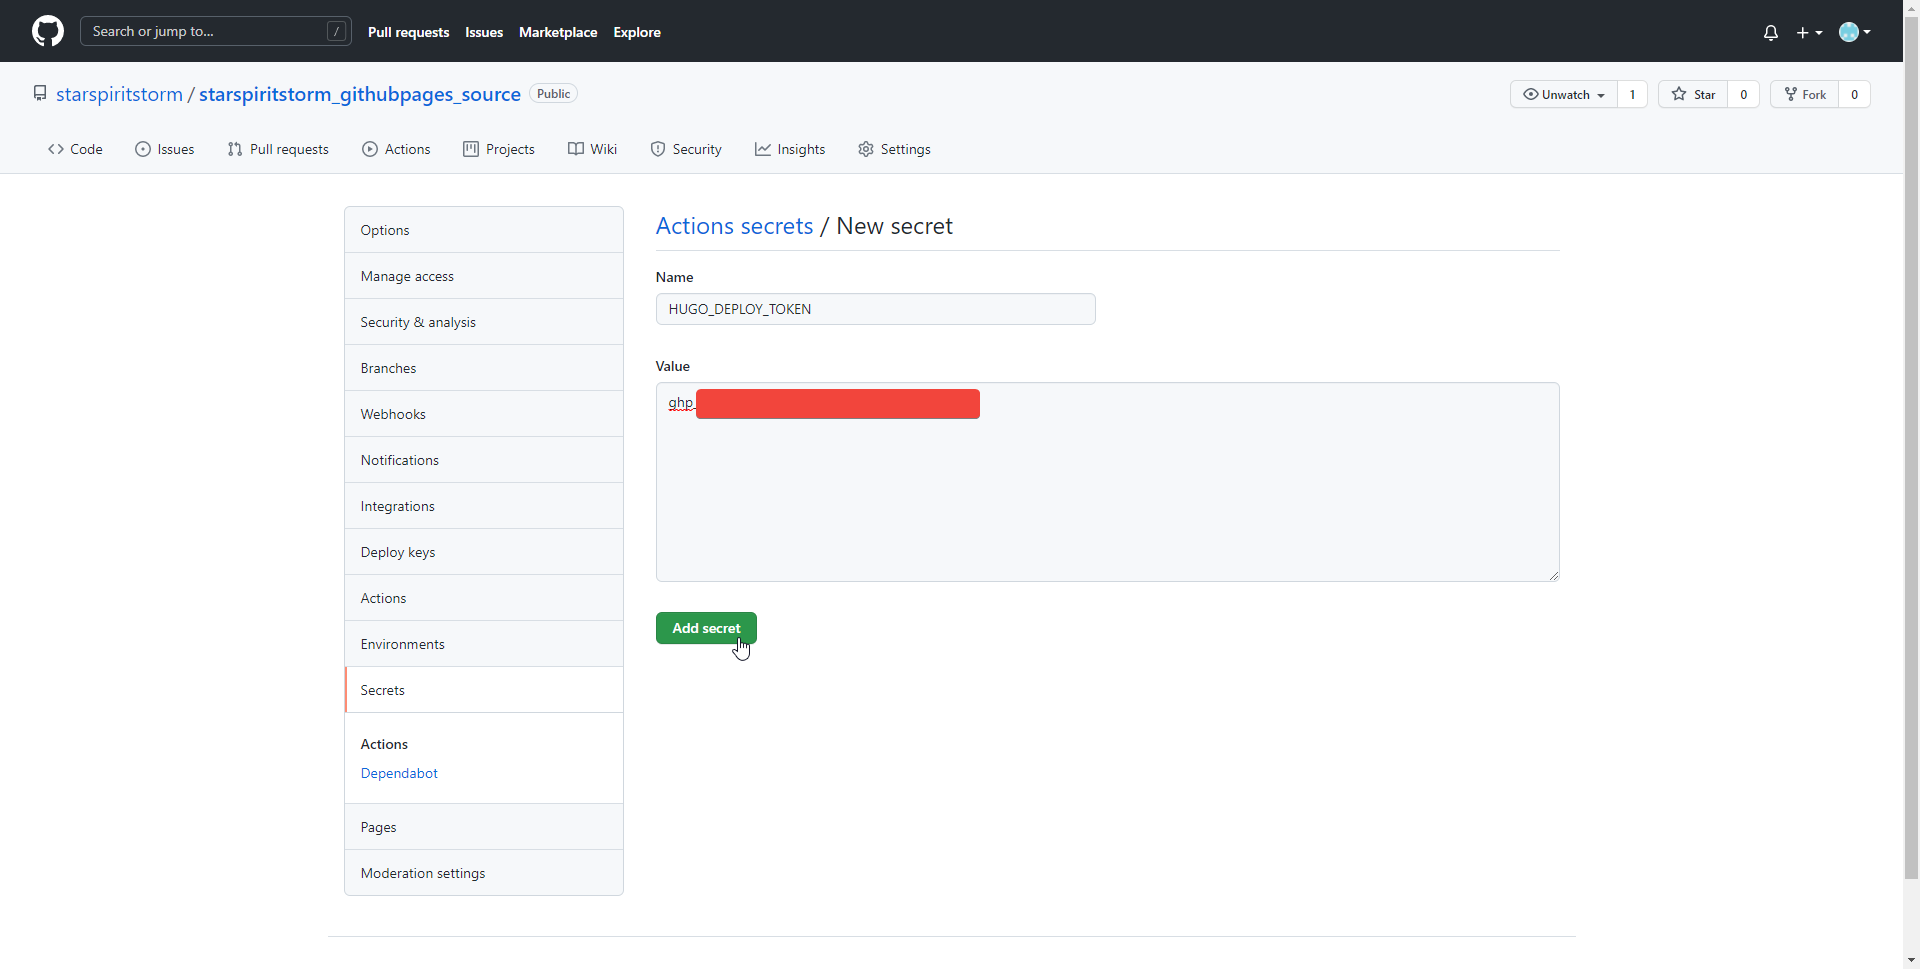 ◎ Fig34. generate new secret
設定 GitHub Action 的 workflow
到 Github Action 頁面,點選 set up a workflow your self
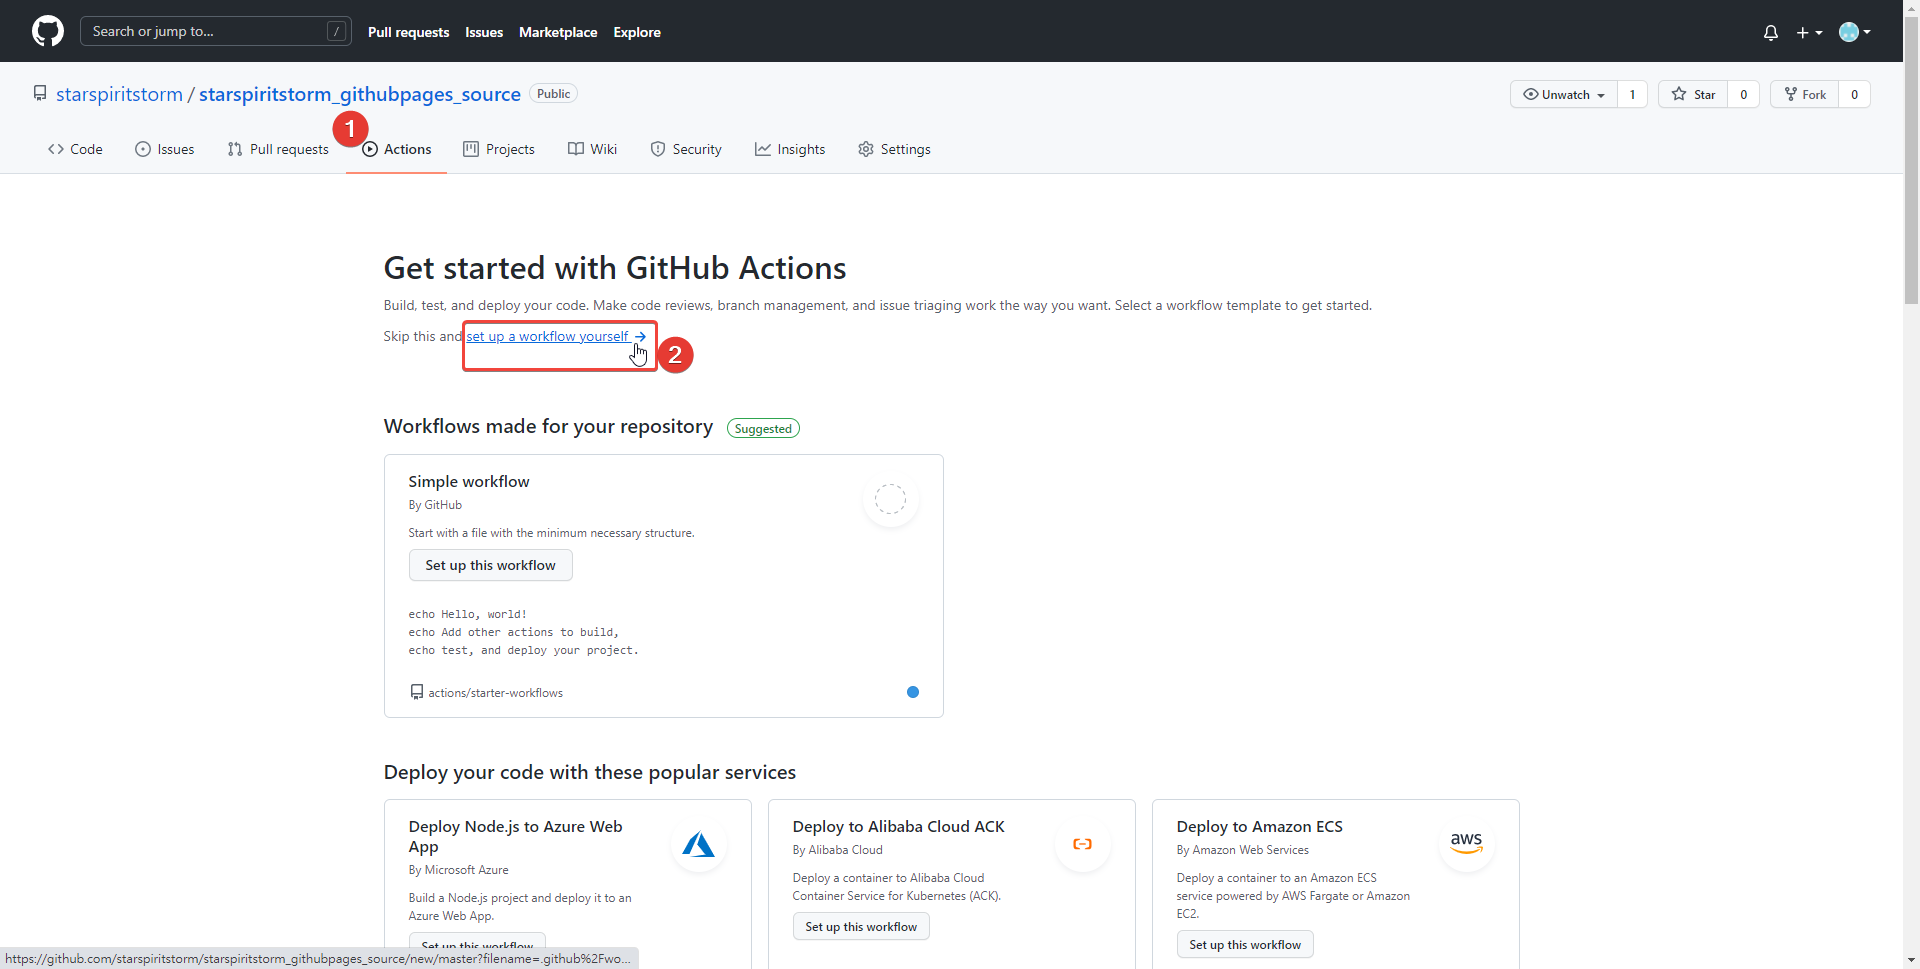 ◎ Fig35. set up a workflow
在左邊 Edit New file 裡面把下面的 script 貼上後, 記得把 external_repository 修改成你的 Github Pages 的 repository。
按下 start commit 後等他跑完。
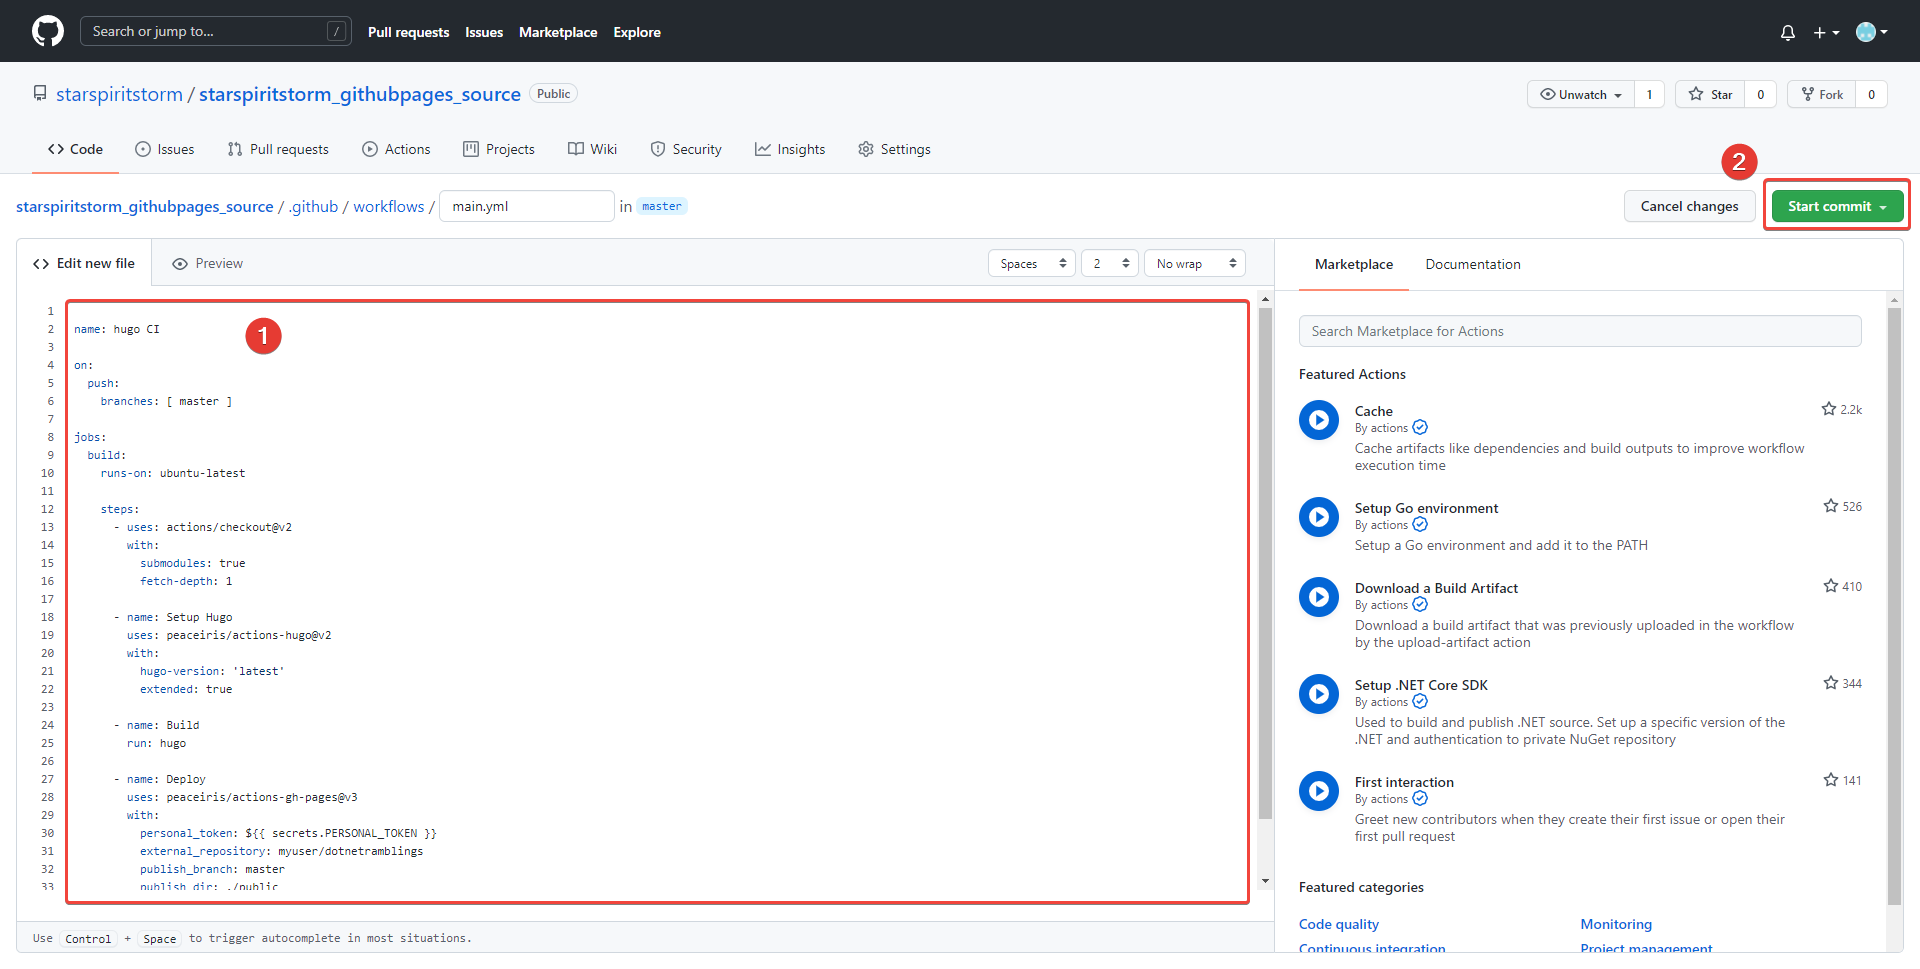 ◎ Fig35. use script
name: hugo CI

on:
  push:
	branches: [ master ]

jobs:
  build:
	runs-on: ubuntu-latest

	steps:
	  - uses: actions/checkout@v2
		with:
		  submodules: true
		  fetch-depth: 1

	  - name: Setup Hugo
		uses: peaceiris/actions-hugo@v2
		with:
		  hugo-version: 'latest'
		  extended: true

	  - name: Build
		run: hugo

	  - name: Deploy
		uses: peaceiris/actions-gh-pages@v3
		with:
									  #[2]:這邊名稱要填入剛剛在 secret 產生的 token 的名稱,此行記得刪除
		  personal_token: ${{ secrets.HUGO_DEPLOY_TOKEN }}
							   #[3]:這邊要輸入的是你的 Github Pages 的 repo,此行記得刪除
		  external_repository: starspiritstorm/starspiritstorm.github.io
		  publish_branch: master
		  publish_dir: ./public
		  commit_message: ${{ github.event.head_commit.message }}
		  # https://en.wikipedia.org/wiki/List_of_tz_database_time_zones
		  TZ: Asia/Taipei
[2] 難點2:
當初不知道那個「secrets.後面這串」是要填剛剛在 secret 產生的 token 的名稱。
就在 Action 的 Deploy 裡面遇到錯誤。
Error: Action failed with “not found deploy key or tokens”
◎ Fig002. not found deploy key or tokens
[3] 難點3:
這邊原本我複製 Github Pages 的時候多複製到了.git,變成 starspiritstorm/starspiritstorm.github.io.git。
結果就在 Action 的 Deploy 裡面遇到錯誤。
remote: Repository not found.
fatal: repository ‘https://github.com/starspiritstorm/starspiritstorm.github.io.git.git/' not found
Error: Action failed with “The process ‘/usr/bin/git’ failed with exit code 128”
◎ Fig003. repository not found
最後看到 source code 的 Action 畫面成功地顯示 build 綠勾勾,就代表你成功的建立好流程了。
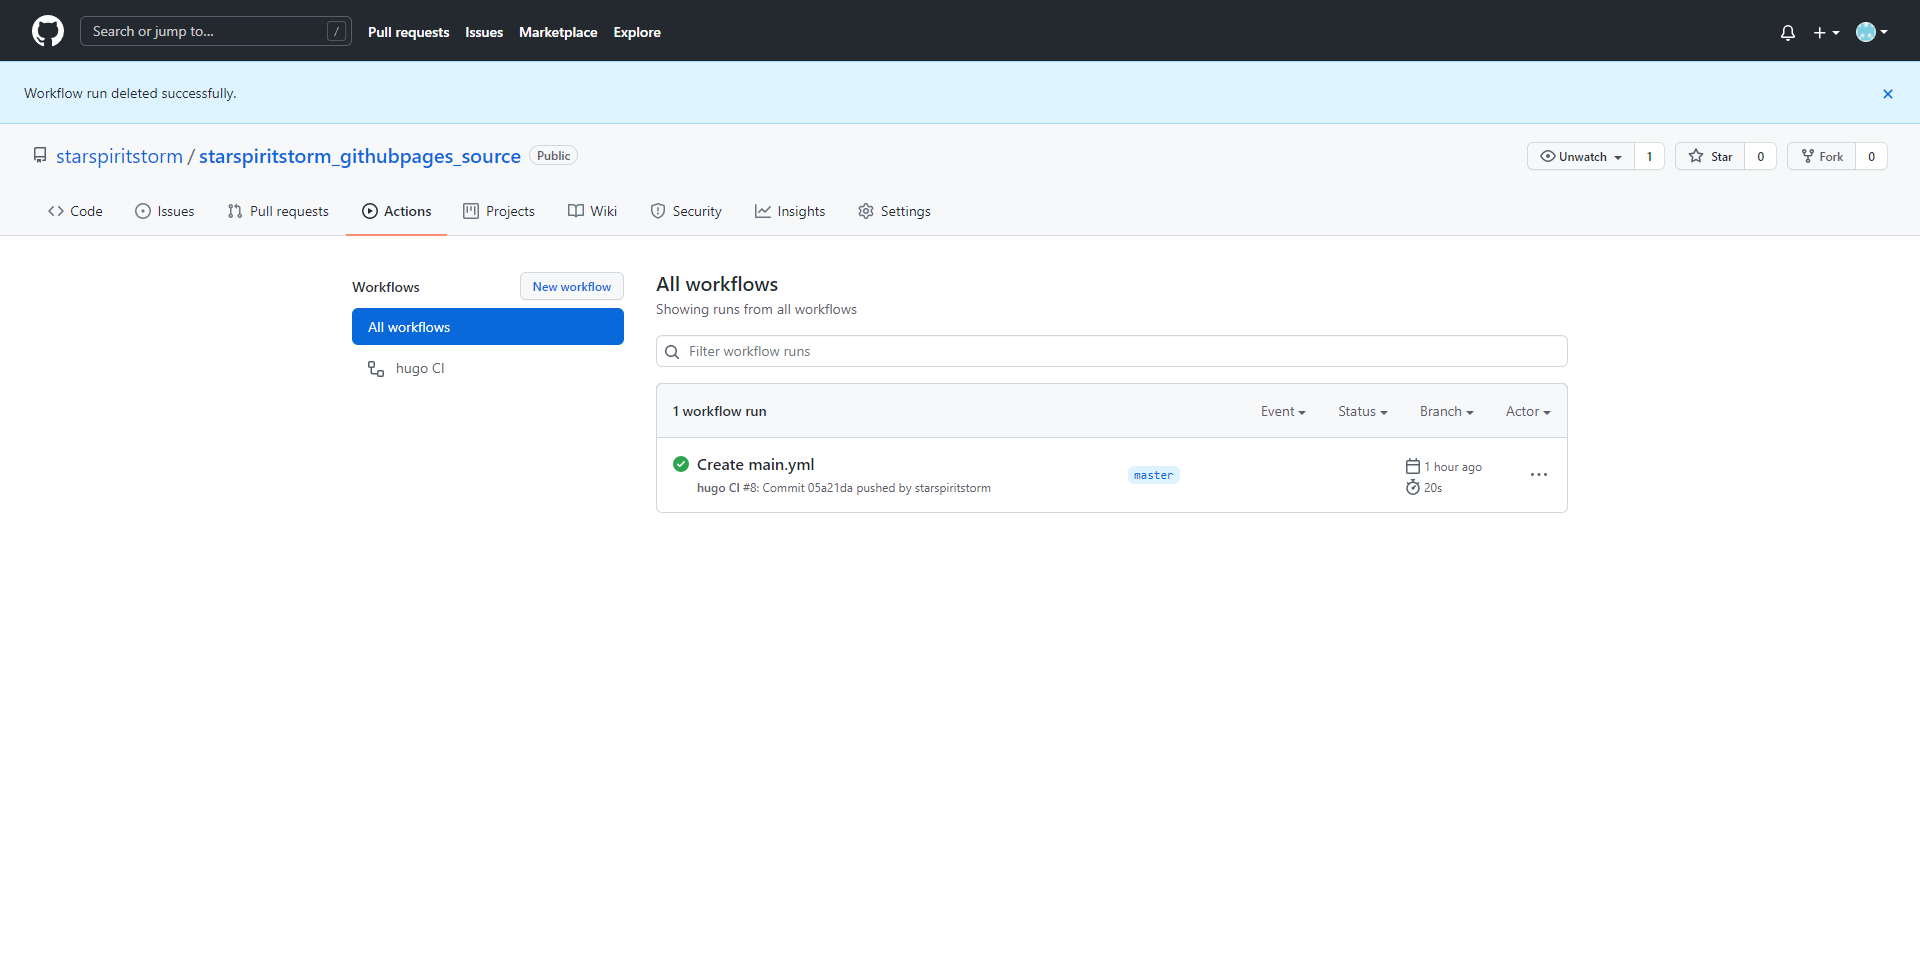 ◎ Fig40. workflow finished
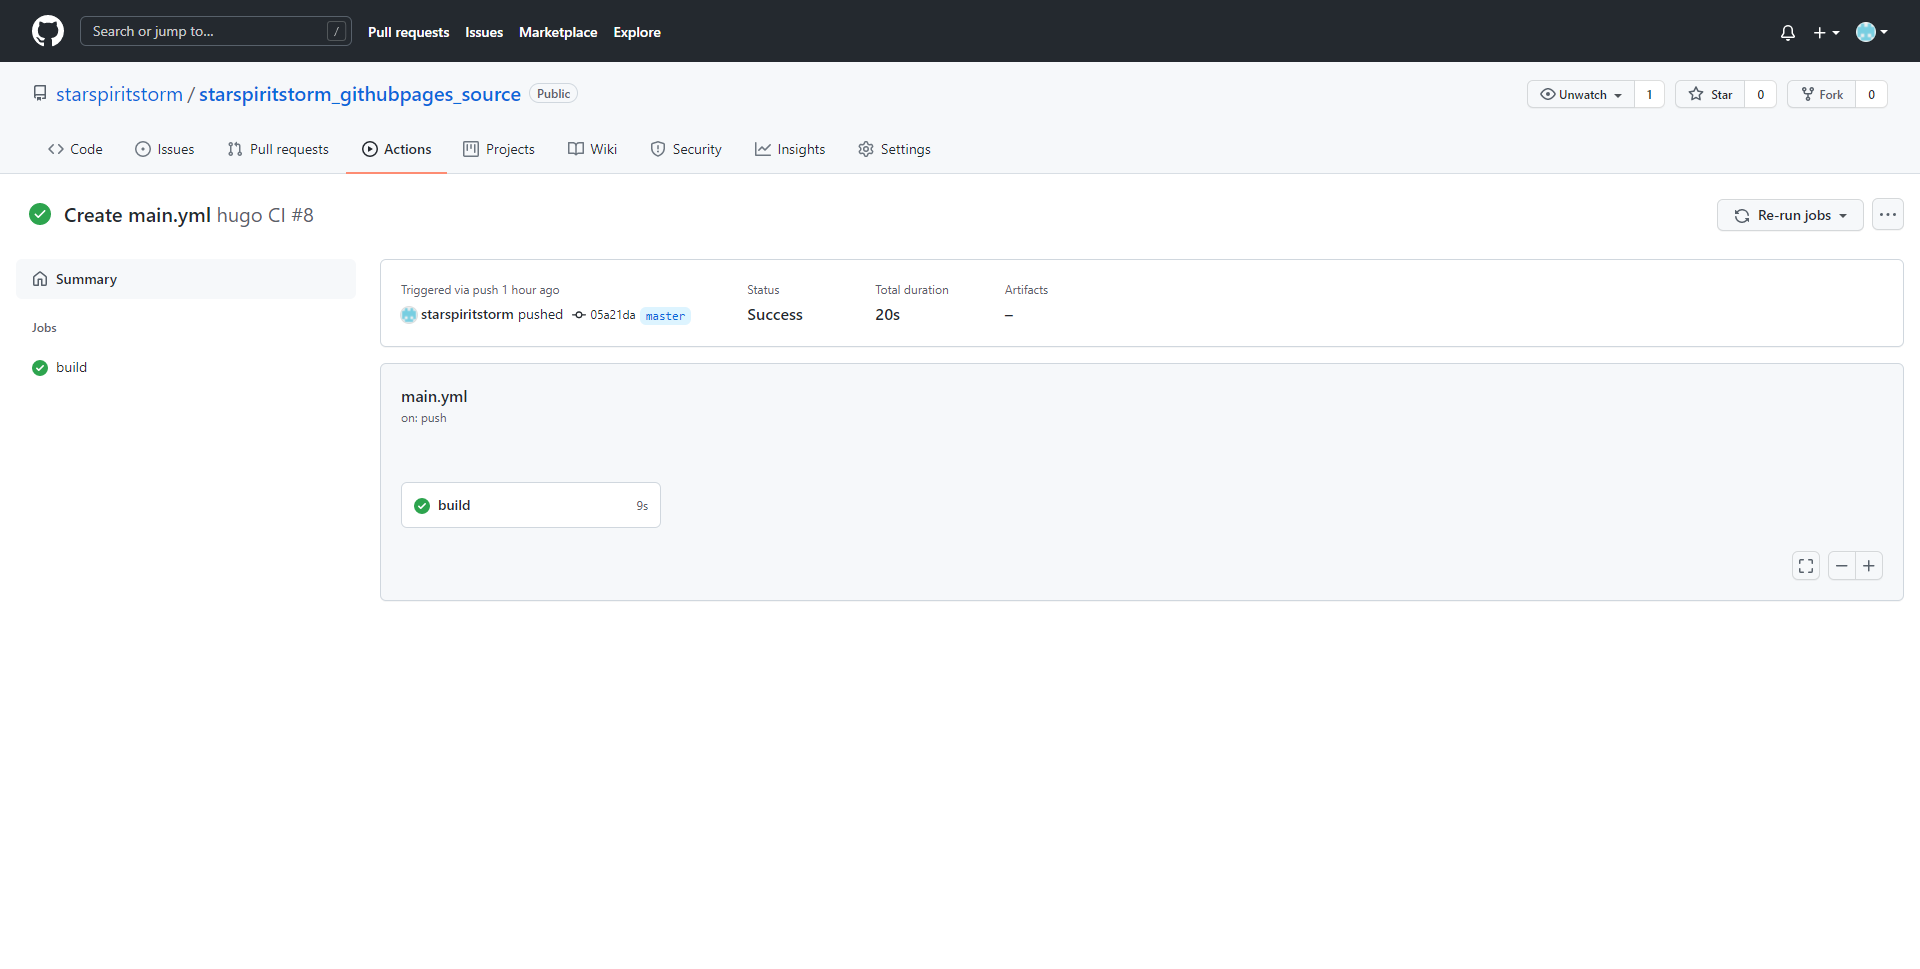 ◎ Fig41. build sucess
自動化部屬測試
之後只需要在 source code 的 repository 新增 post 就會自動更新到 Github Pages 上了。
一樣在 myblog 資料夾開 Git Bash,然後 hugo new 一個 post。
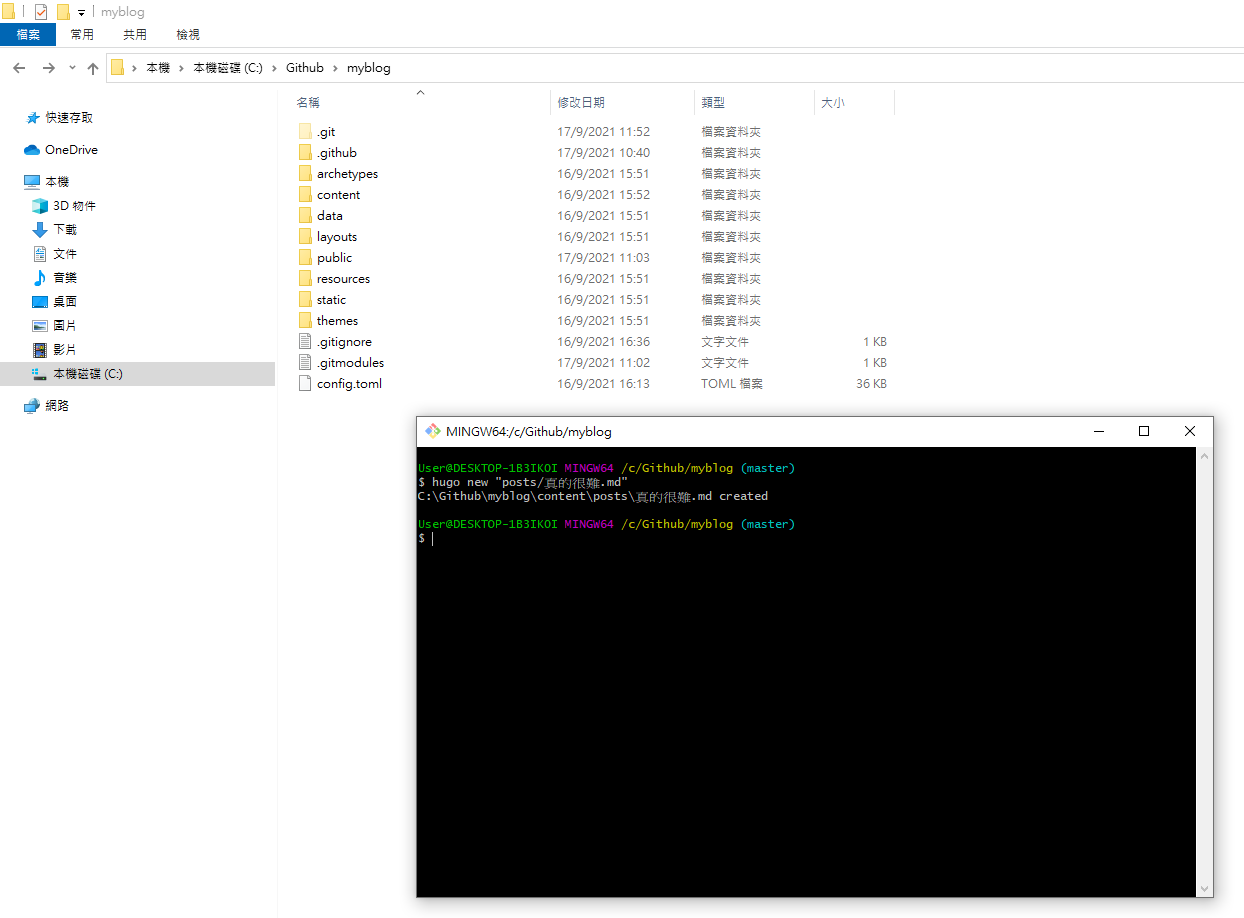 ◎ Fig44. new post
然後 commit 之後 push 到 origin,再去 Action 看,可以看到成功的內容。
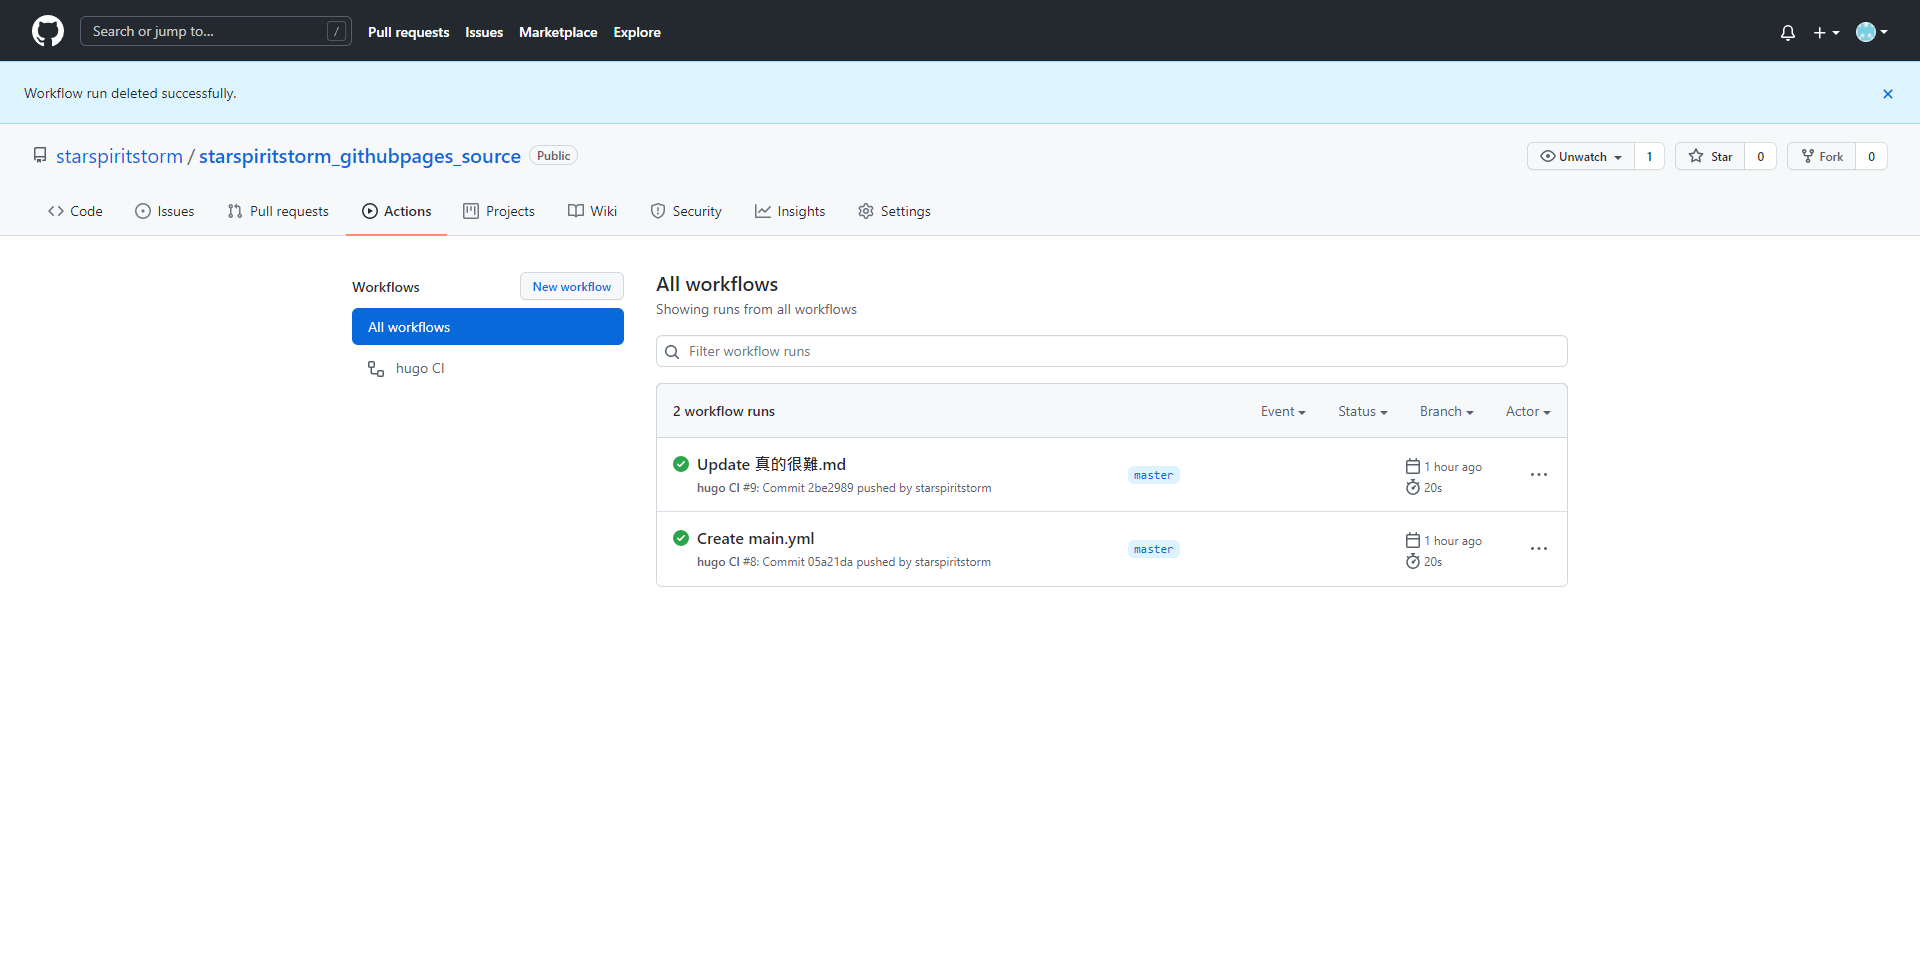 ◎ Fig45. auto deploy
然後可以再去你的 Github Pages 看看剛剛新增的 post。
 ◎ Fig46. deployed_post1
 ◎ Fig47. deployed_post2
最後一個要注意的就是當初 config.toml 是直接複製範本過來用的,所以裡面有一些資訊要記得做修正。 請參考下篇文章。
Reference
-
theme meme 的作者寫的「使用 GitHub Actions 部署 Hugo 博客到 GitHub Pages」
-
Github Action 的參考,不能完全照抄,會失敗…,組合起來嘗試才成功的
Create and host a blog with Hugo and GitHub Pages in less than 30 minutes
