Establish Hugo Site on GithubPage.
Establish Hugo Site
Local
Finding your favorite folder, start git bash.
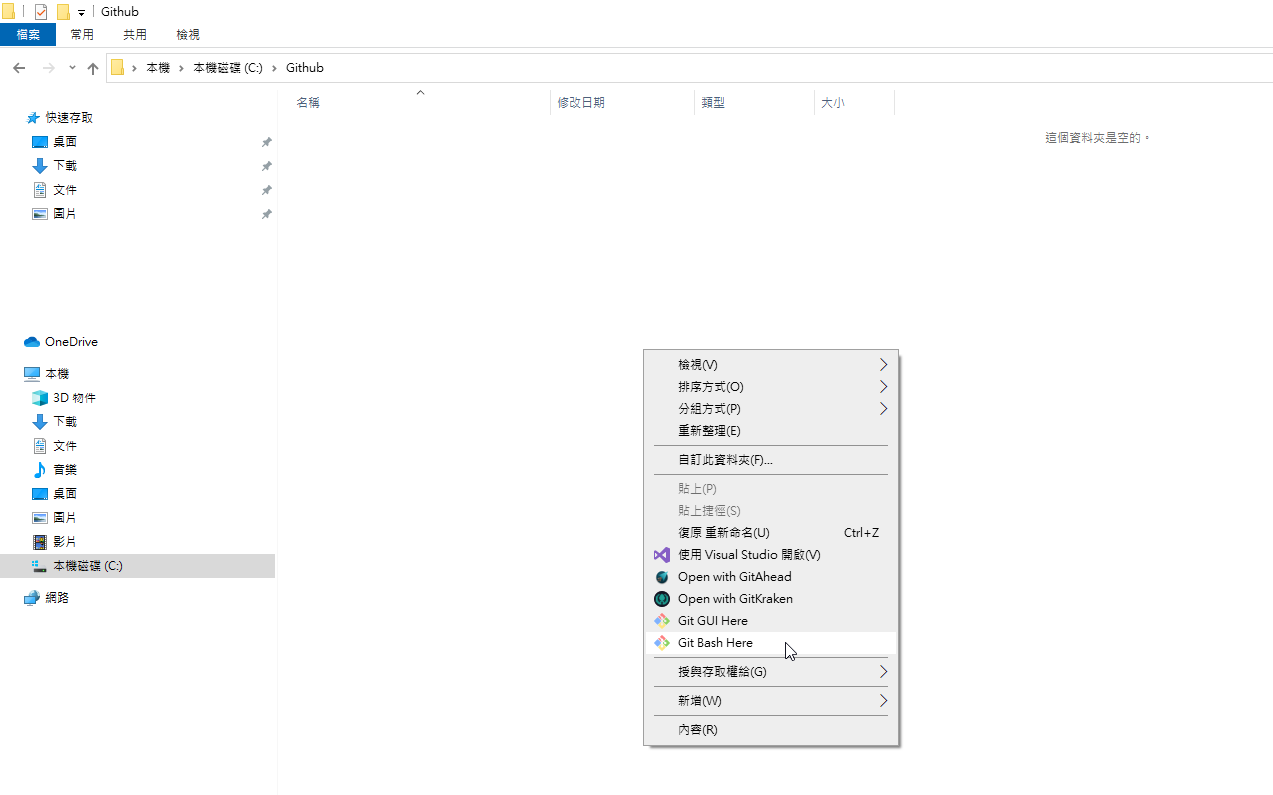 ◎ Fig1. start git bash here
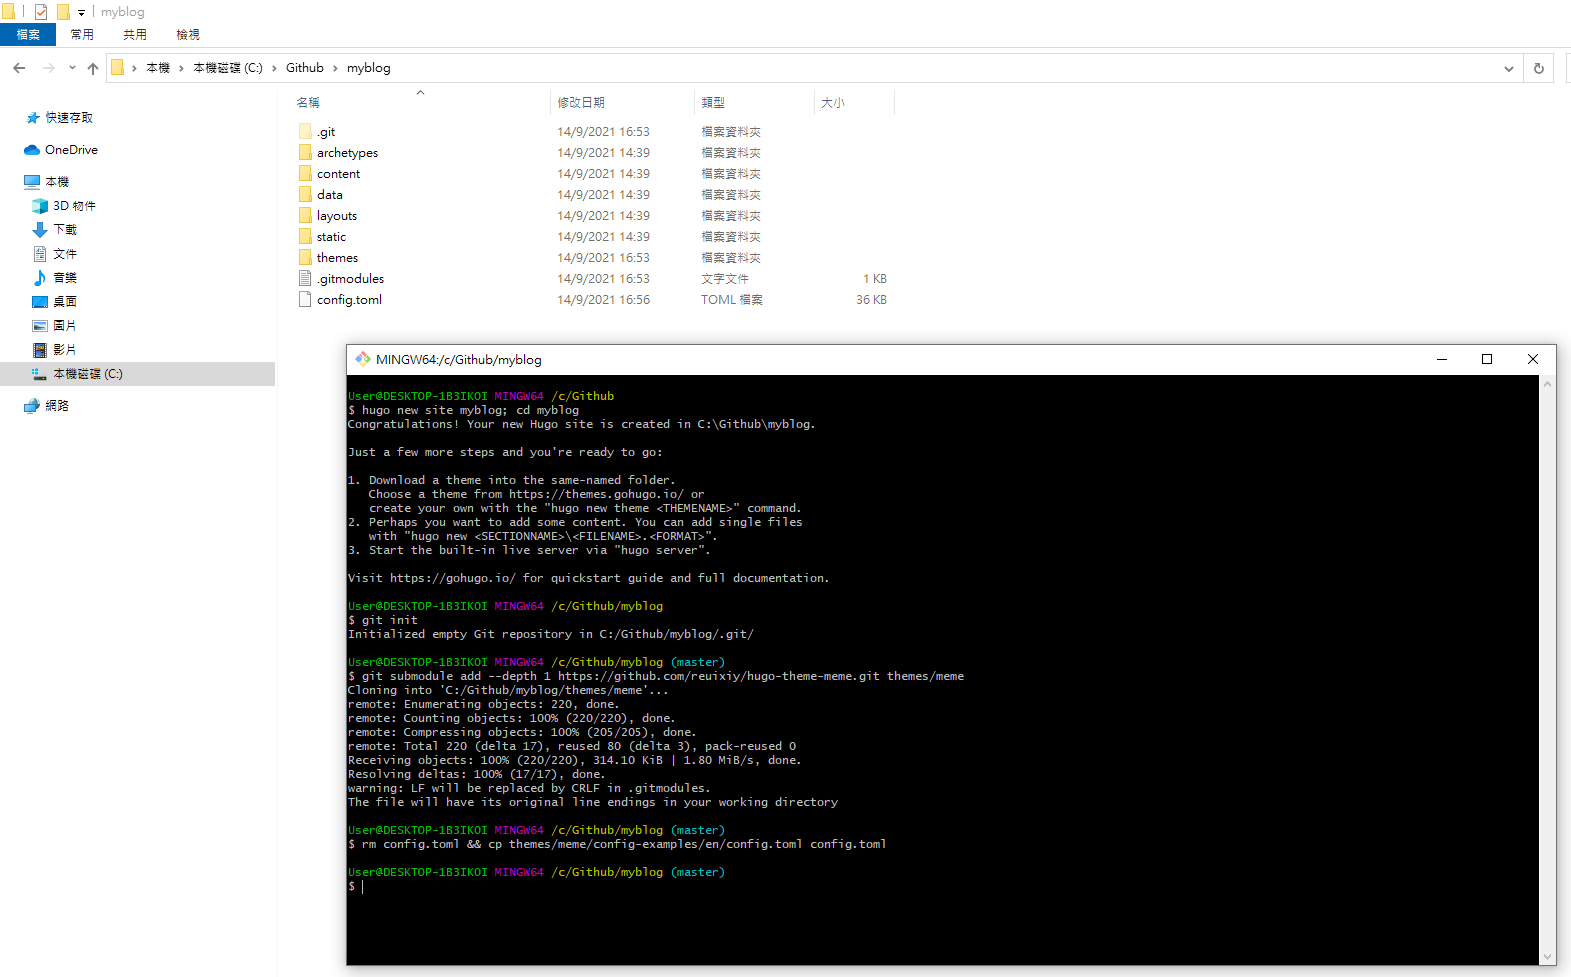
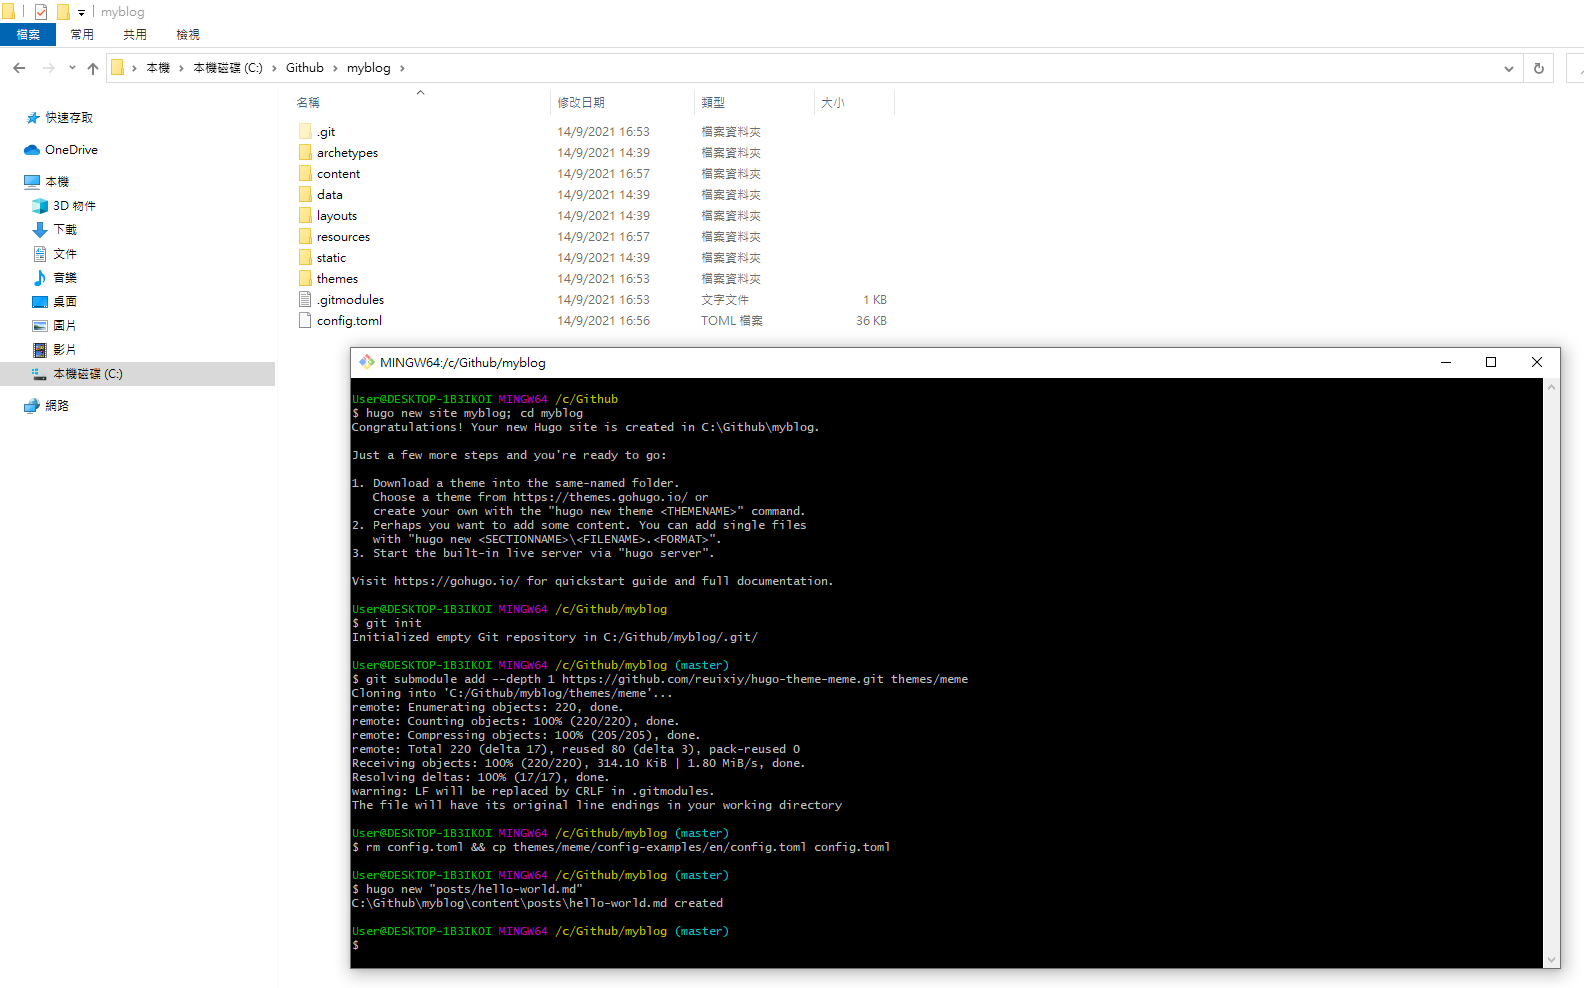
Generate hugo site command
hugo new site myblog
Change folder path
cd myblog/
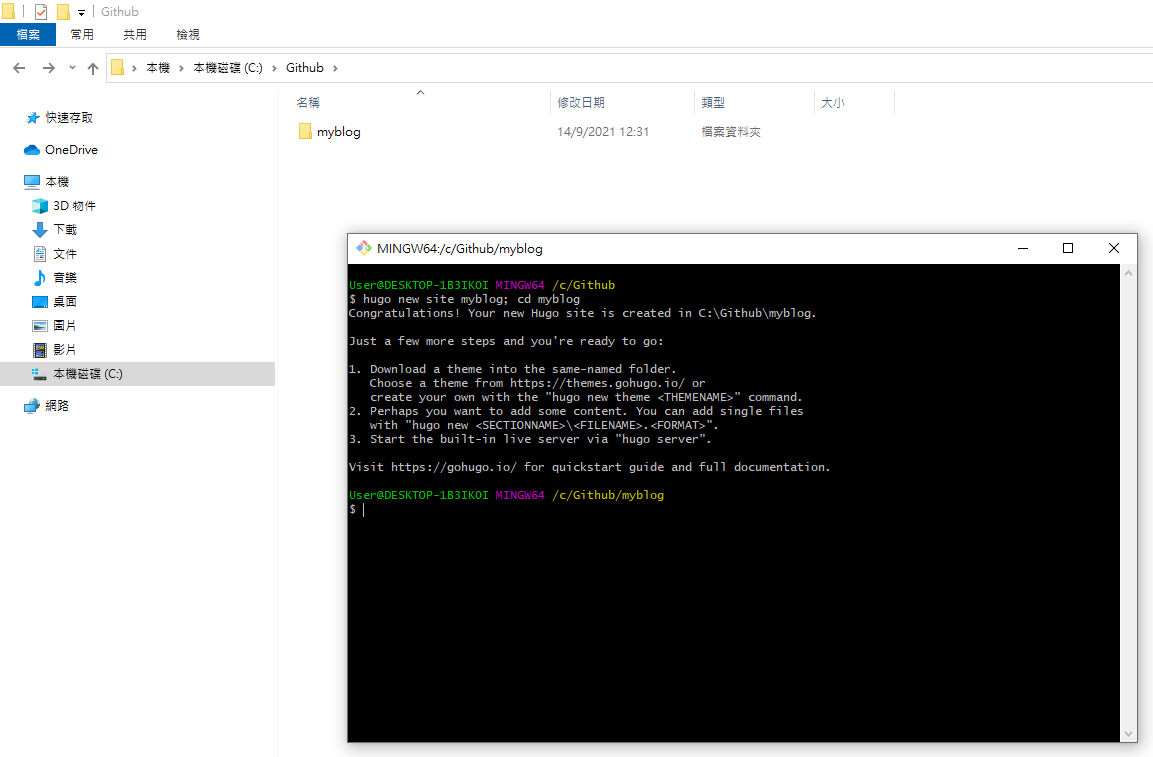 ◎ Fig2. hugo new site
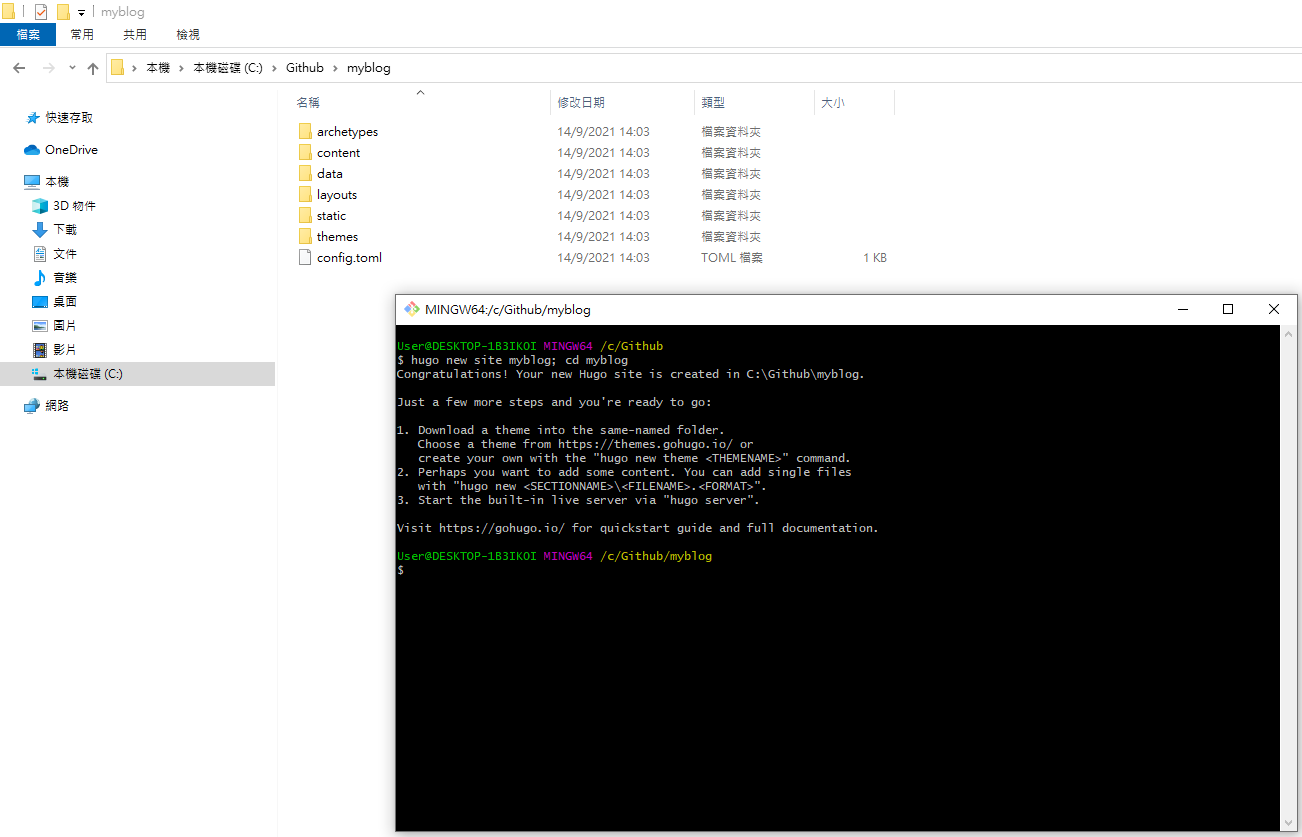 ◎ Fig3. cd folder
Install Hugo Theme - meme
You can go to hugoranked find with more stars.
Or go to hugo official website, check your favorite theme.
Here I choose theme/meme.
If your are choosing different theme, please check their installment instruction.
Using git to get theme meme
git init
git submodule add --depth 1 https://github.com/reuixiy/hugo-theme-meme.git themes/meme
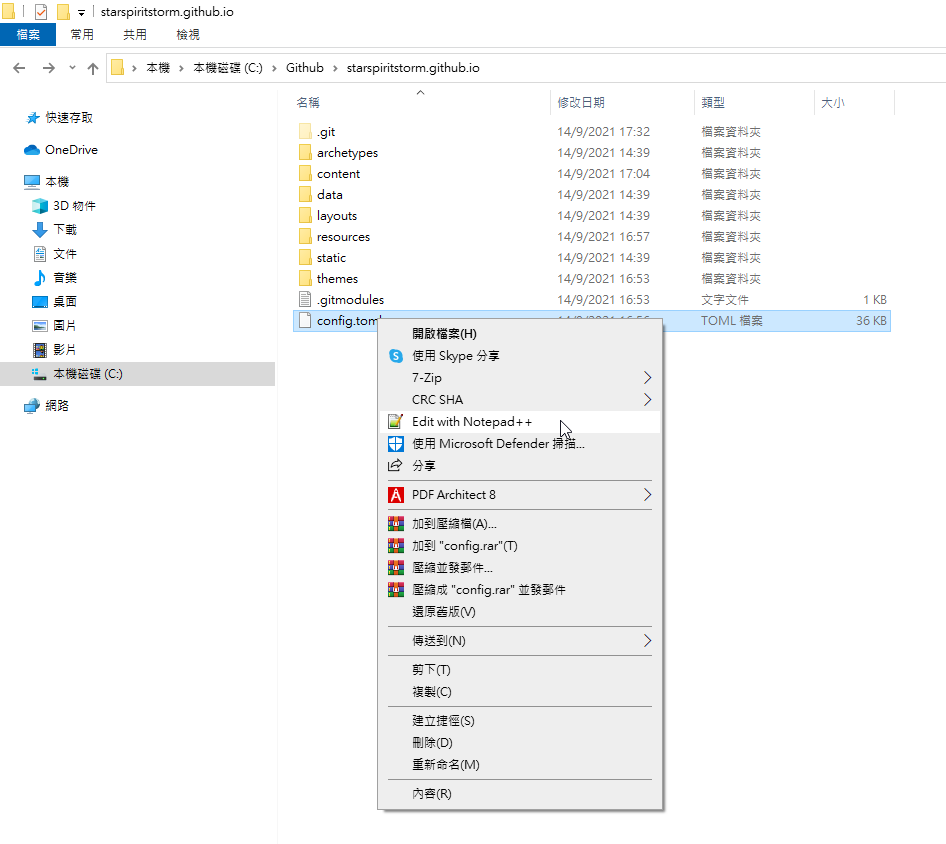
Use hugo theme meme’s config.toml
rm config.toml && cp themes/meme/config-examples/en/config.toml config.toml
 ◎ Fig5. git command
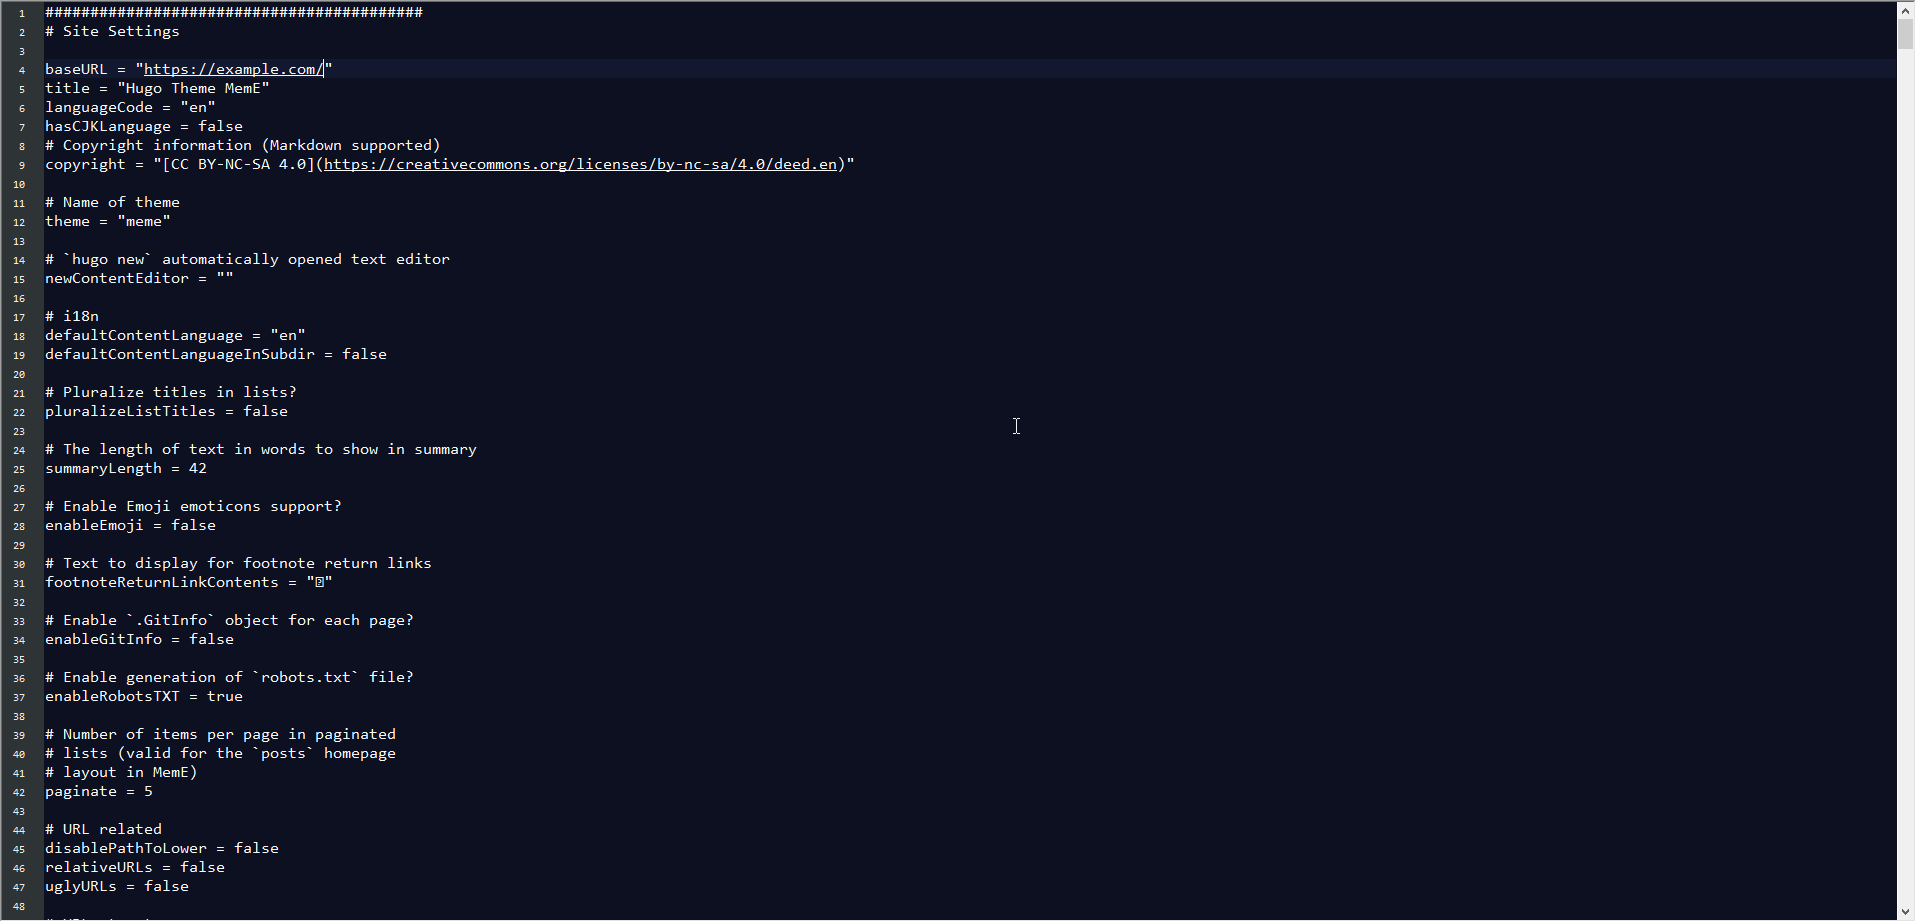
Modify config.toml baseurl = “https://[your_github_username].github.io/”
Example: https://starspiritstorm.github.io/
 ◎ Fig5-1. edit config
 ◎ Fig5-2. rename url
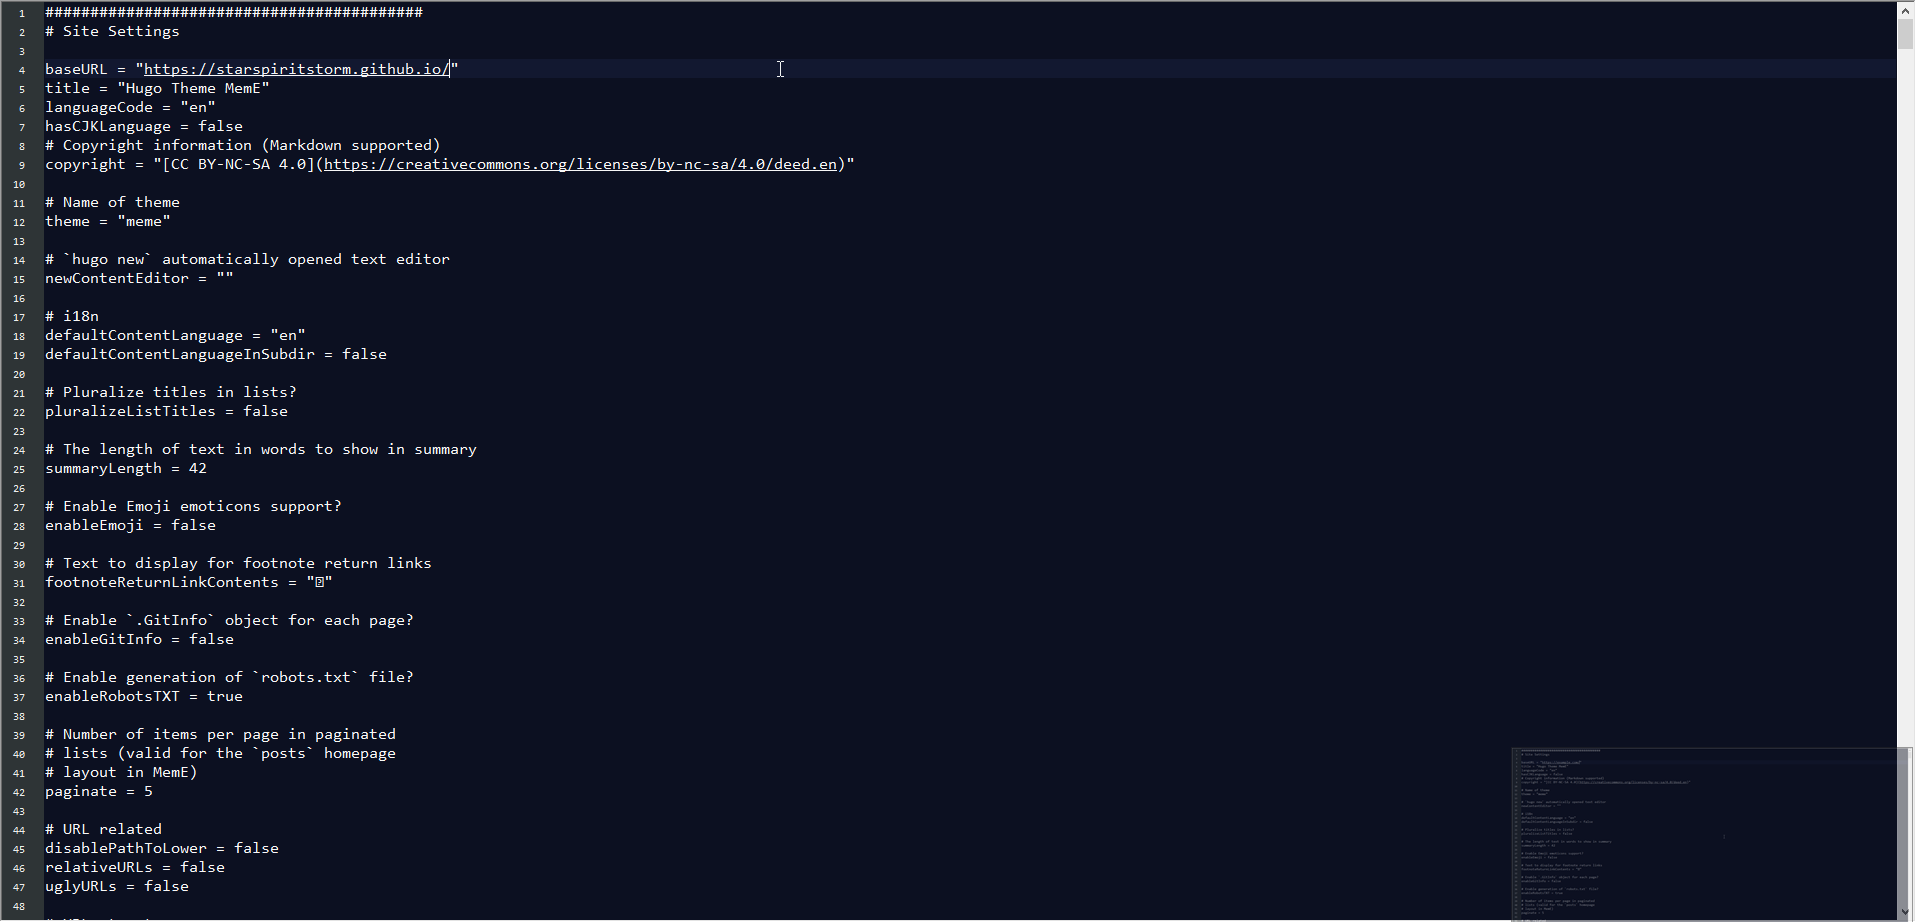 ◎ Fig5-3. rename url yours
Generate simple post&about
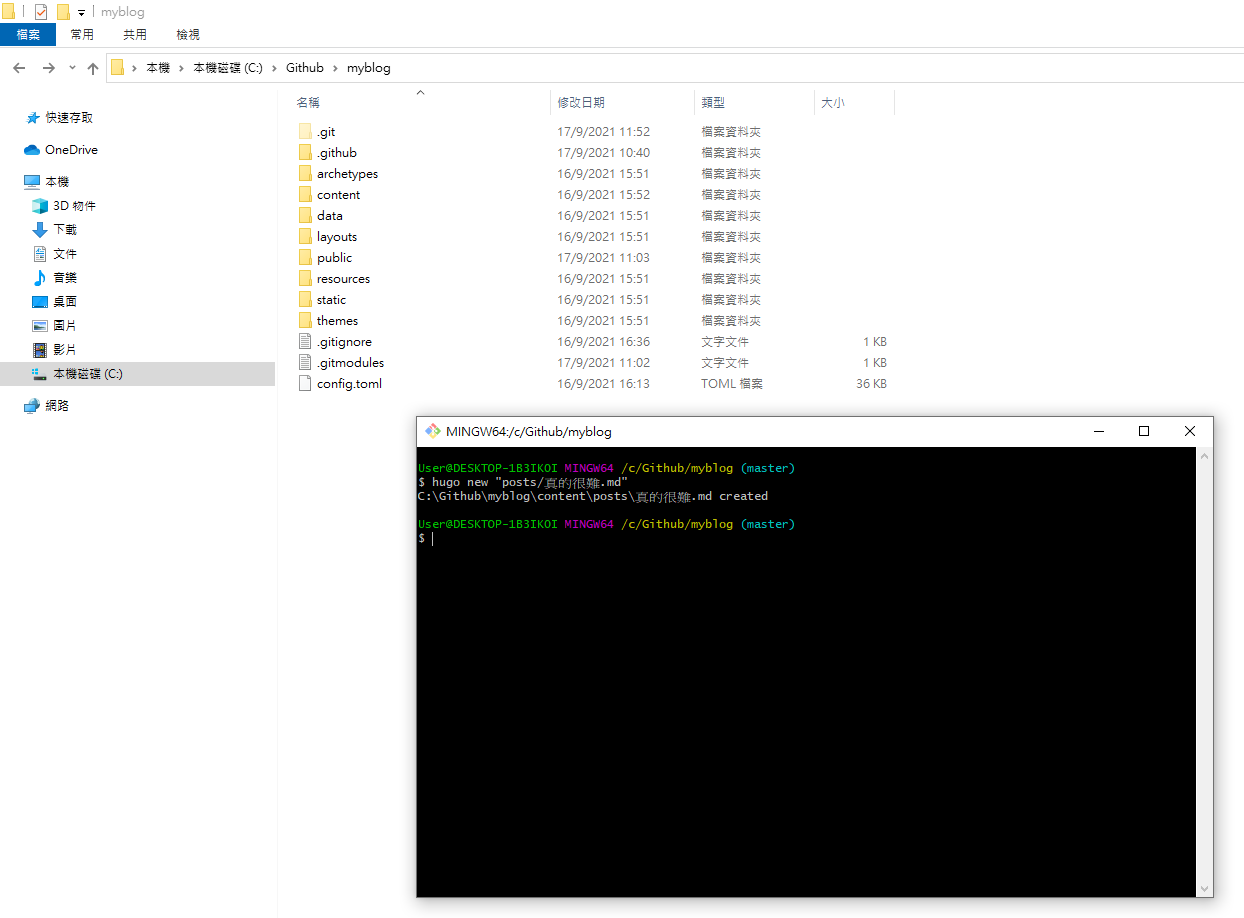
hugo new "posts/hello-world.md"
hugo new "about/_index.md"
 ◎ Fig6. generate posts
One thing you need to take care of is, the draft setting of posts generated by hugo new are all default true.
Open up with notepad++, and change it to false, then it will appeared on Github Pages.
The posts are separated here
myblog\content\posts
myblog\content\about
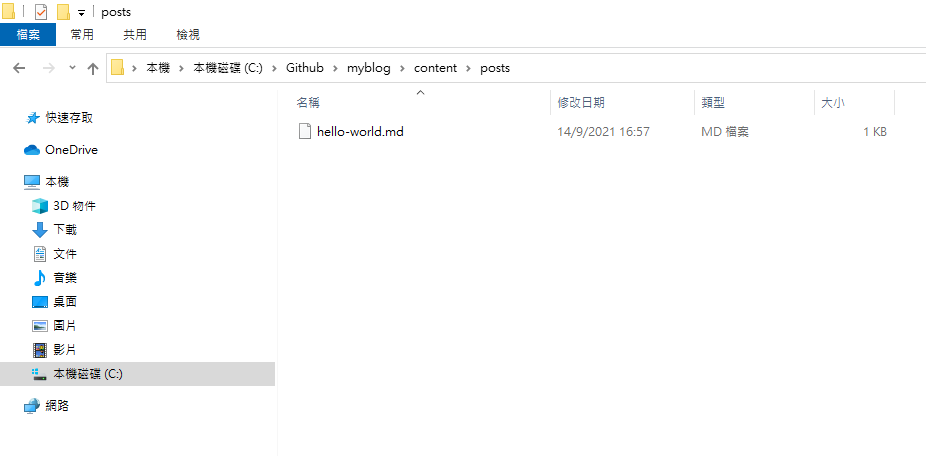 ◎ Fig6-1. file in posts
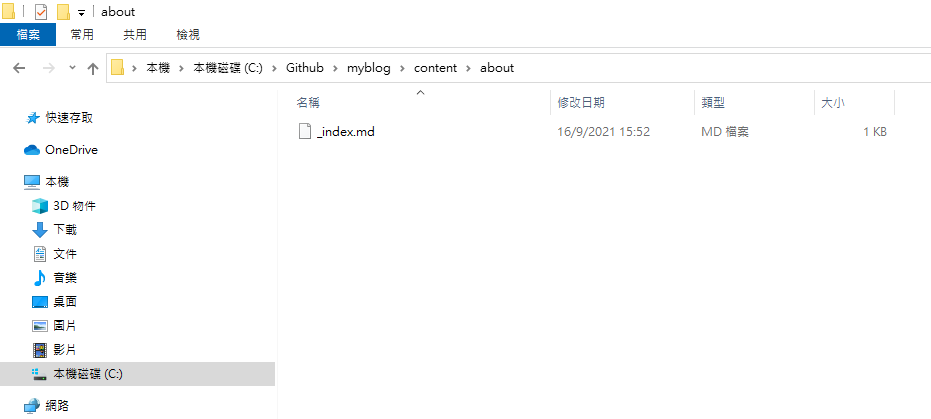 ◎ Fig6-2. file in about
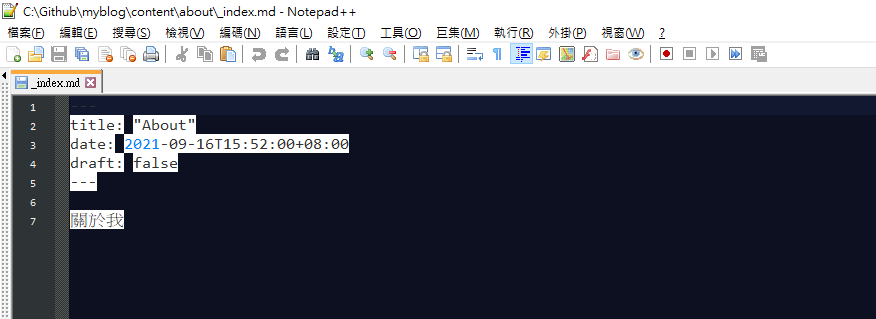 ◎ Fig7-1. about draft false
 ◎ Fig7-2. post draft false
Check Hugo site in local
Turn on the site.
hugo server -D
 ◎ Fig8. hugo server
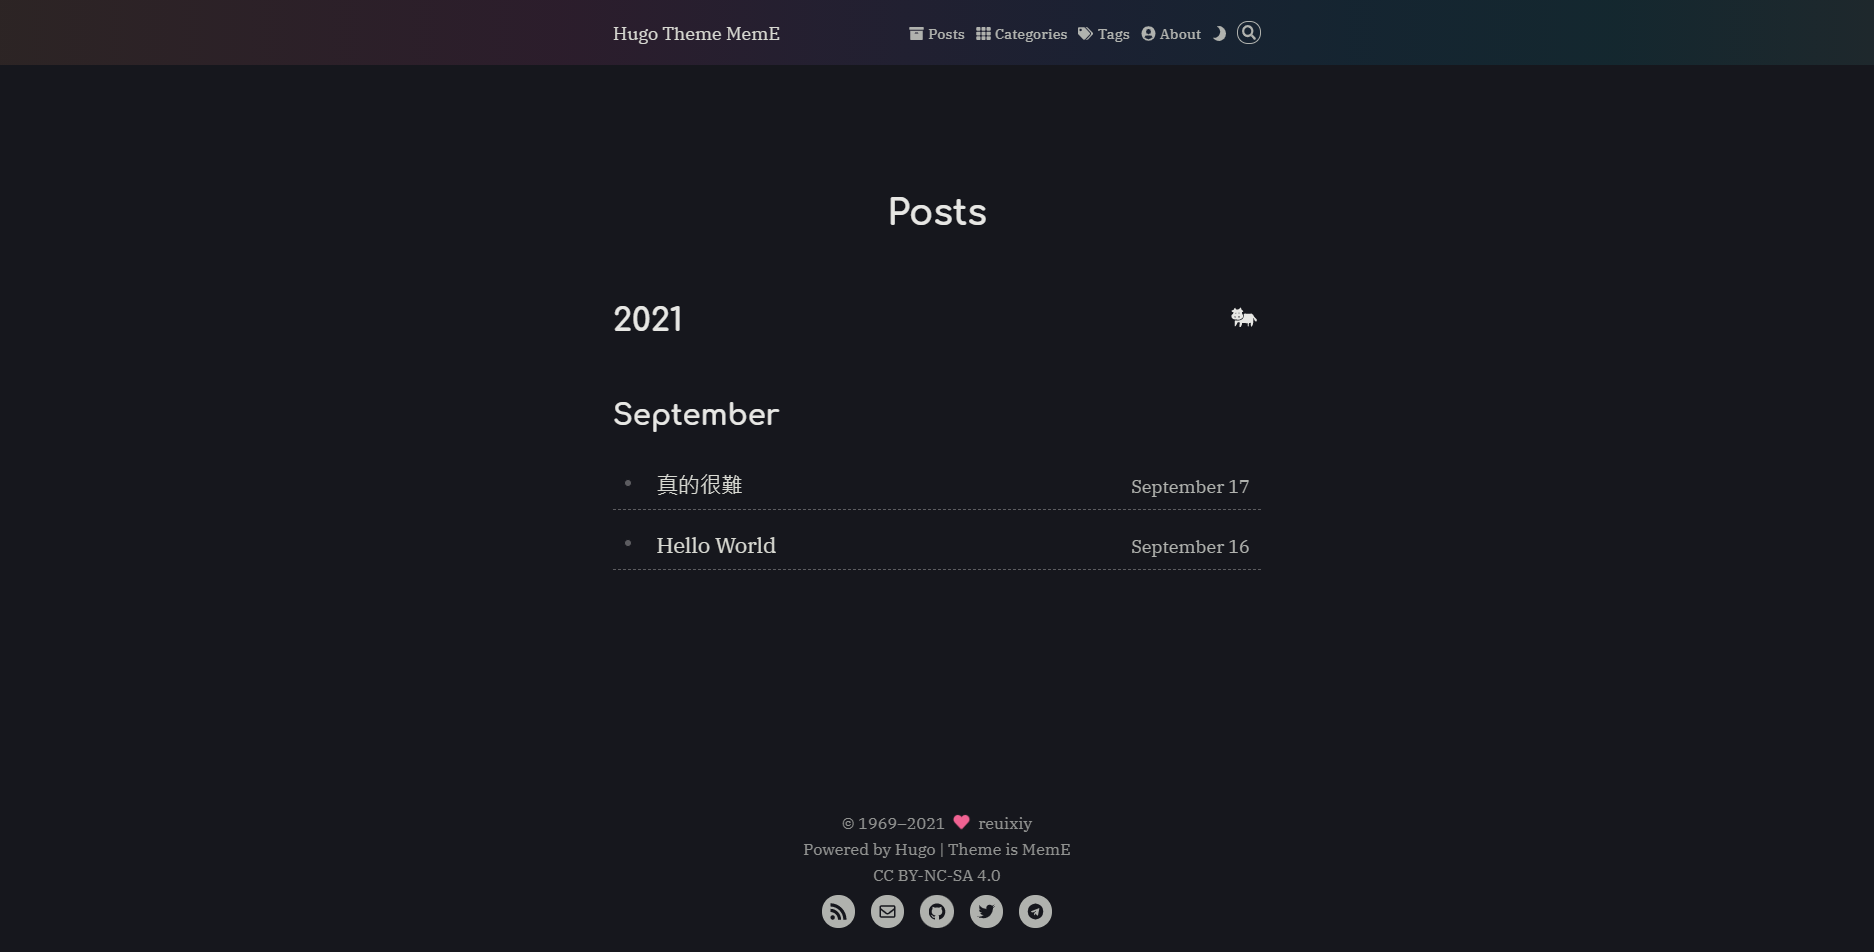
Typing this url on browser
http://localhost:1313/
To see if you can see the posts you just generated or not.
 ◎ Fig9. hugo blog in local
Deploy to Github Pages
Create Github Pages’s repository first
Go to your github to generate your Github Pages repository。
The name of Github Pages repository must be “[your_github_account].github.io”.
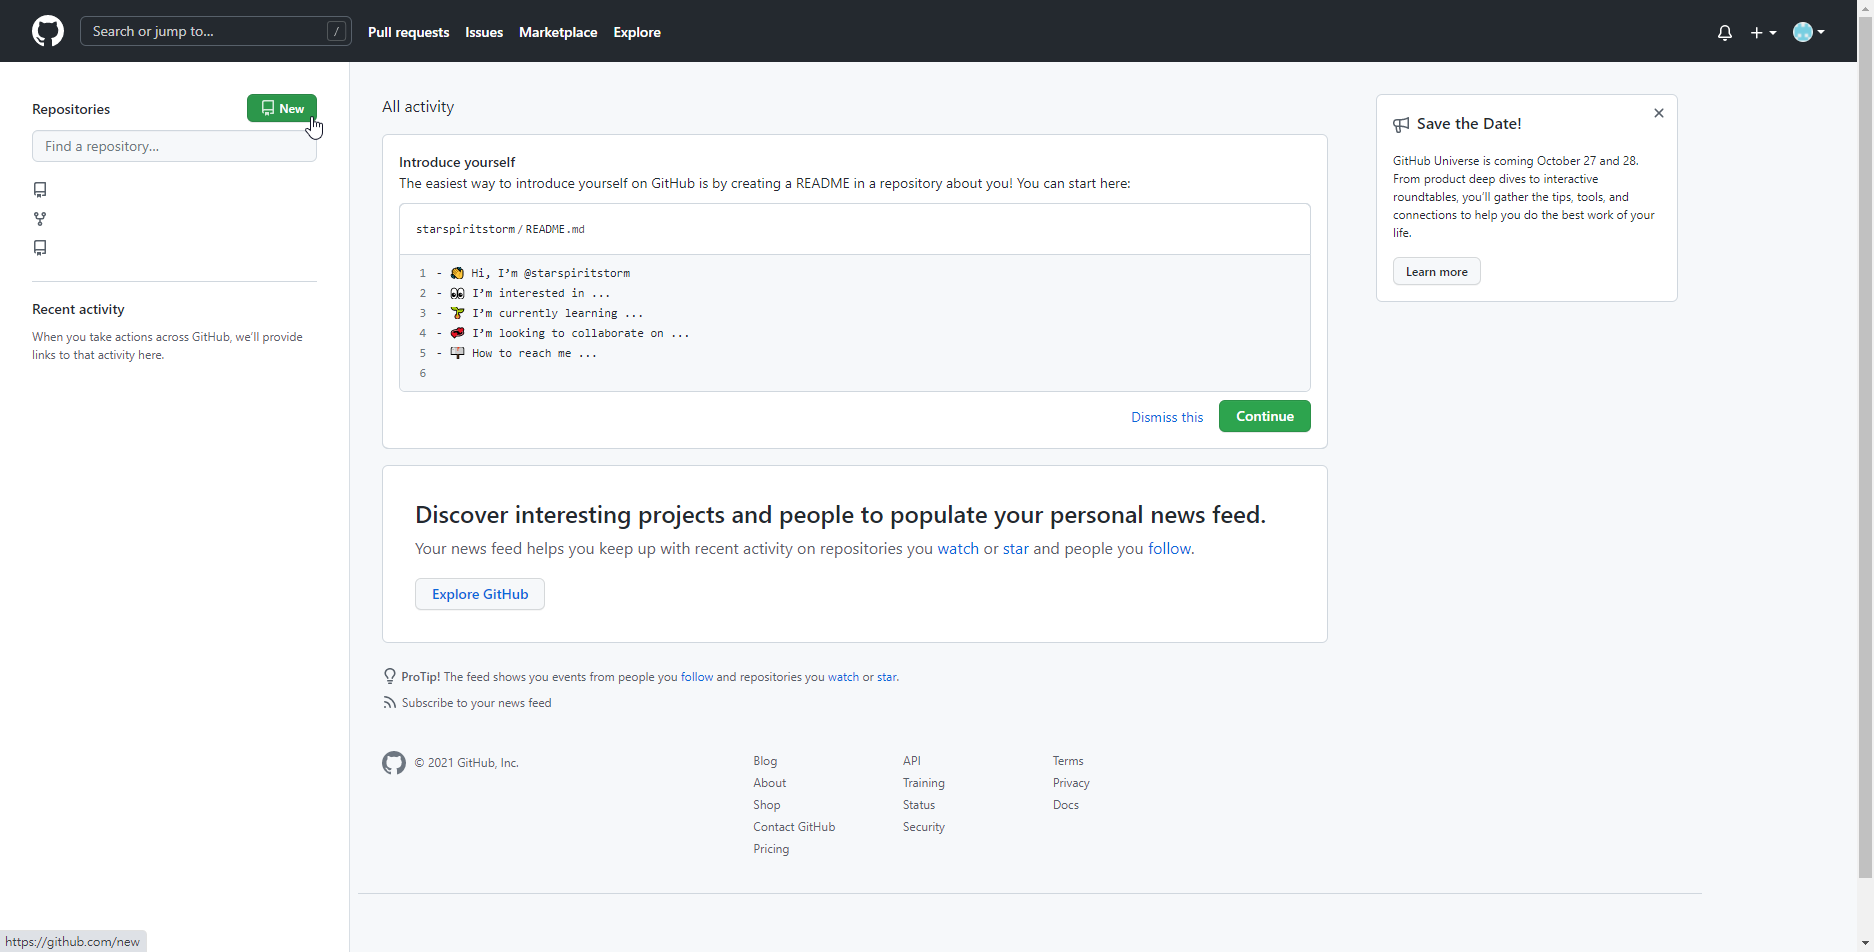 ◎ Fig10. step1 yourname.github.io
 ◎ Fig11. step2 yourname.github.io
 ◎ Fig12. step3 yourname.github.io
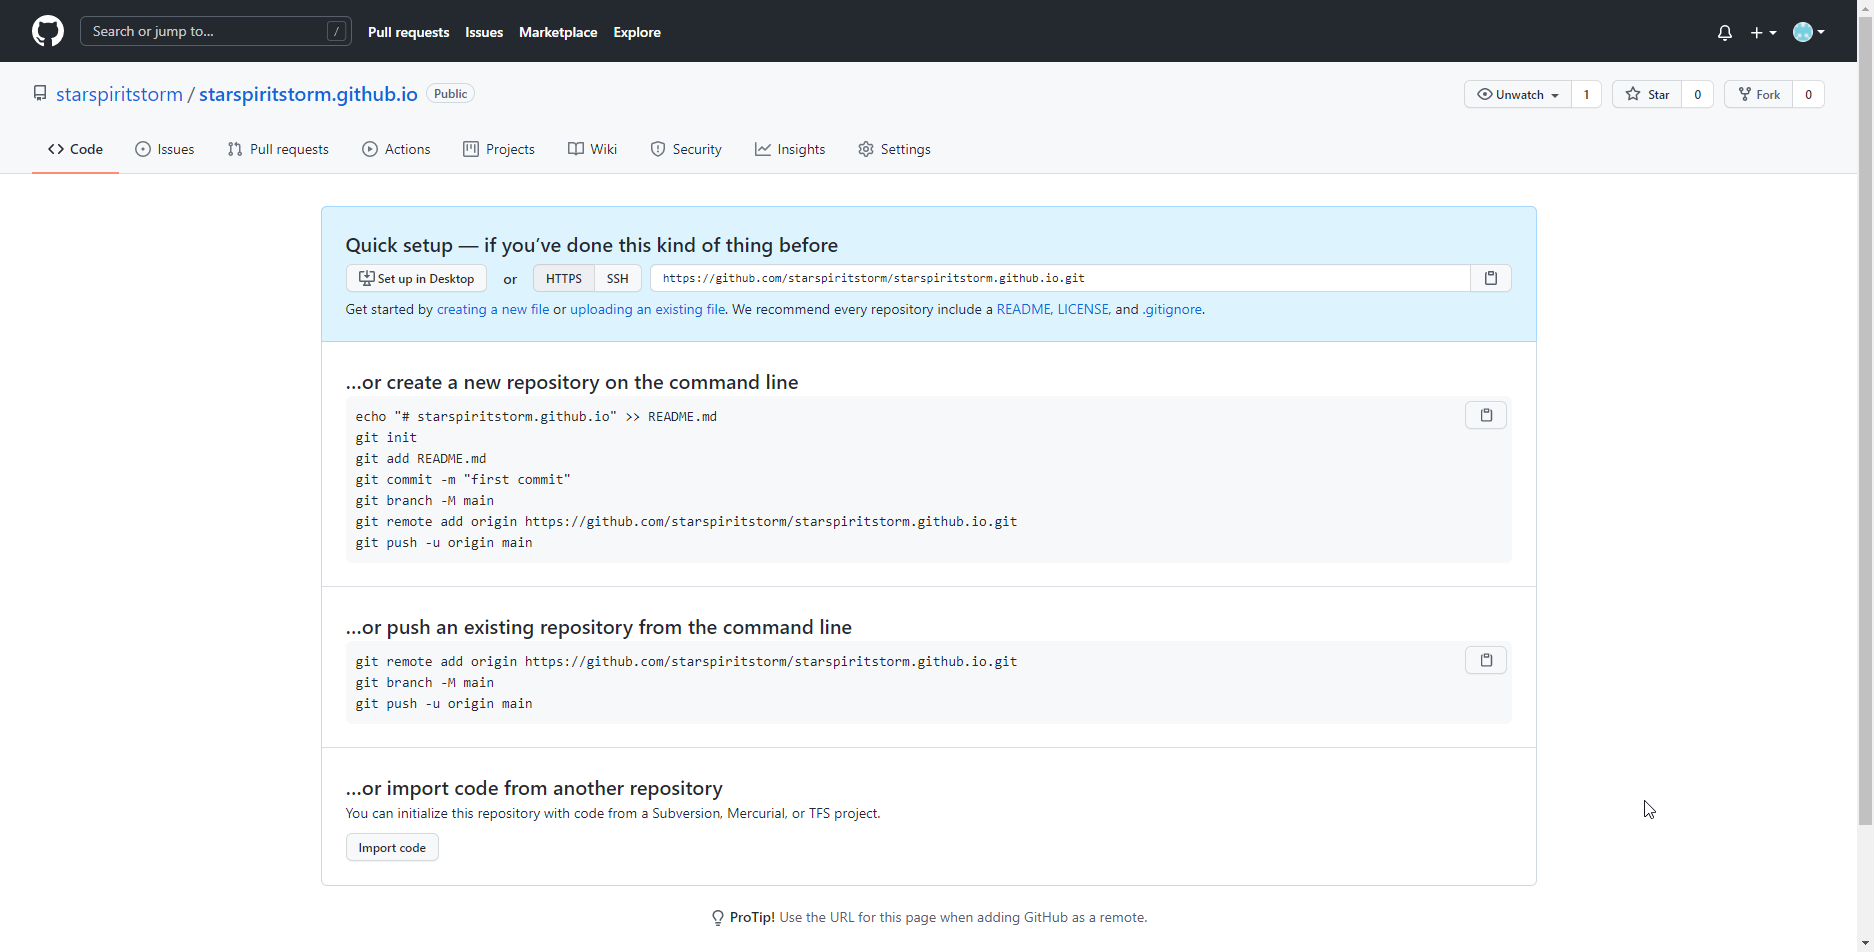
Generate hugo public folder in myblog
Back to the myblog, execute
hugo
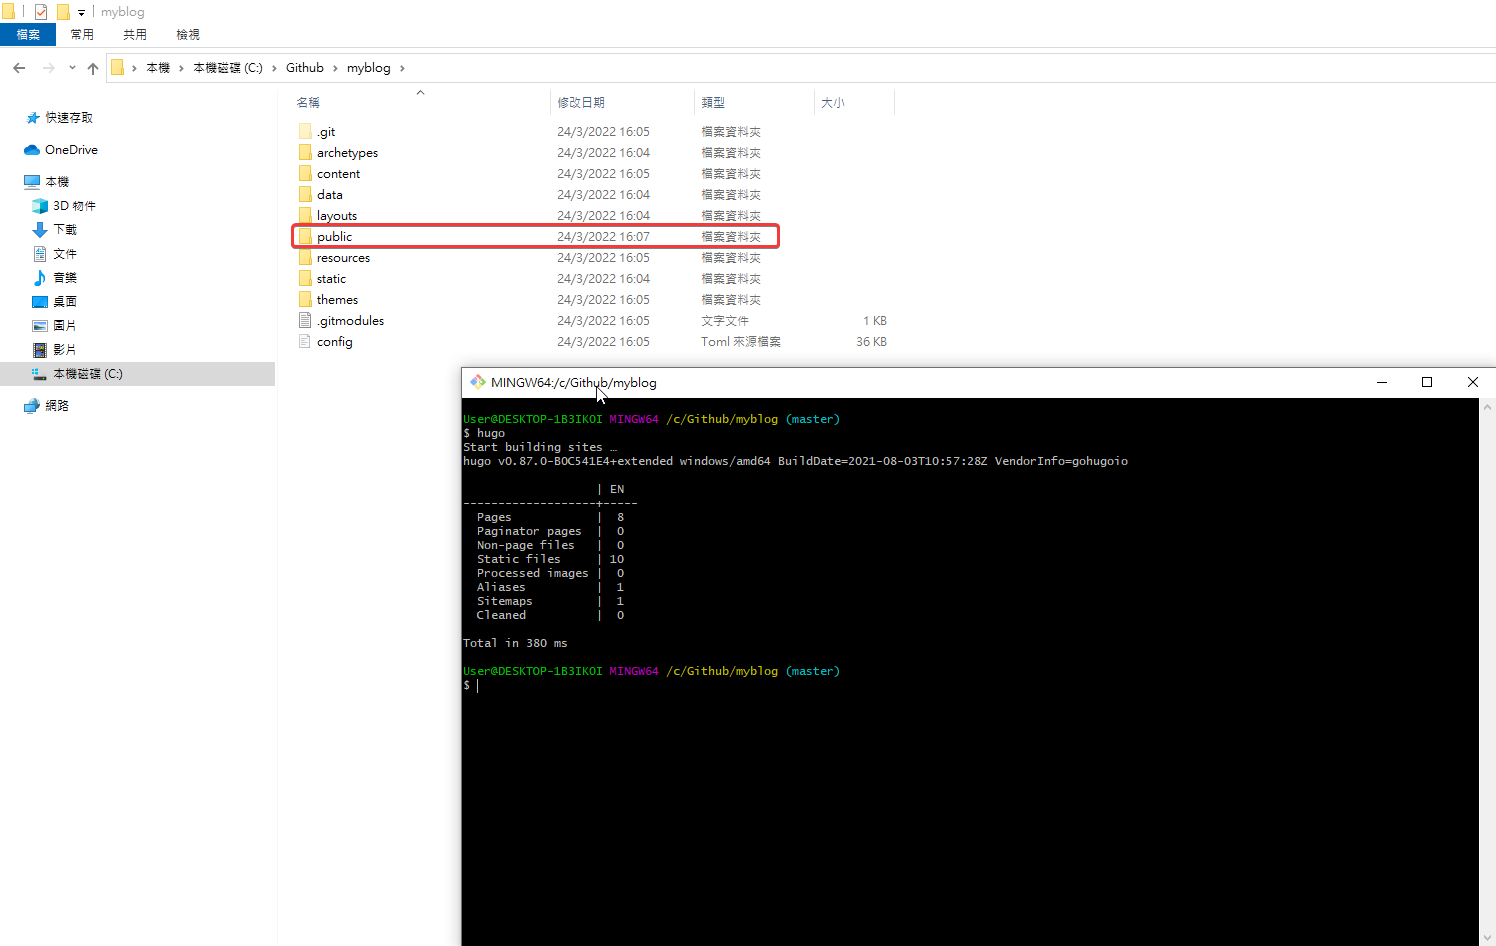 ◎ Fig14. execute hugo
Then you will see the public folder, change folder to public
cd public/
The public folder is for hugo Github Pages, it’s for this repository
https://github.com/[your_github_account]/[your_github_account].github.io
Initial git in public folder, for pushing to the github
You need to initialize git in public folder to push it on github.
git init
git remote add origin https://github.com/[your_github_account]/[your_github_account].github.io
Example: git remote add origin https://github.com/starspiritstorm/starspiritstorm.github.io
git add .
git commit -m "Initial commit"
git push --set-upstream origin master
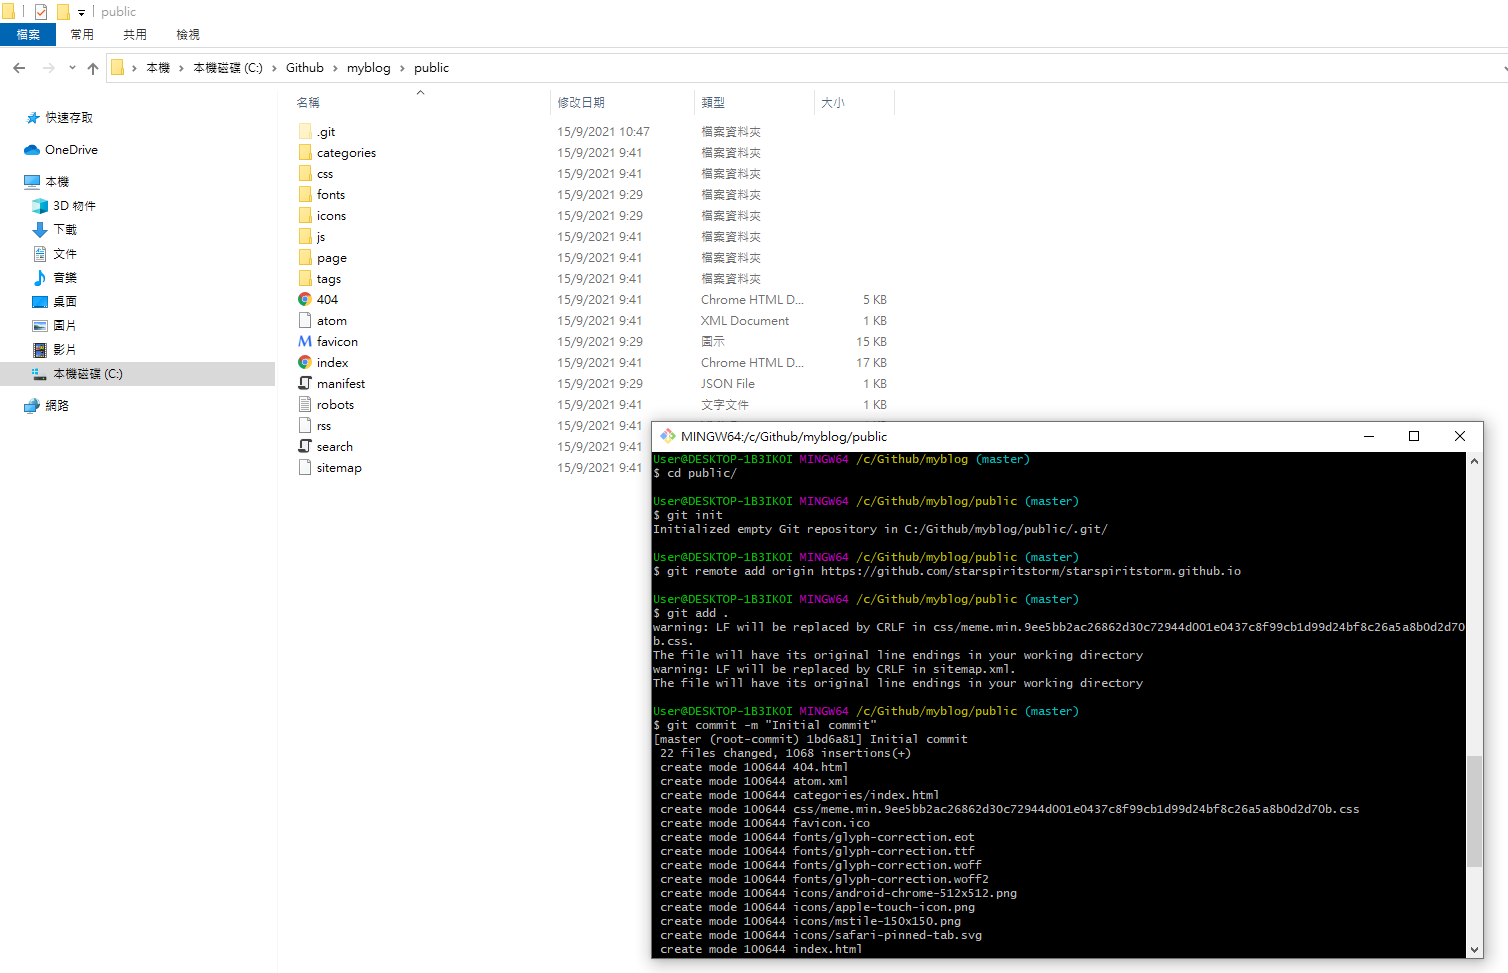 ◎ Fig15. init git in public
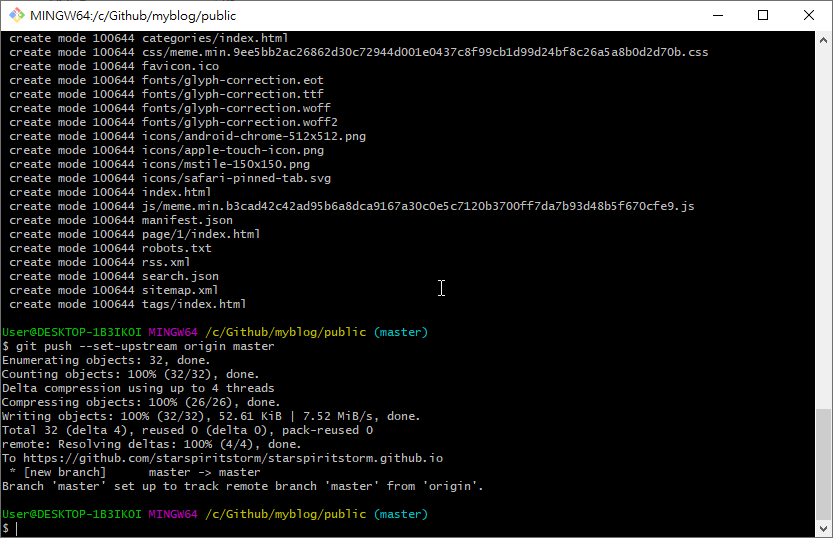 ◎ Fig16. init git in public2
Setting source in github webpage
After pushing the code into GitHub you still need to modify the Repository settings.
Change the setting found in: Settings > Options > Github Pages > Source to “master branch”
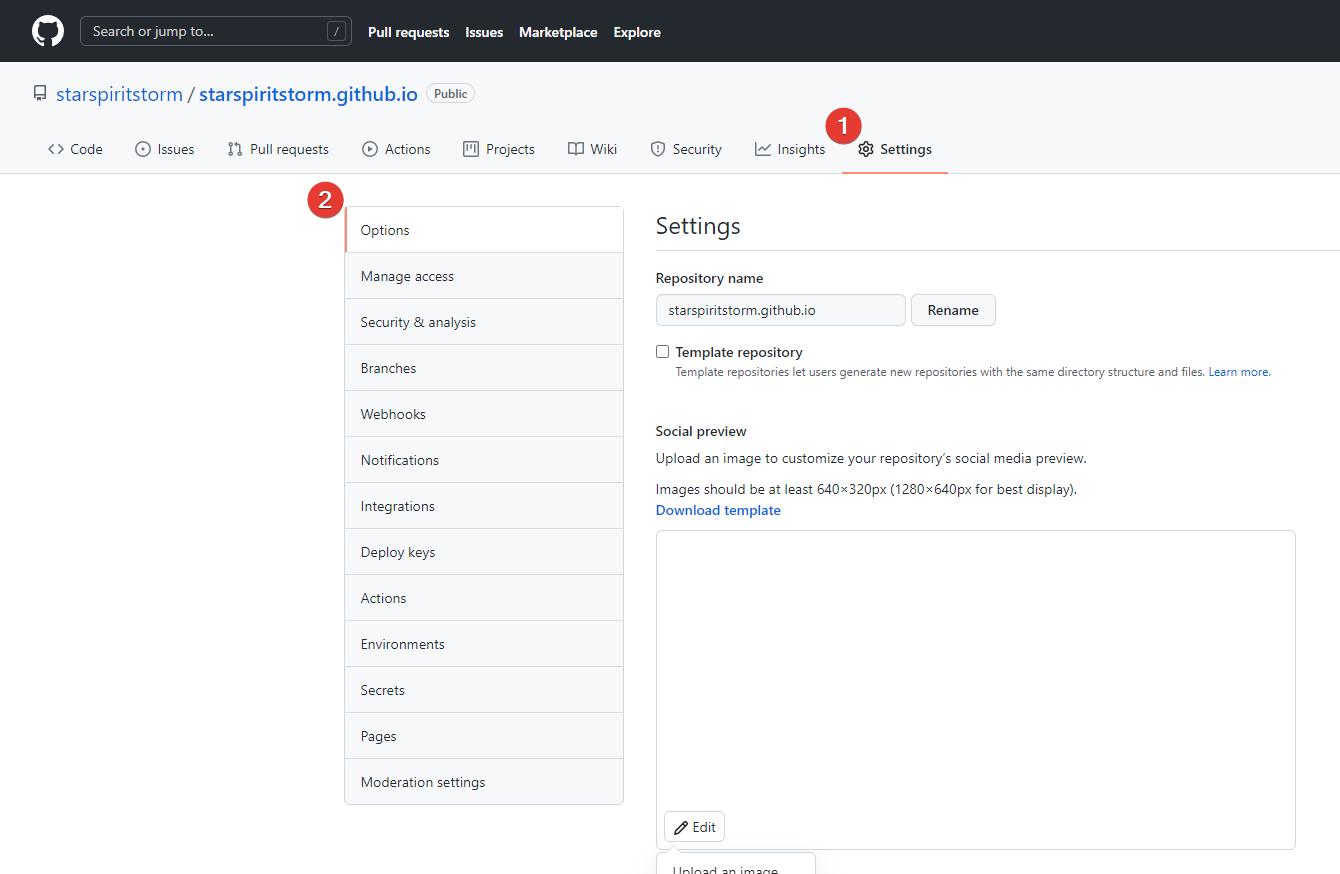 ◎ Fig18. github setting source1
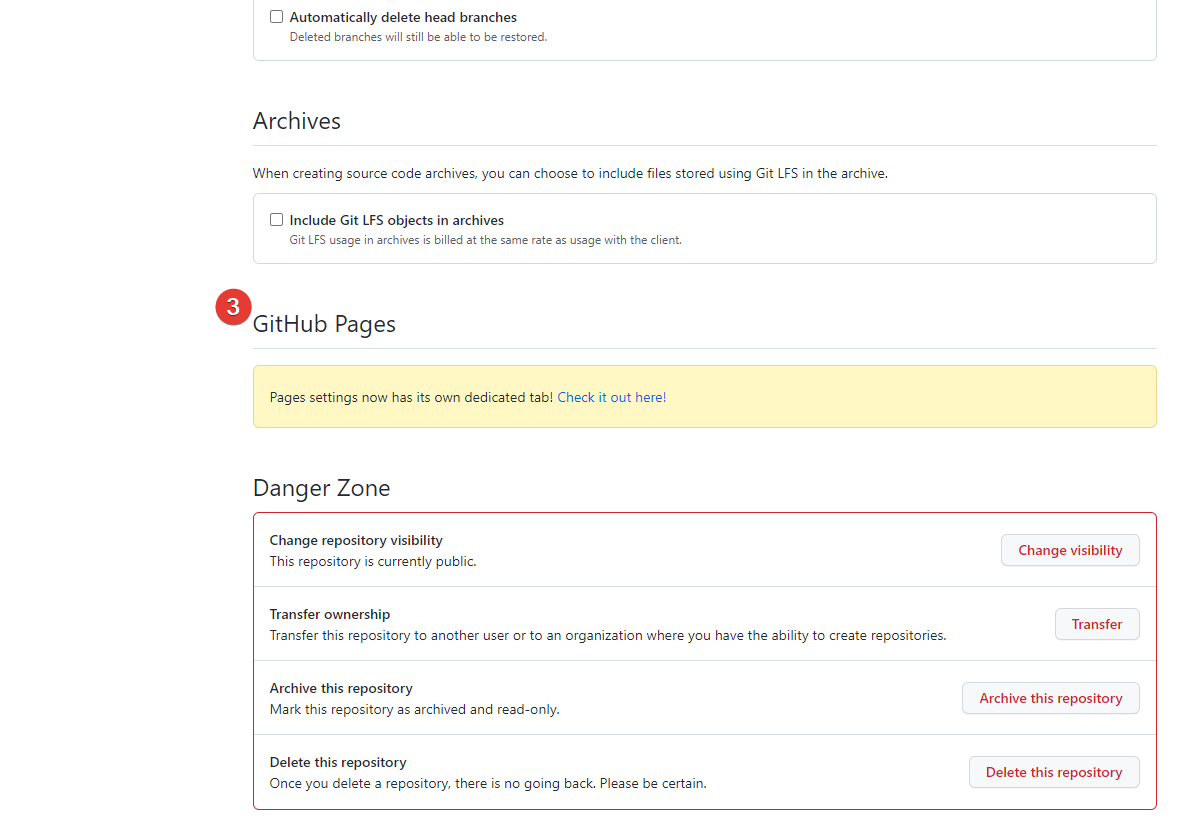 ◎ Fig19. github setting source2
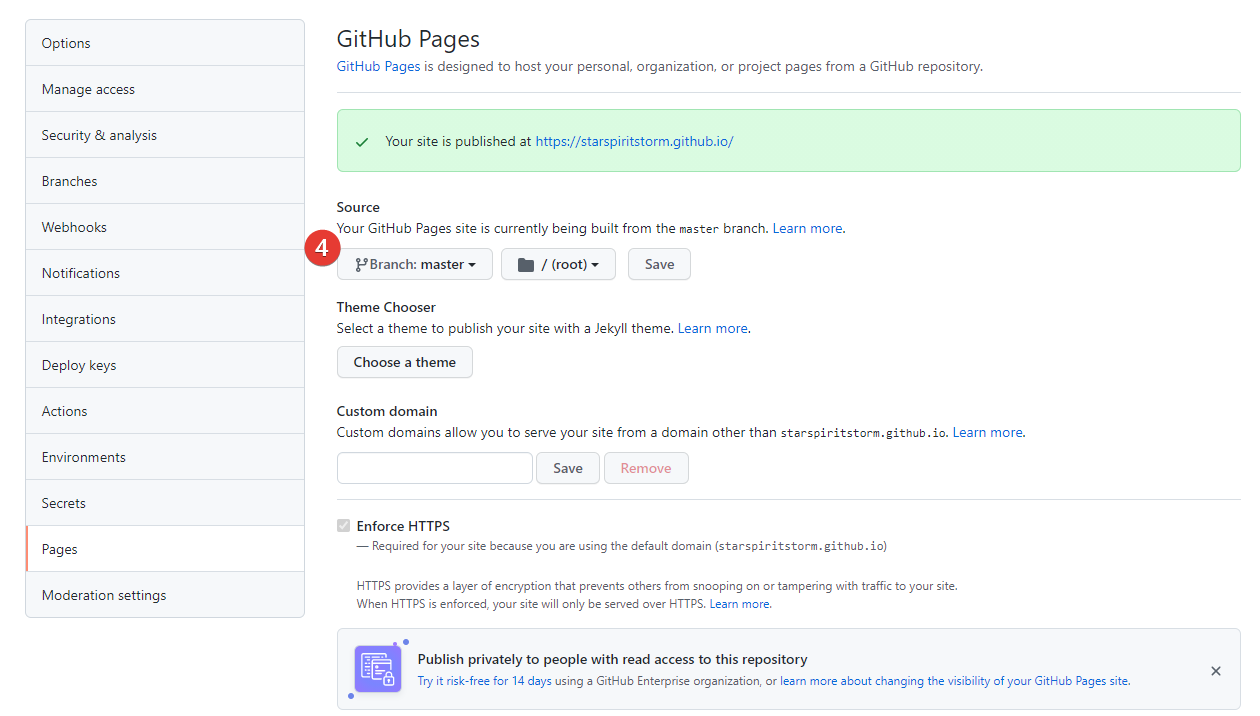 ◎ Fig20. github setting source3
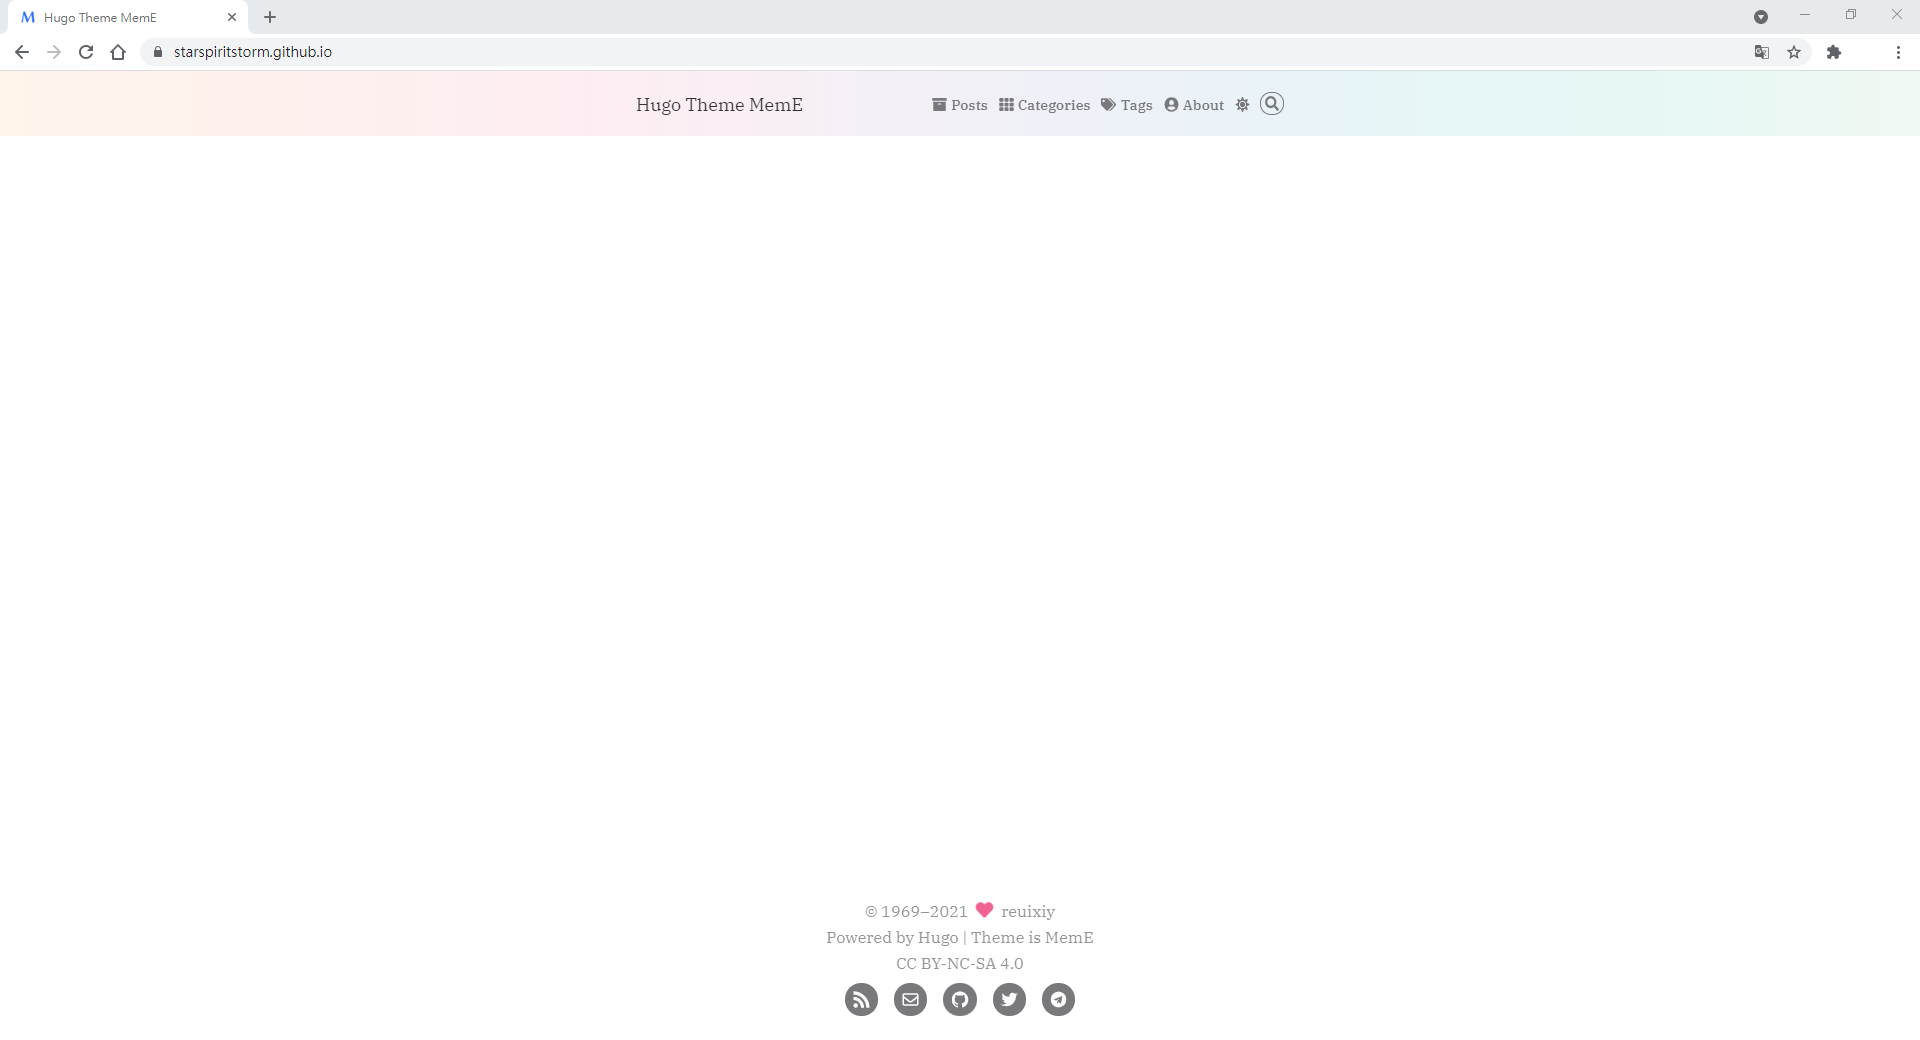
You can check the result after pushing it to your Github Pages (https://[your_github_account].github.io/).
 ◎ Fig22. github pages result
Github Pages hugo source code
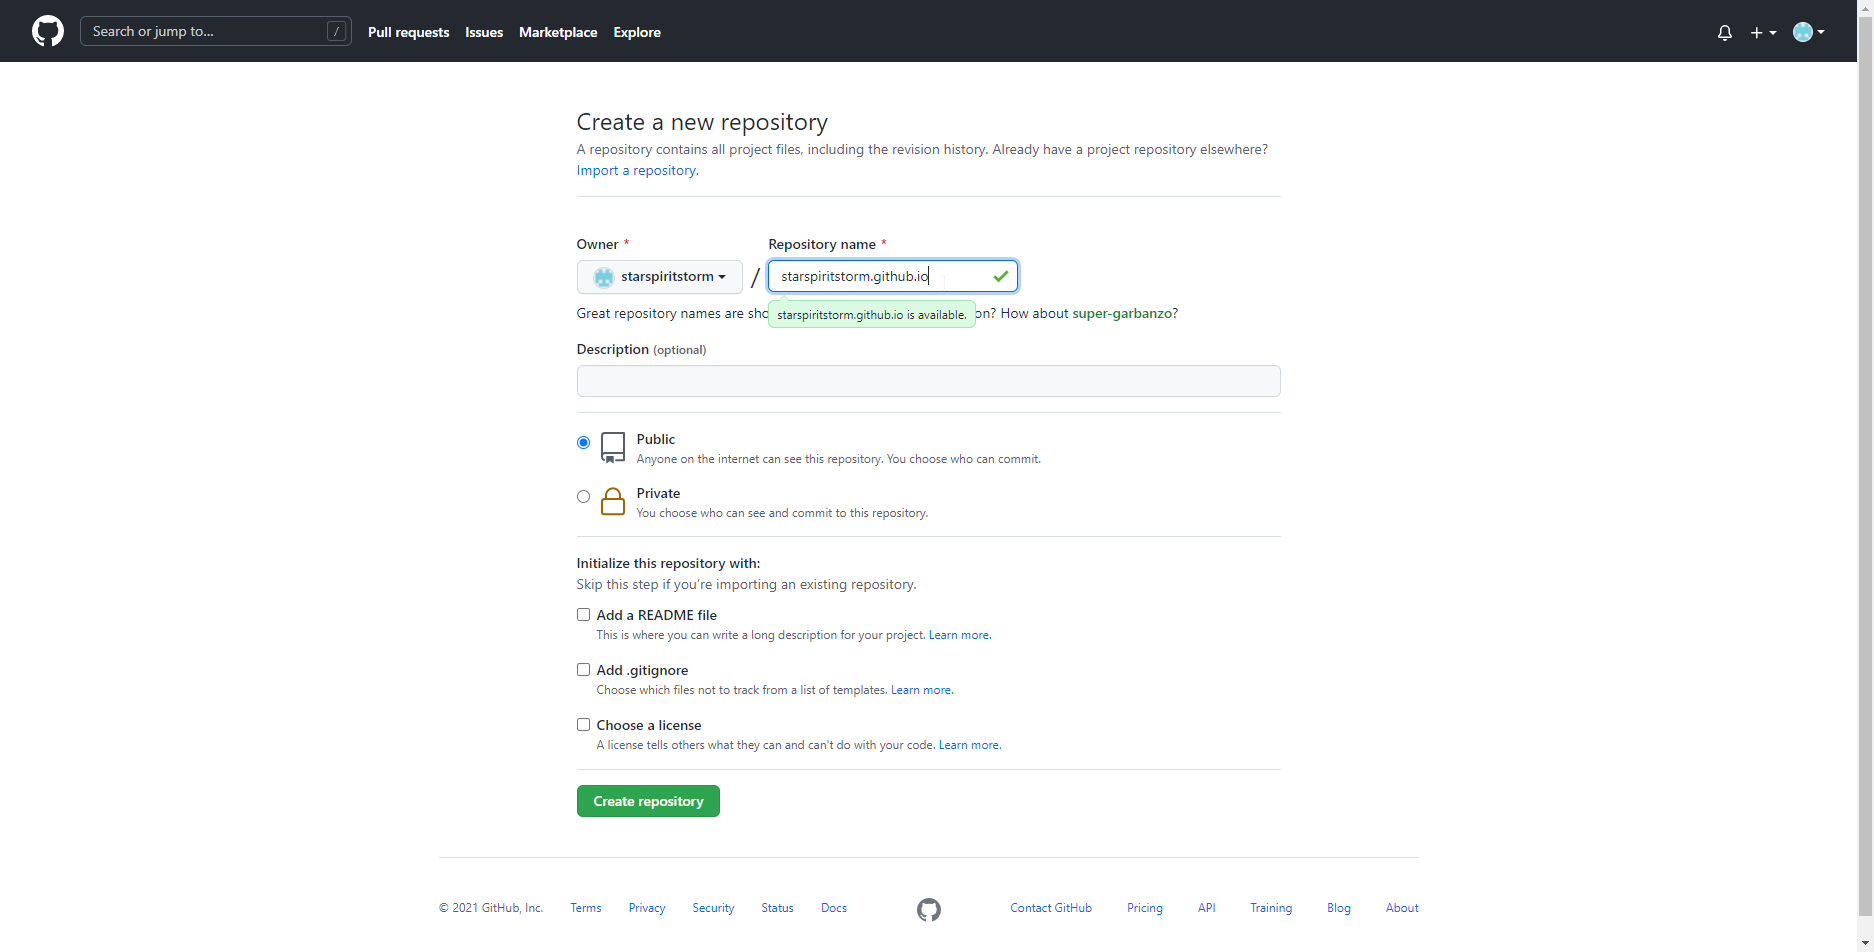
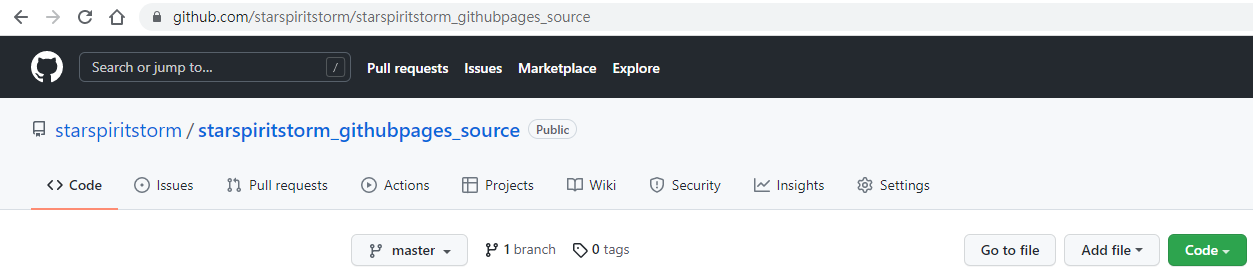
Create Github Pages source code’s repository
Note that all articles source code is stored in your local side. The previous pushed to your Github Pages is just your public folder.
So you need to open up another repository to store your source code. The steps are same with previous Github Pages repository, you can name your favorite naming for your source code repository.
https://github.com/[your_github_account]/[your_github_account]_githubpages_source
Example: https://github.com/starspiritstorm/starspiritstorm_githubpages_source
 ◎ Fig24. create source code repository
Back to myblog folder, open git bash for github_source_code
After finished repository, open up git bash in myblog.
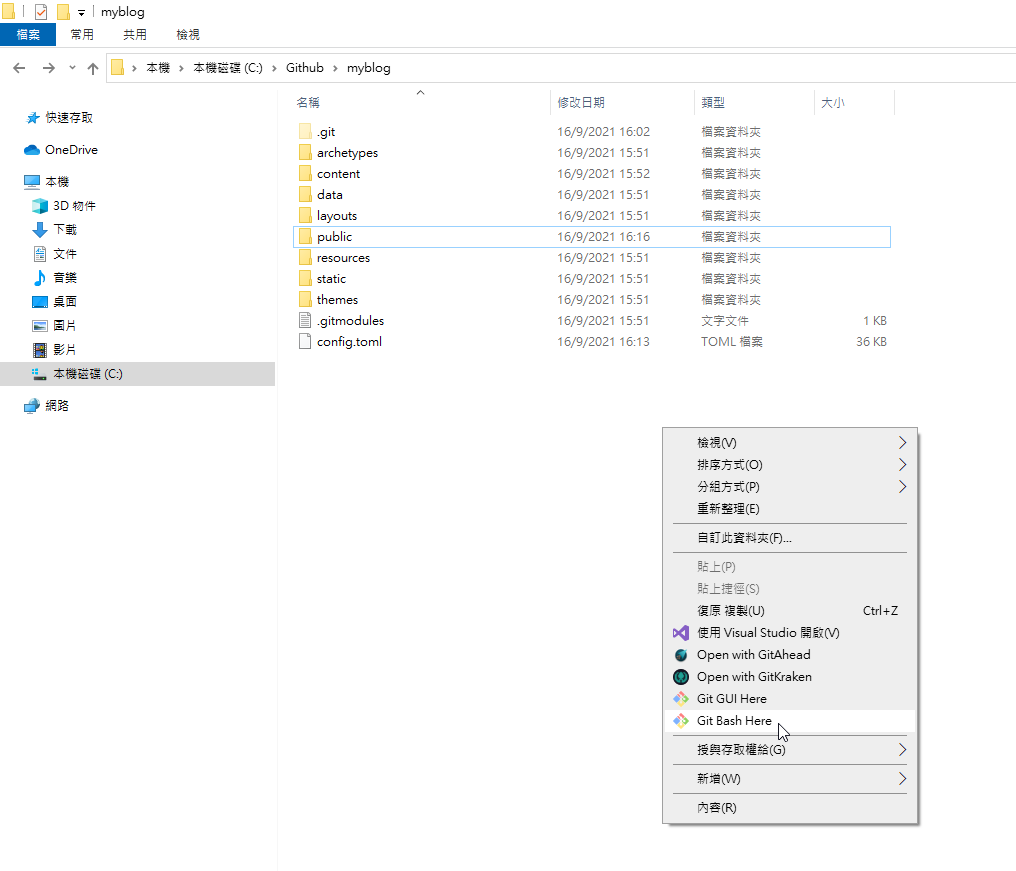 ◎ Fig25. open git bash in myblog
Then generate a gitignore to exclude public folder, we don’t need it because it is result from hugo build.
echo "public/" >> .gitignore
 ◎ Fig26. git ignore public
And do the same steps to push your myblog’s source code to your new repository.
git init
git remote add origin https://github.com/[your_github_account]/[your_github_account]_githubpages_source
Example: git remote add origin https://github.com/starspiritstorm/starspiritstorm_githubpages_source
git add .
git commit -m "Add hugo source code"
git push --set-upstream origin master
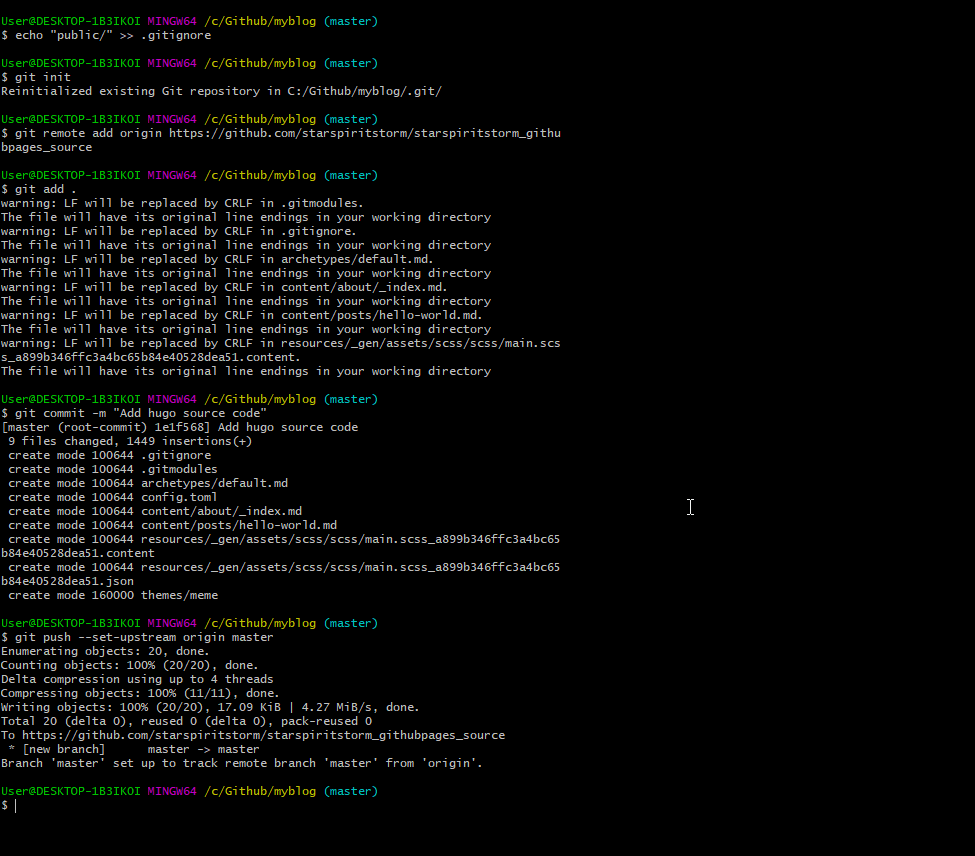 ◎ Fig27. init git in myblog
Automatic deployment (GitHub Action)
Submodule needs a public folder
Last step, use GitHub Action to do automatic deployment. When you push your source code to your source code repo, GitHub Action will generate the result to your GithubPage.
For the automatic deployment, you need to generate submodule public first[1].
git submodule add -f --depth 1 https://github.com/[your_github_account]/[your_github_account].github.io.git public
Example: git submodule add -f –depth 1 https://github.com/starspiritstorm/starspiritstorm.github.io.git public
And remember commit & push.
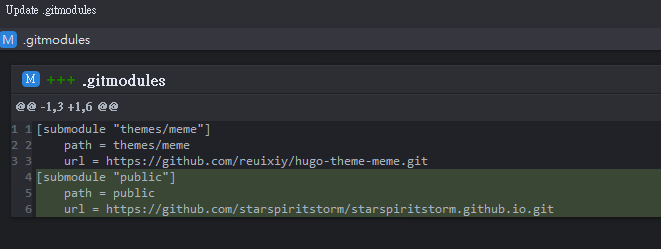 ◎ Fig28. submodule commit
Create github Personal Access Token
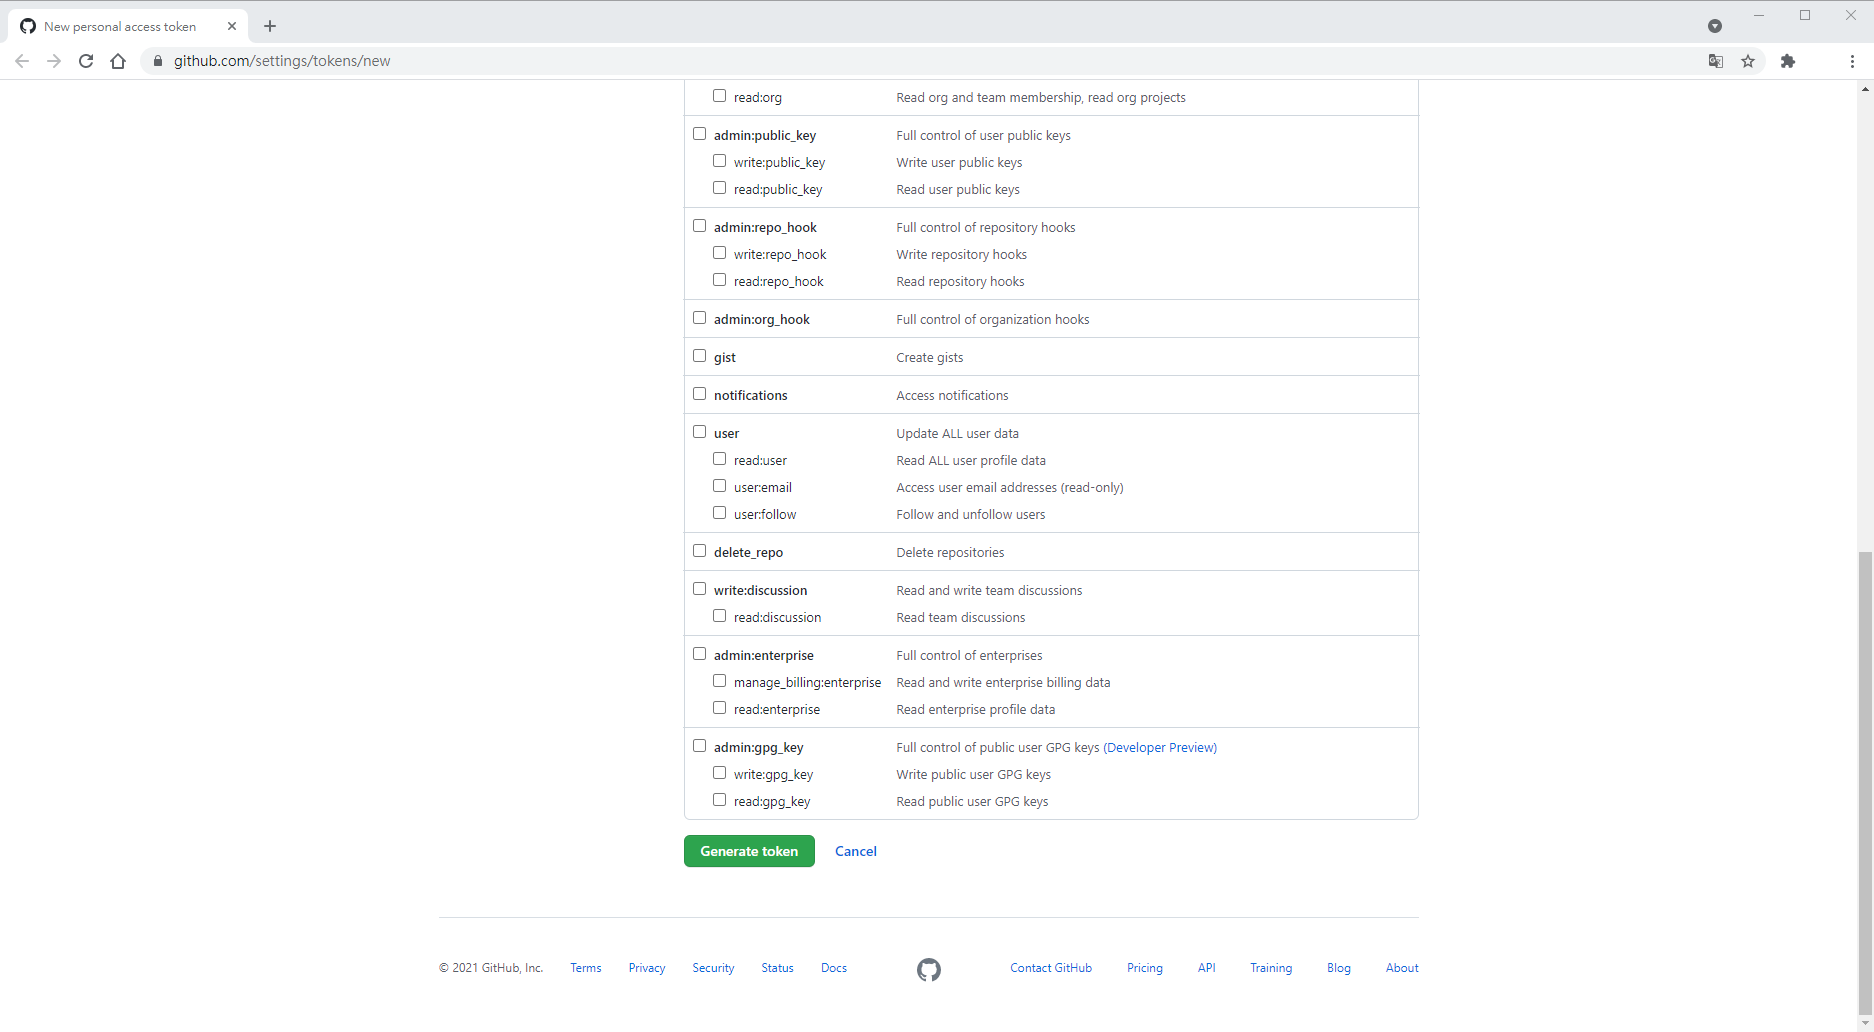
Go to here to create Personal Access Token (PAT).
Naming no restricted, expired time I choose “No expired”, you can regenerate token if you want.
Check workflow
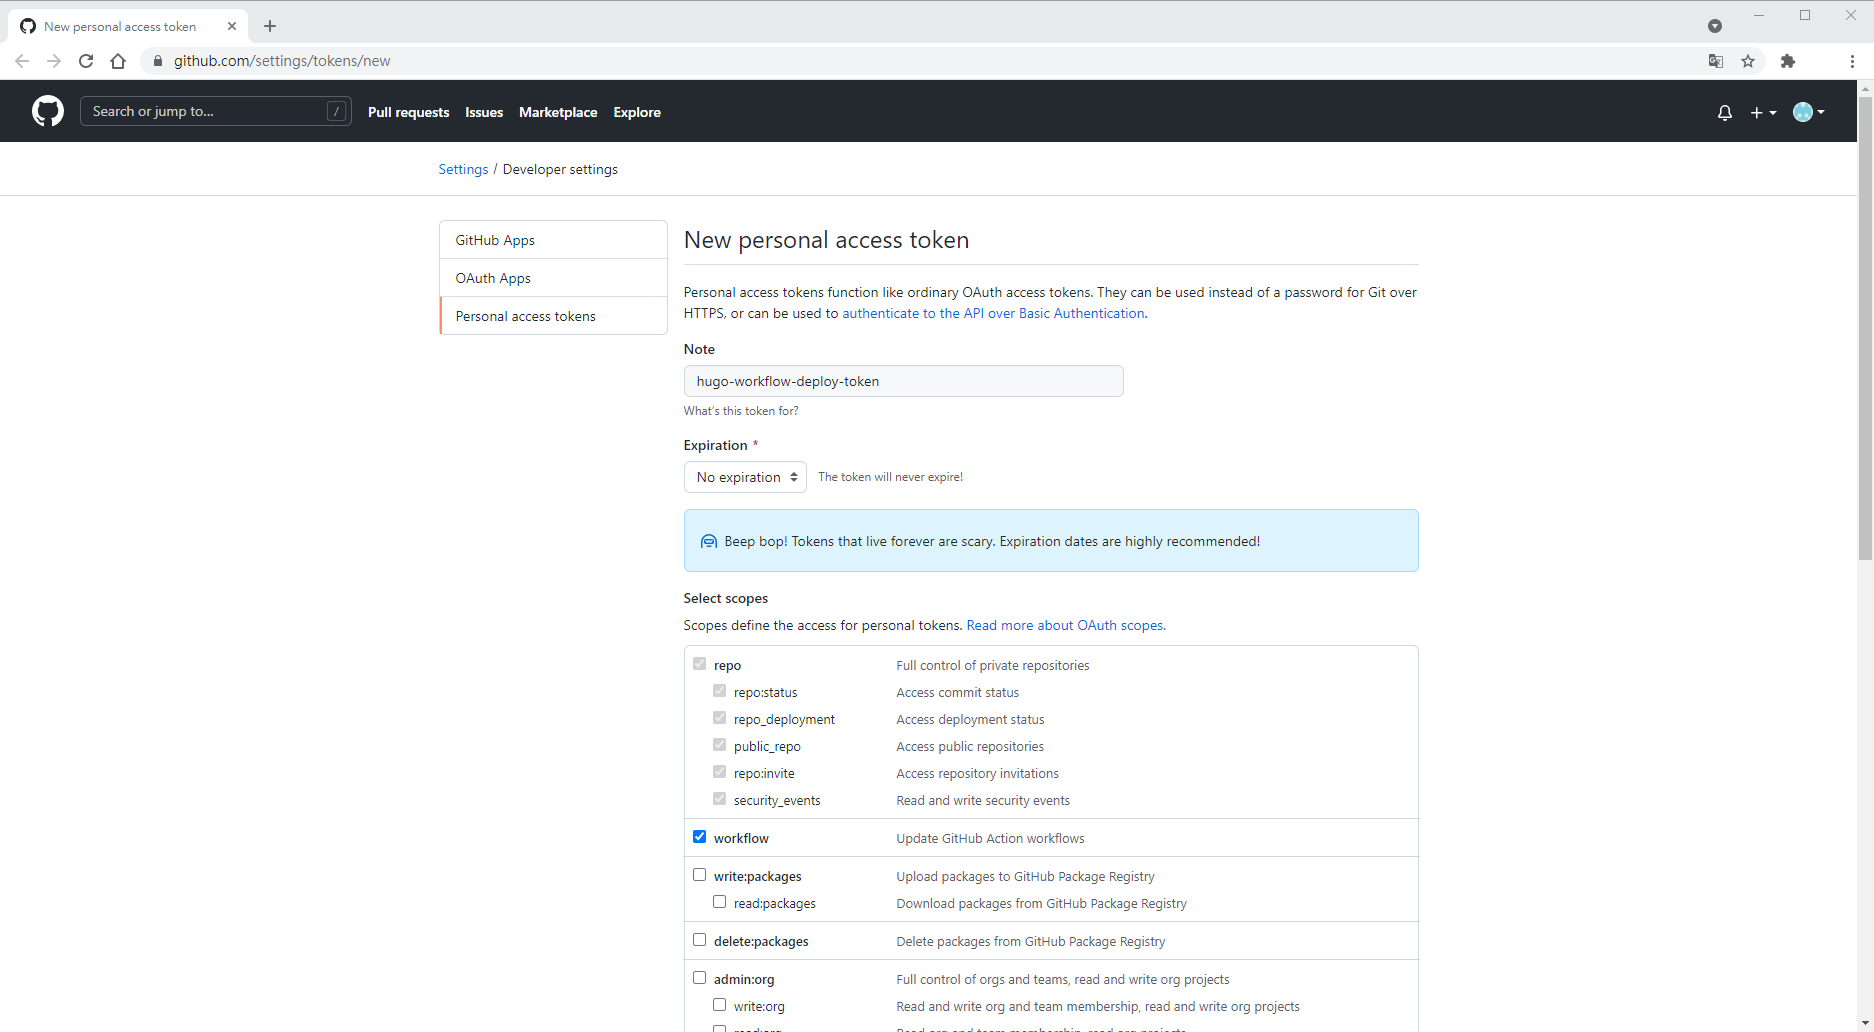 ◎ Fig30. generate github personal access token
Pull down and click Generate token.
 ◎ Fig31. click generate
And copy the token value.
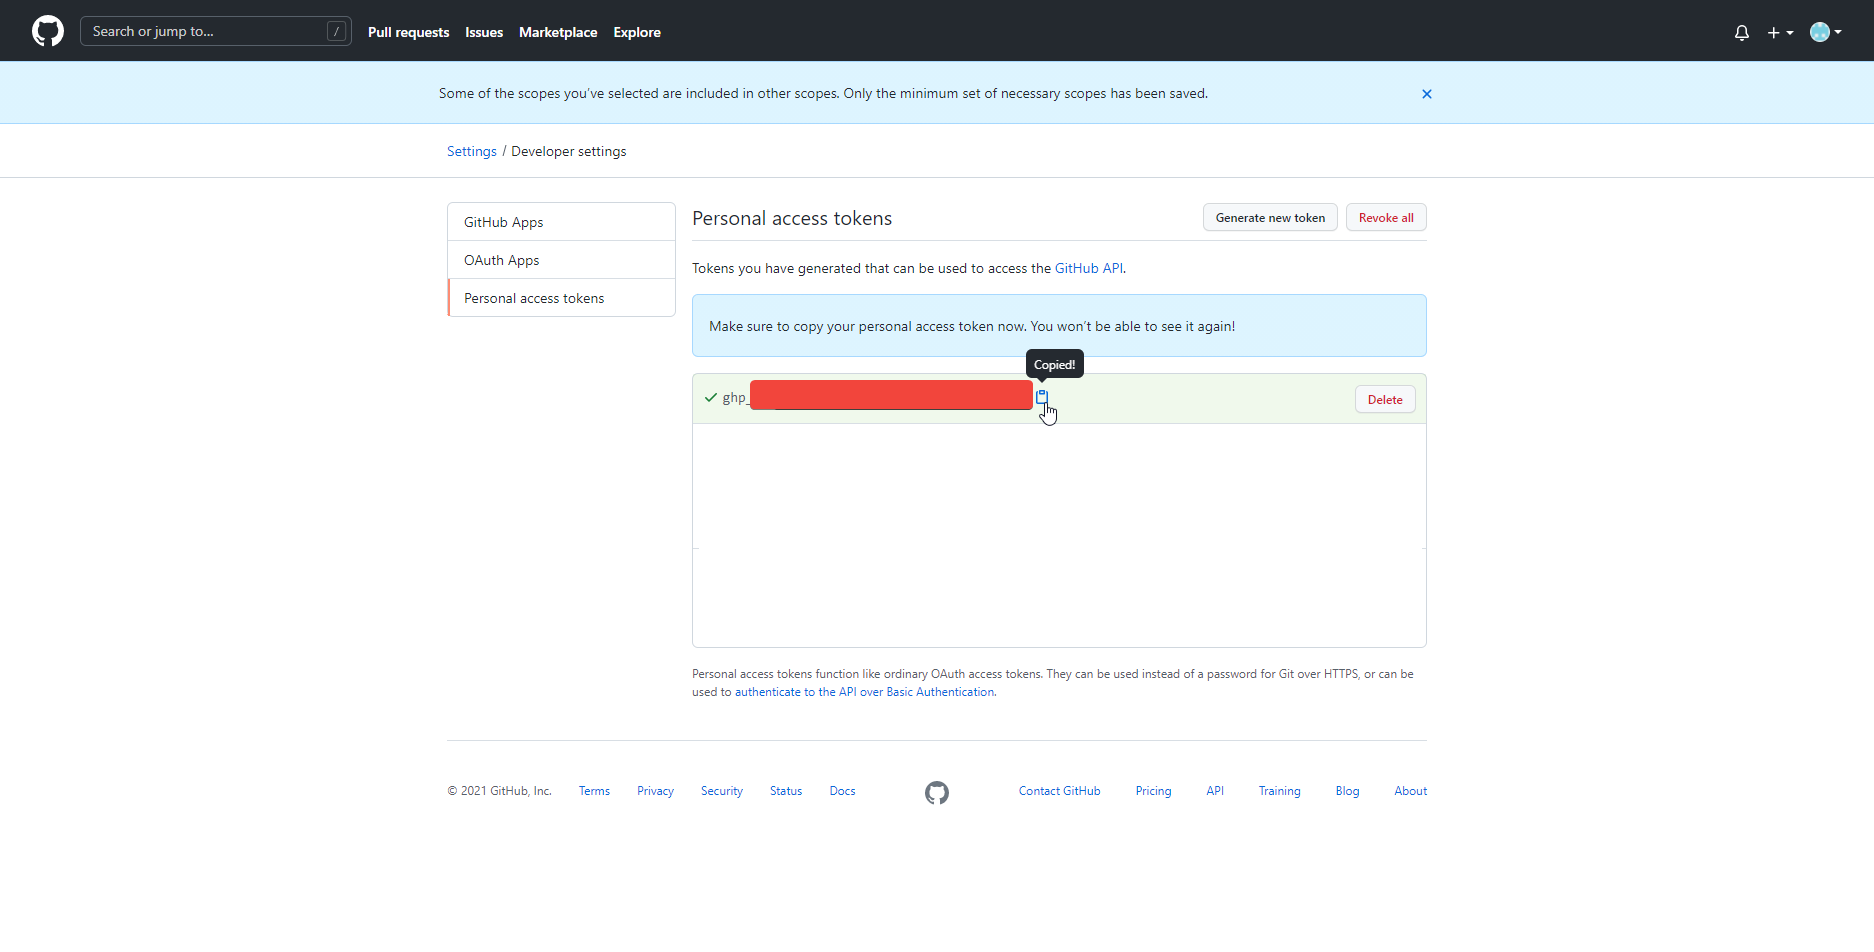 ◎ Fig32. PAT generated
Using the generated token value to set up your repository secret.
Settings > Secret > New repository secret
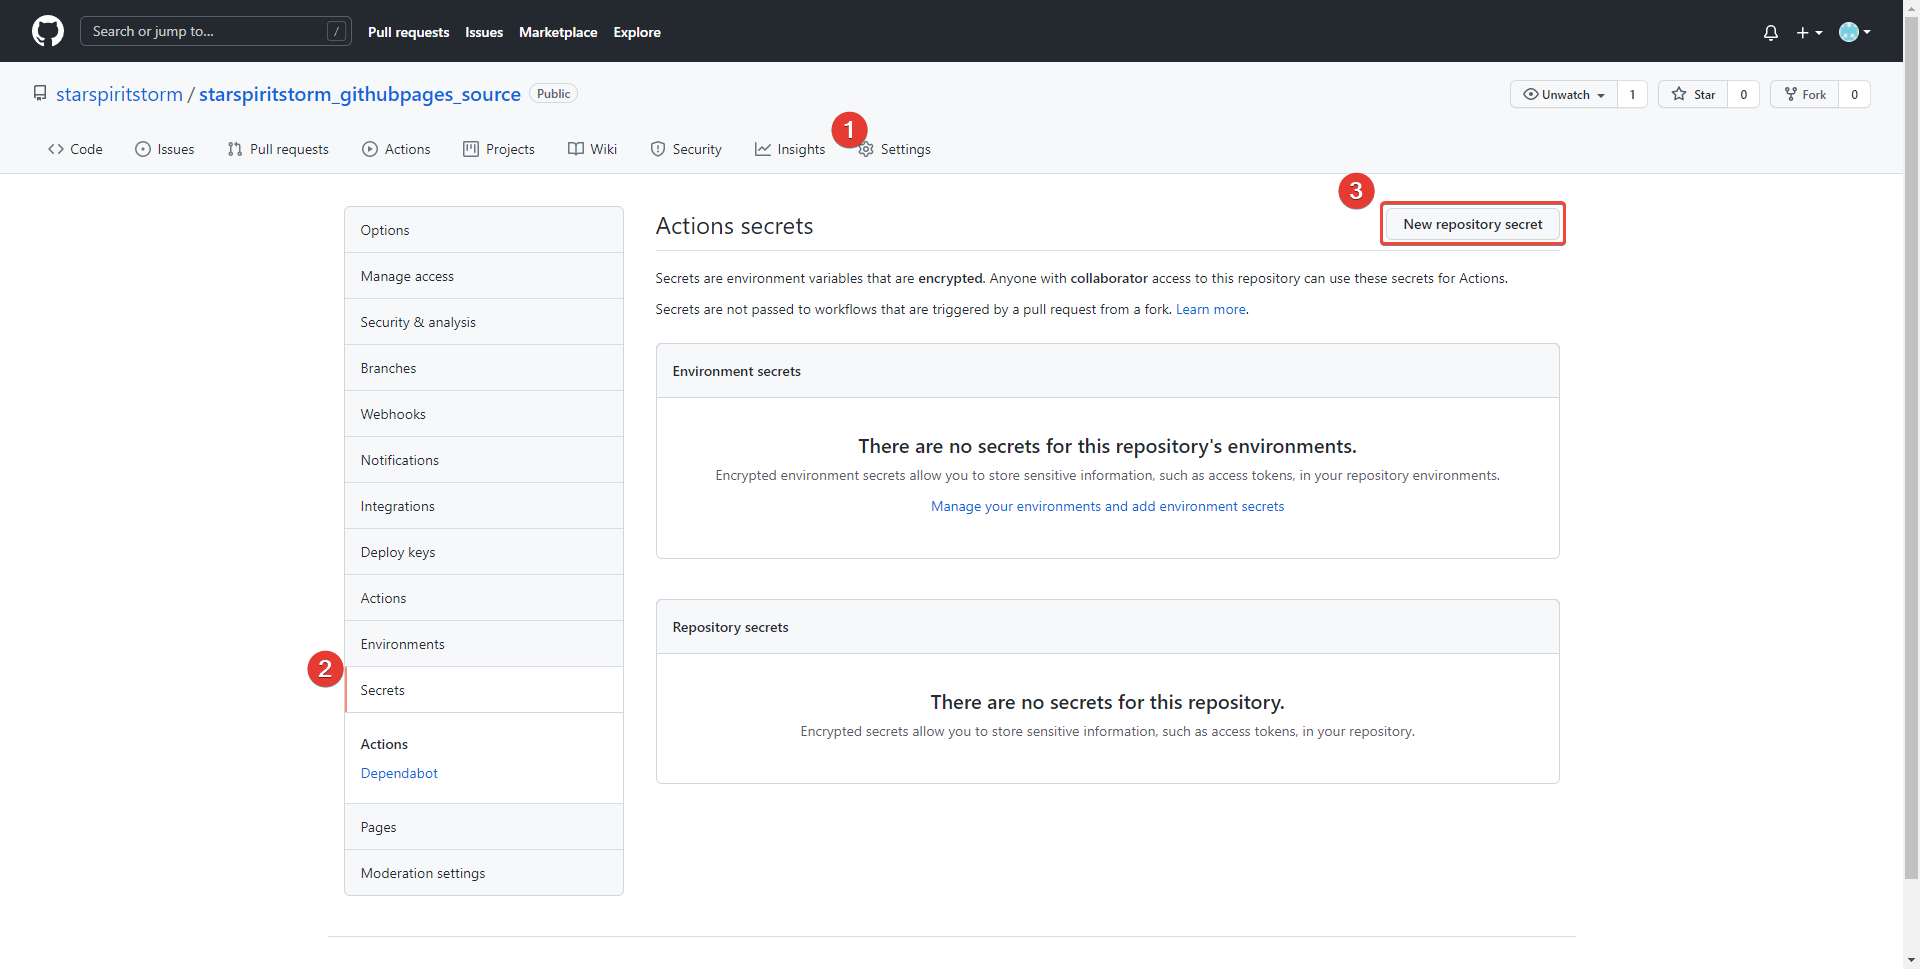 ◎ Fig33. use token
Name HUGO_DEPLOY_TOKEN, and paste the copied token value.
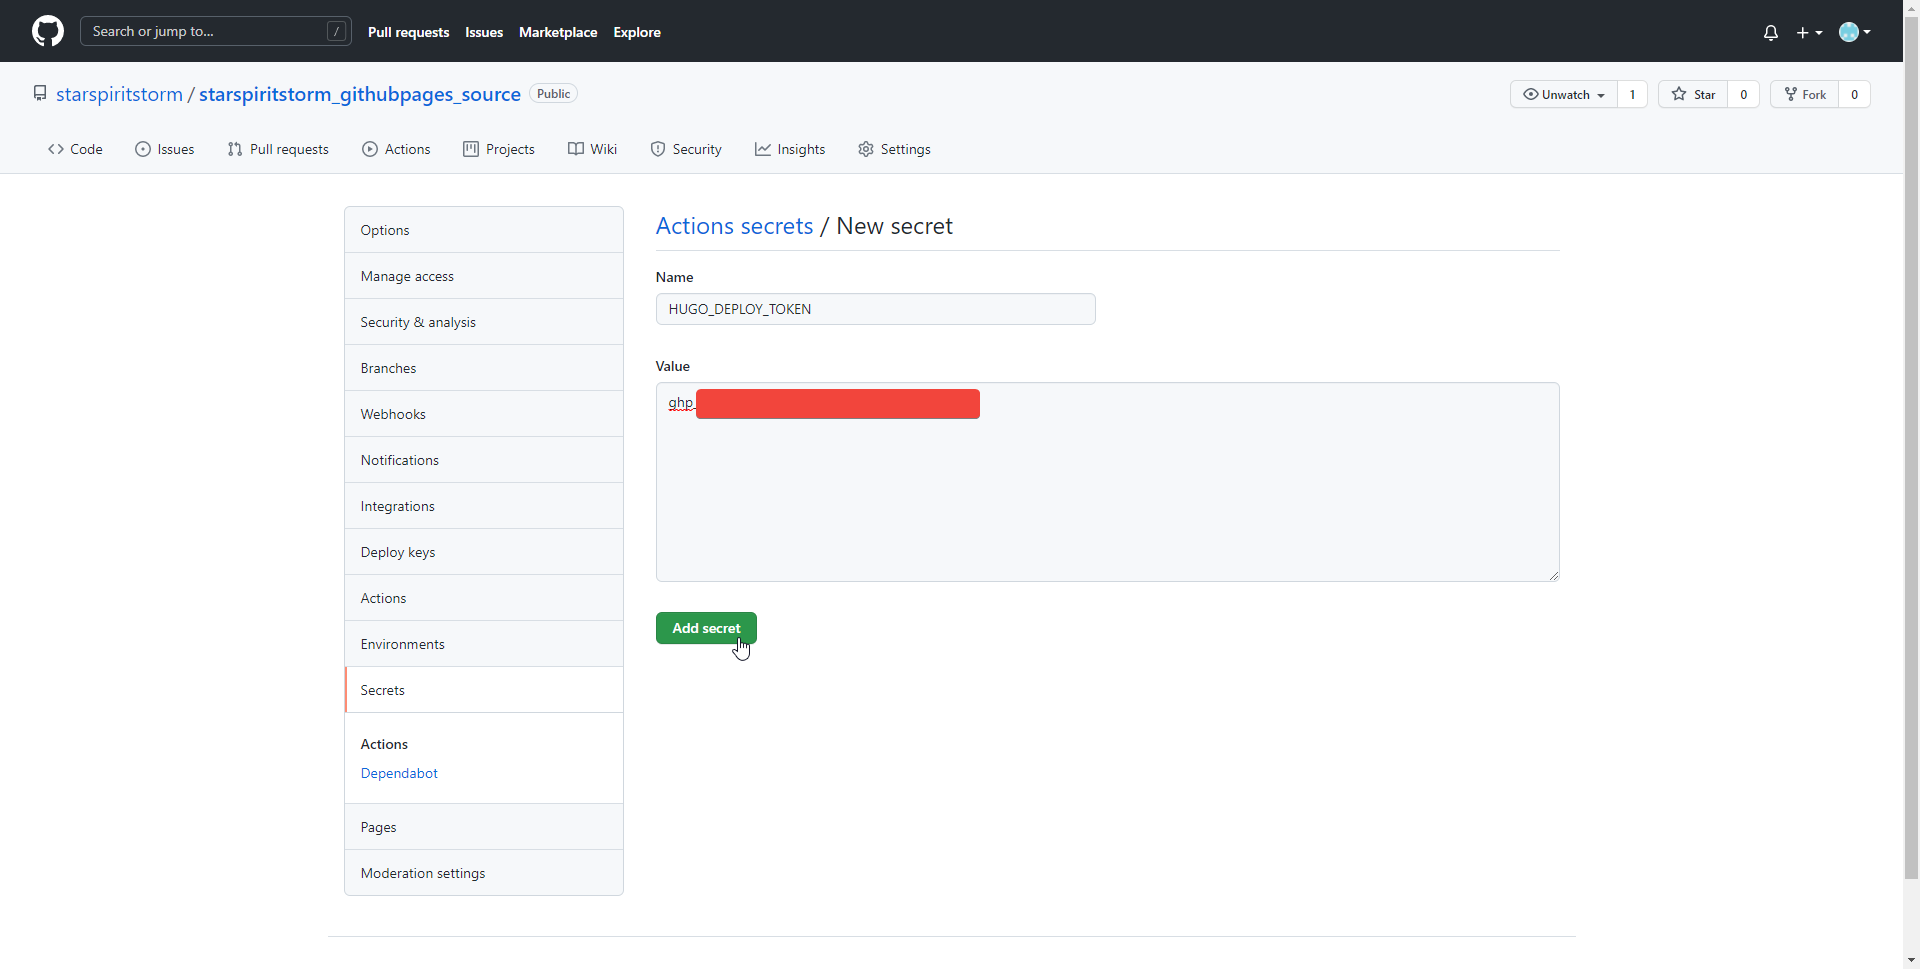 ◎ Fig34. generate new secret
Setting GitHub Action workflow
Go to Github Action webpage, click “set up a workflow your self”
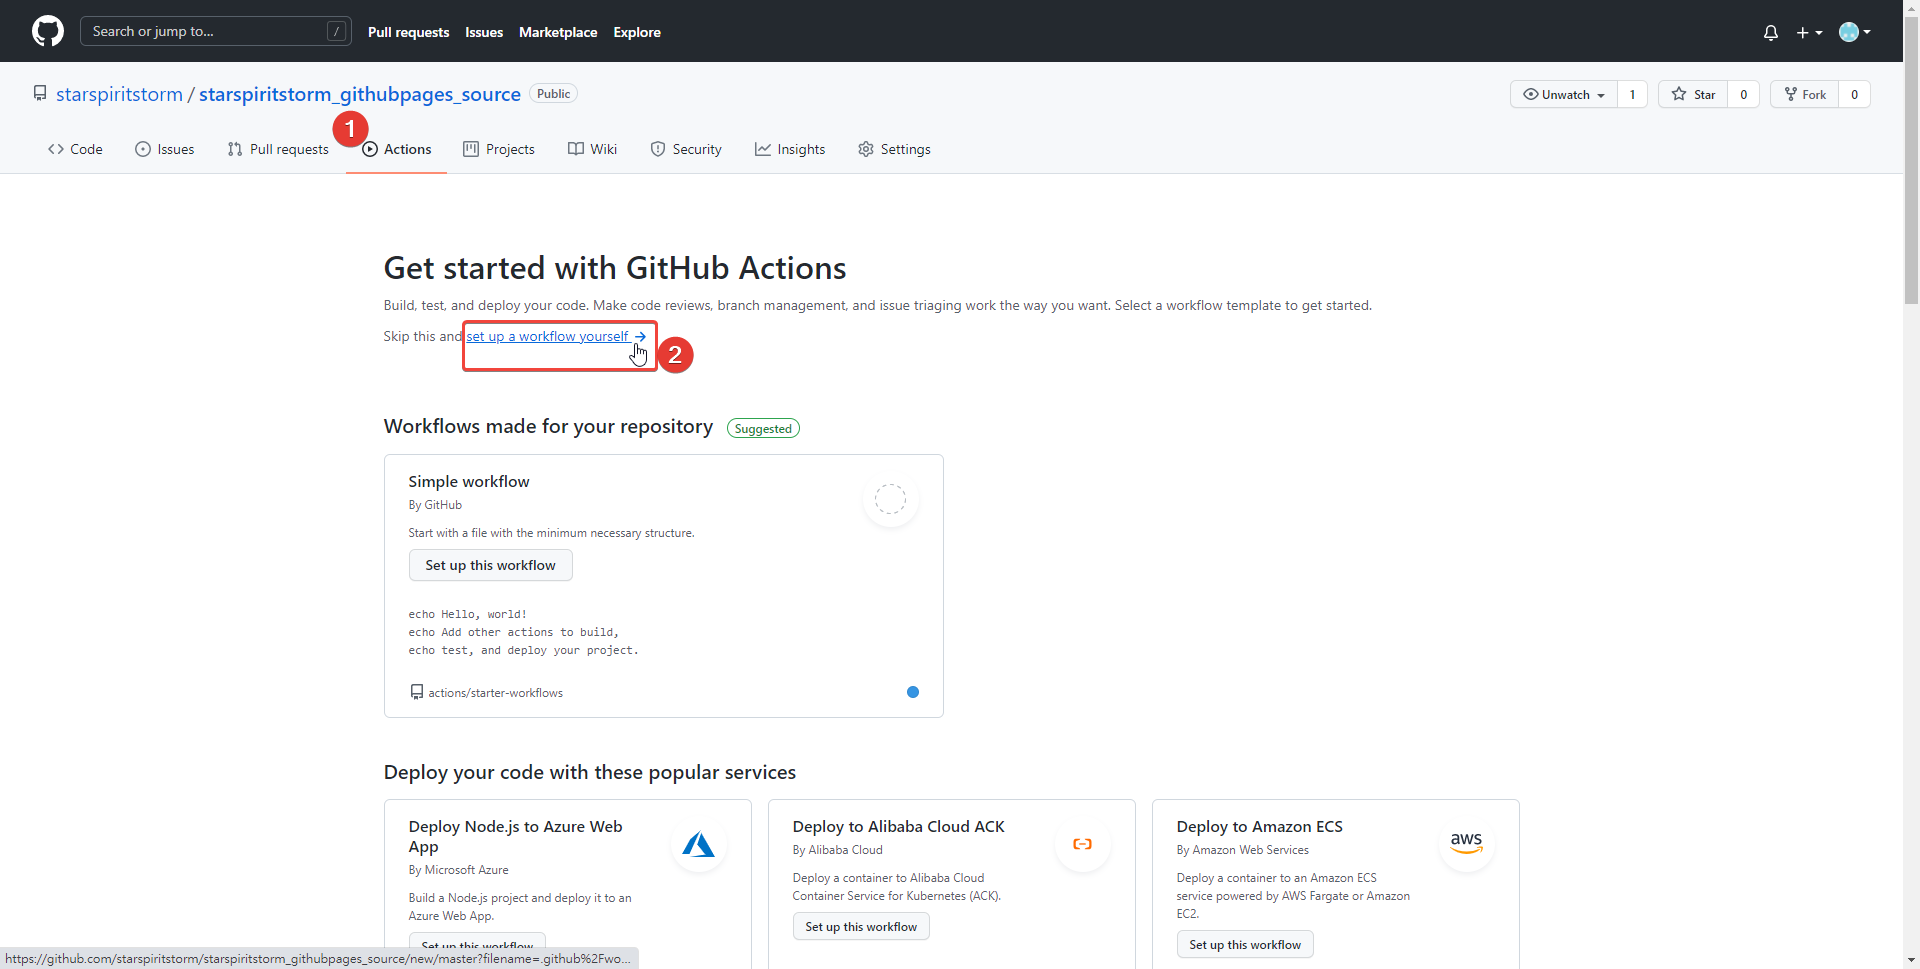 ◎ Fig35. set up a workflow
Paste script in the “Edit new file”, remember changing external_repository to your Github Pages repository.
Click “start commit”, and wait.
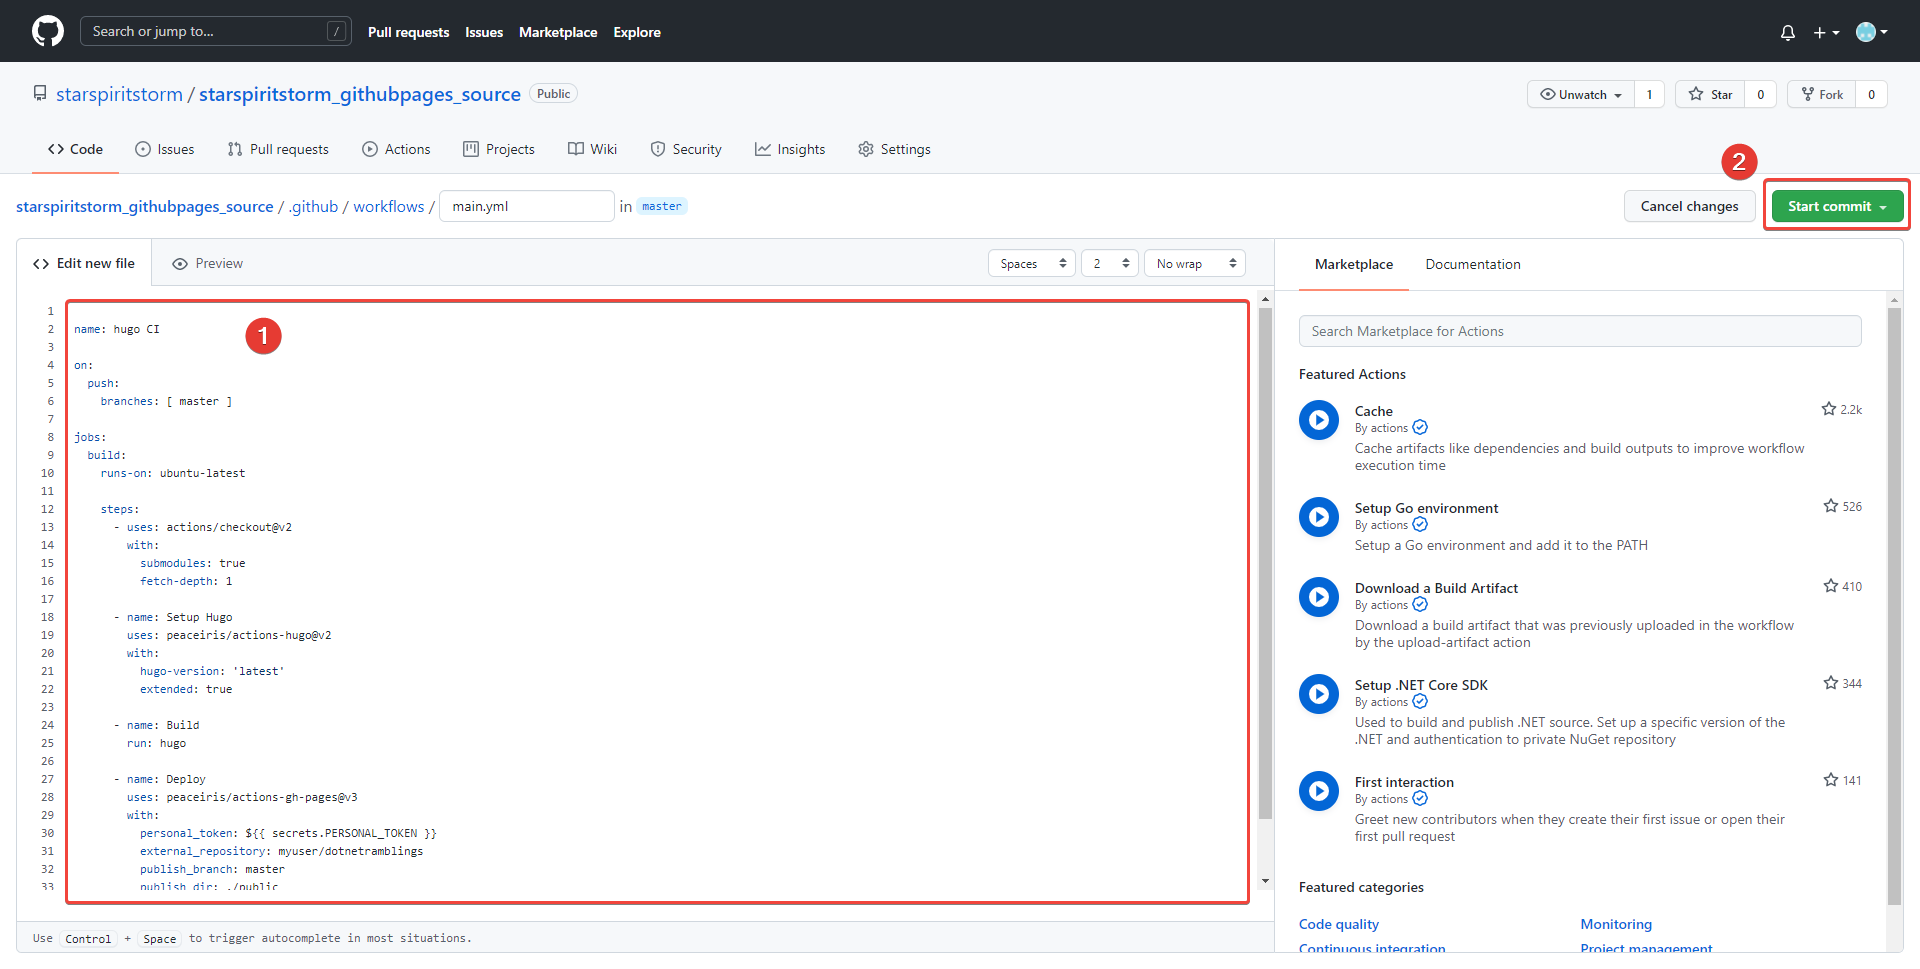 ◎ Fig35. use script
name: hugo CI

on:
  push:
	branches: [ master ]

jobs:
  build:
	runs-on: ubuntu-latest

	steps:
	  - uses: actions/checkout@v2
		with:
		  submodules: true
		  fetch-depth: 1

	  - name: Setup Hugo
		uses: peaceiris/actions-hugo@v2
		with:
		  hugo-version: 'latest'
		  extended: true

	  - name: Build
		run: hugo

	  - name: Deploy
		uses: peaceiris/actions-gh-pages@v3
		with:
									  #[2]: Here you need fill the secret token name, remember delete this line.
		  personal_token: ${{ secrets.HUGO_DEPLOY_TOKEN }}
							   #[3]: Here you need to type your Github Pages repository, remember delete this line.
		  external_repository: starspiritstorm/starspiritstorm.github.io
		  publish_branch: master
		  publish_dir: ./public
		  commit_message: ${{ github.event.head_commit.message }}
		  # https://en.wikipedia.org/wiki/List_of_tz_database_time_zones
		  TZ: Asia/Taipei
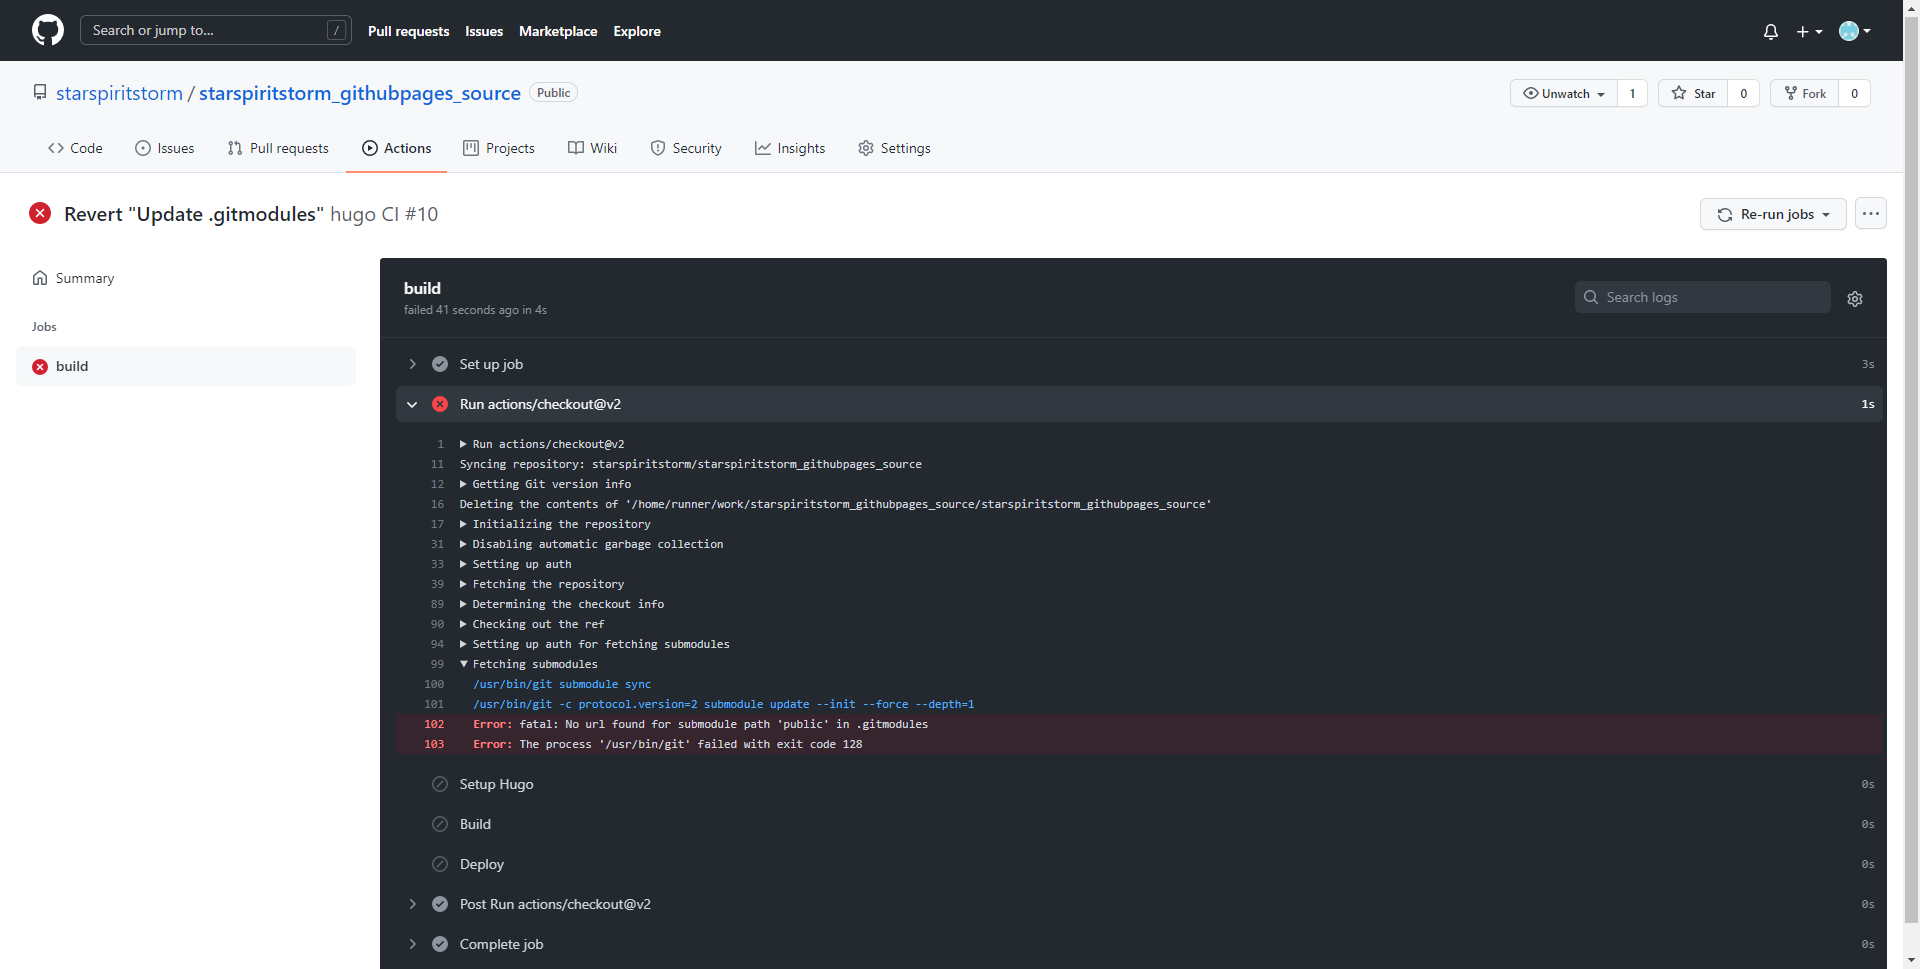
[2] Difficult 2:
I didn’t know that 「secrets.[token_name]」 needs the name of secret token.
So I encountered the error in Action Deploy.
Error: Action failed with “not found deploy key or tokens”
◎ Fig002. not found deploy key or tokens
[3] Difficult 3:
I was miscopied my Github Pages url “starspiritstorm/starspiritstorm.github.io.git”, the .git is not needed.
So I encountered another error in Action Deploy.
remote: Repository not found.
fatal: repository ‘https://github.com/starspiritstorm/starspiritstorm.github.io.git.git/' not found
Error: Action failed with “The process ‘/usr/bin/git’ failed with exit code 128”
◎ Fig003. repository not found
Finally, when you see that Action page with build green check, the workflow are done!
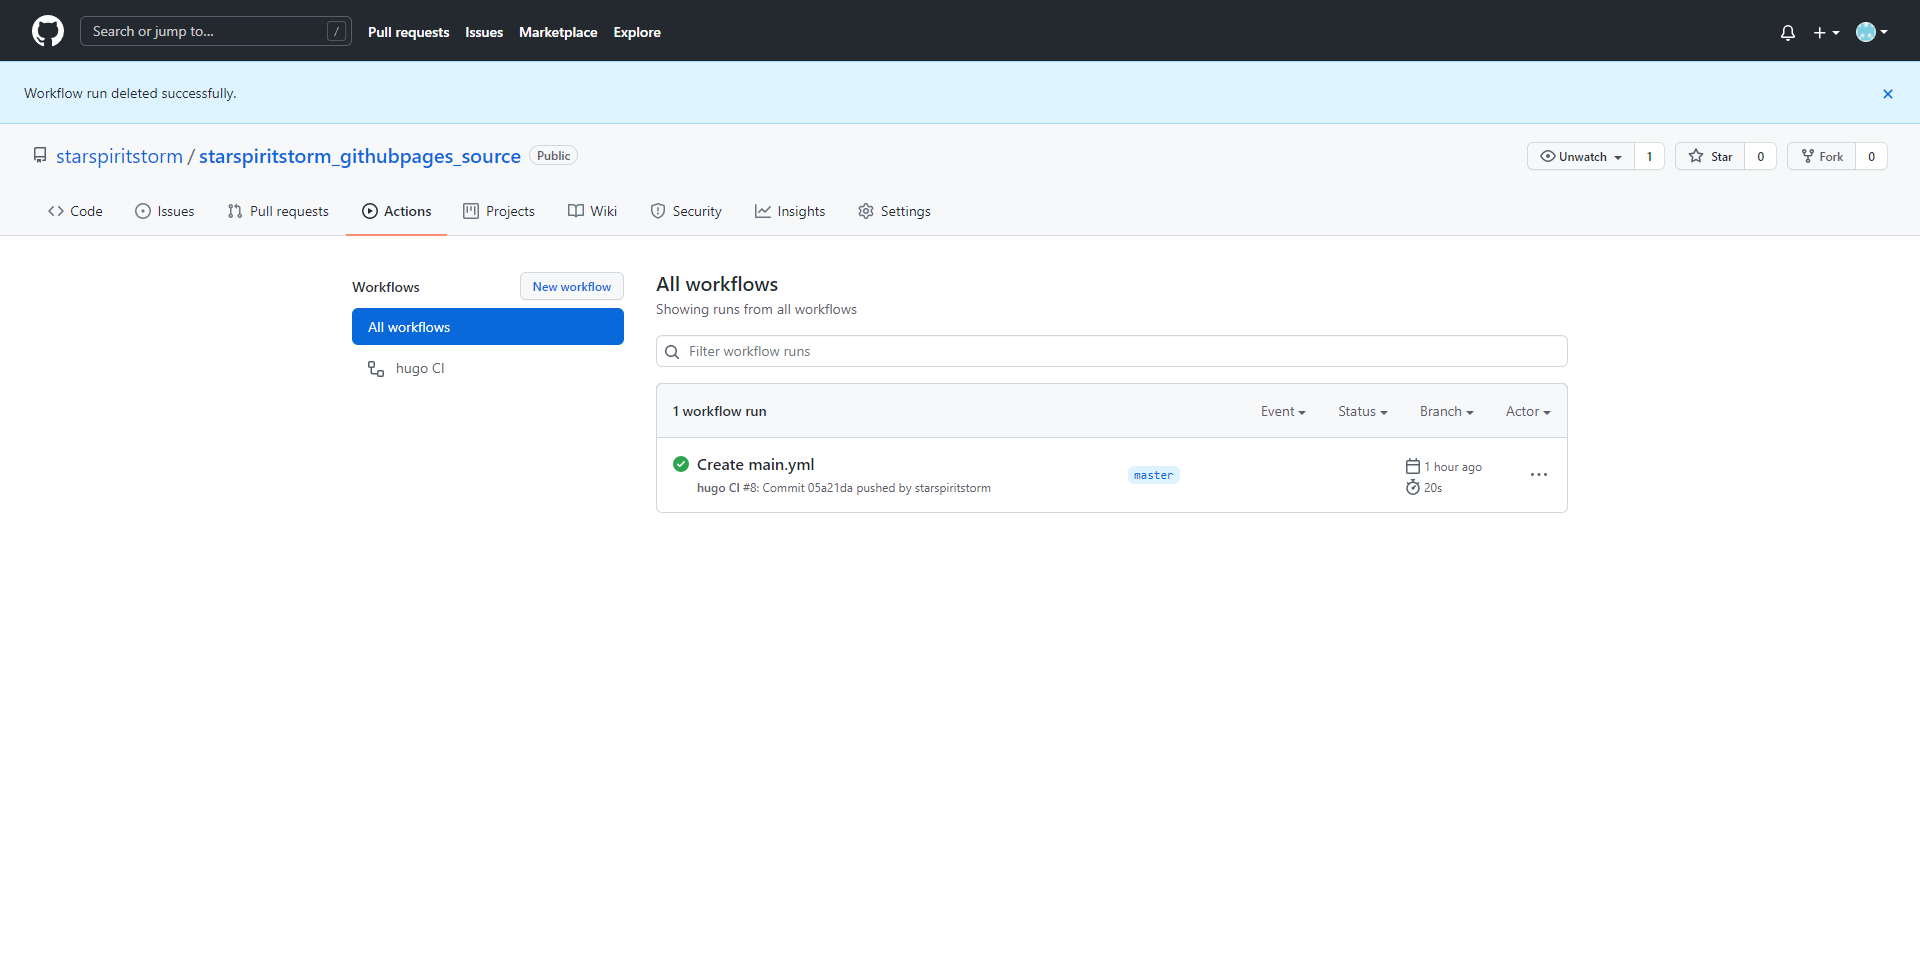 ◎ Fig40. workflow finished
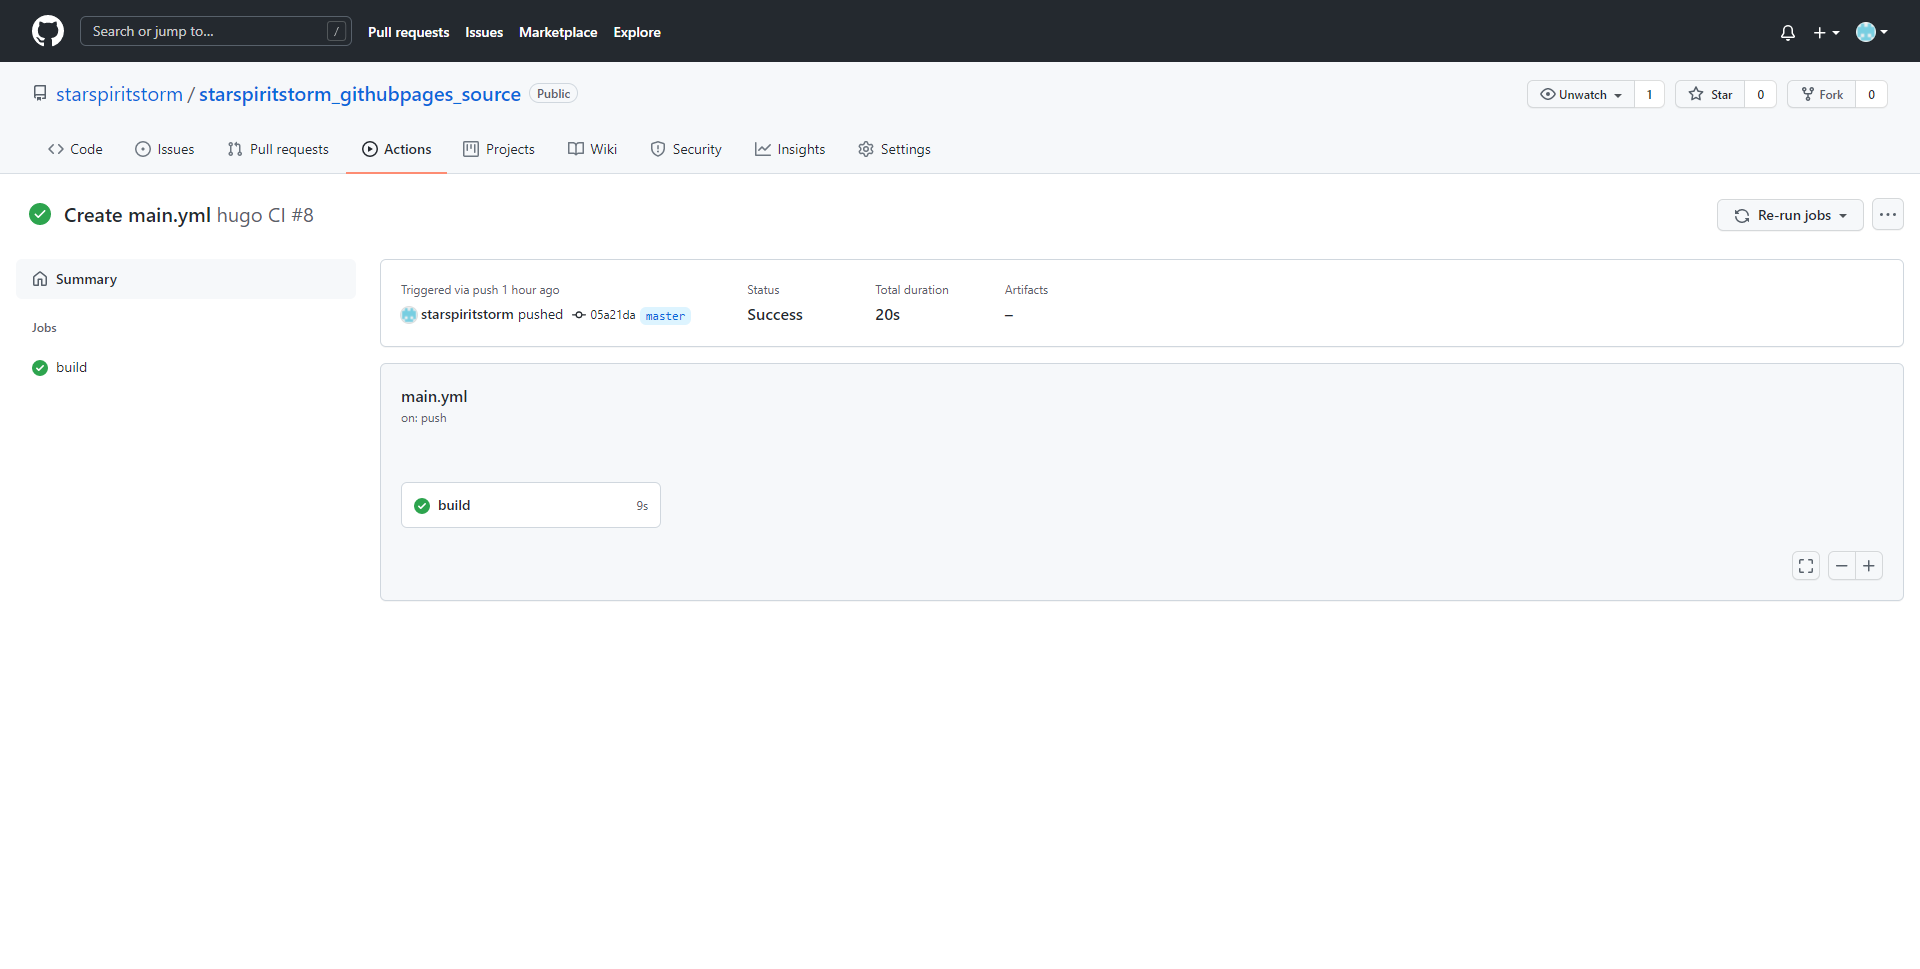 ◎ Fig41. build sucess
Automatic deployment test
After finished Github Action, you just need to new a post in your source code repository, the Github Action will do the rest work for you.
Again, start Git Bash in myblog folder, and hugo new post.
 ◎ Fig44. new post
Commit & push, go to your Action, you will see the sucess result.
 ◎ Fig45. auto deploy
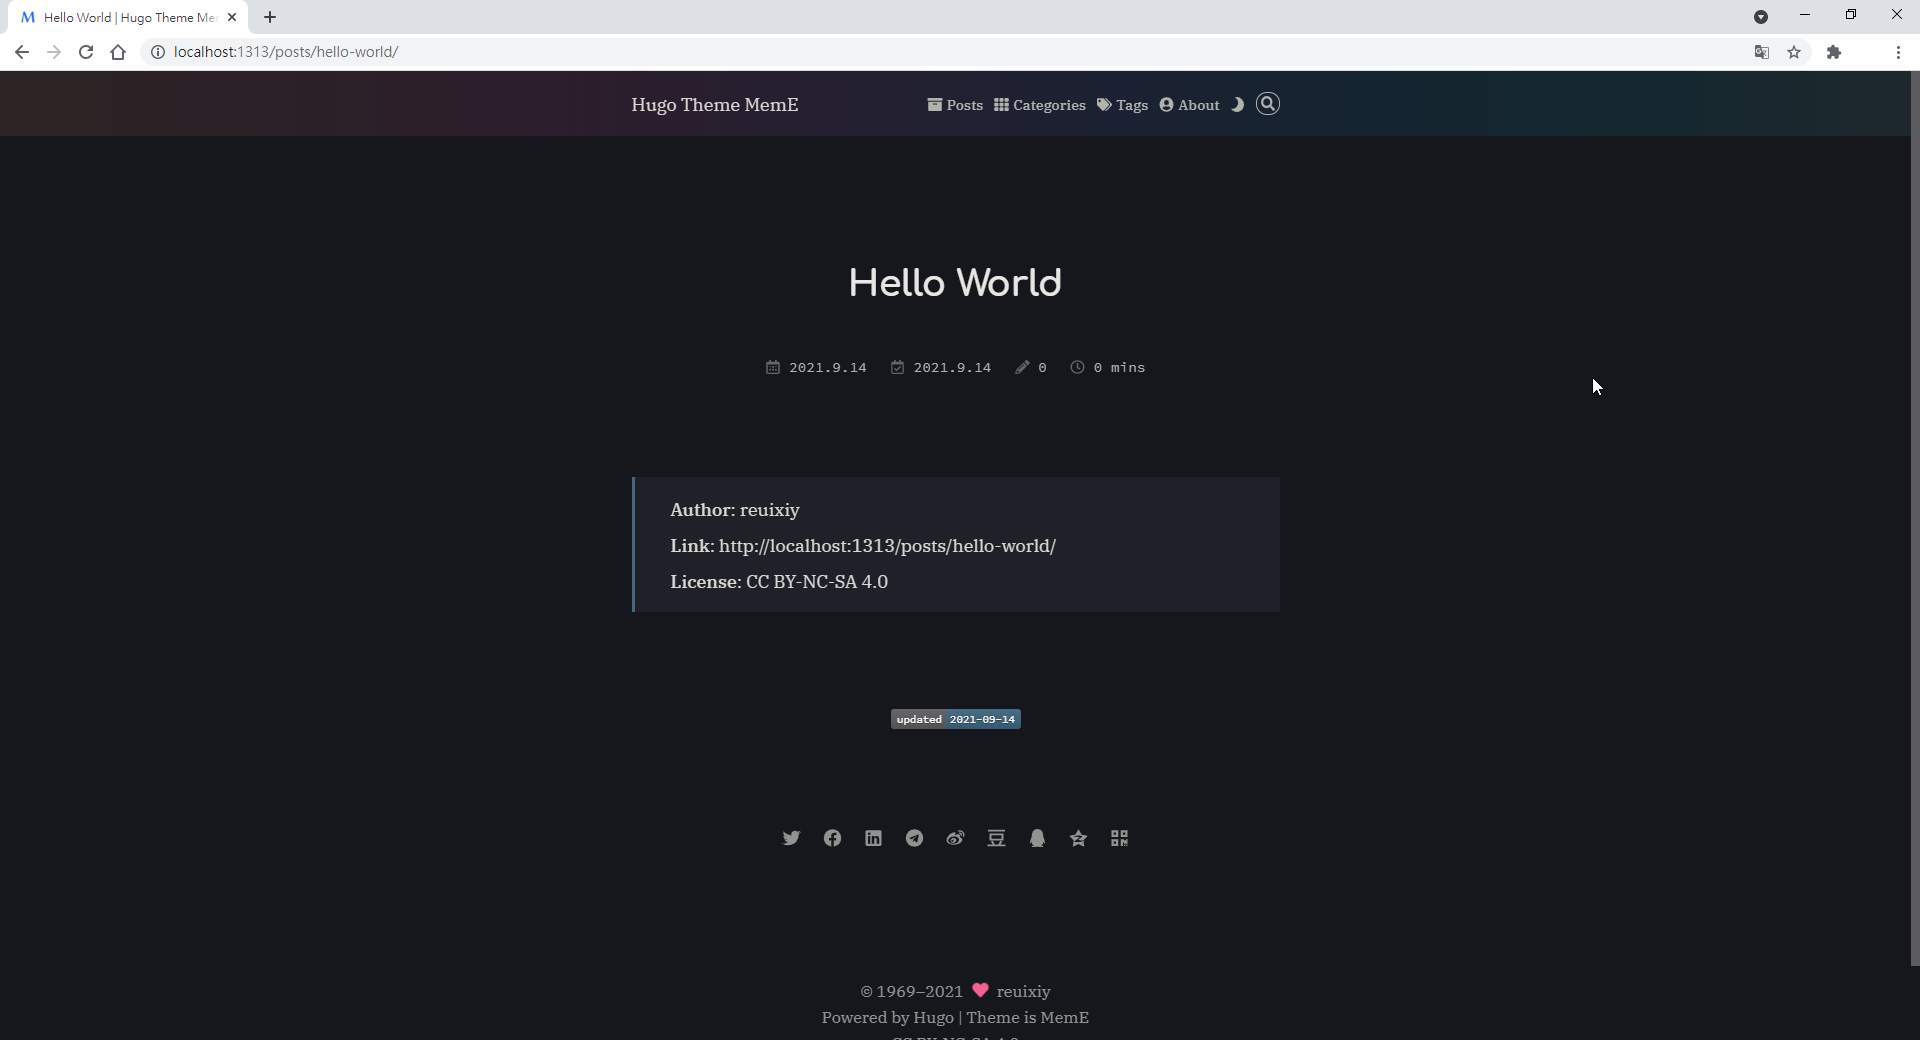
Then you can check the post you just made in your Github Pages.
 ◎ Fig46. deployed_post1
 ◎ Fig47. deployed_post2
Last important thing is the config.toml, there are some place need to modify. Check next post.
Reference
-
Reference of Github Action, cannot just copy and pastes…, I combined these two to build up my Github Action.
Create and host a blog with Hugo and GitHub Pages in less than 30 minutes